Info: This guide was contributed by a member of the HexOS community. Your setup may differ slightly — if a step doesn't match what you see, ask in the #Docs channel on Discord.
TIME MACHINE INSTALL GUIDE (Hex + TrueNAS)
-
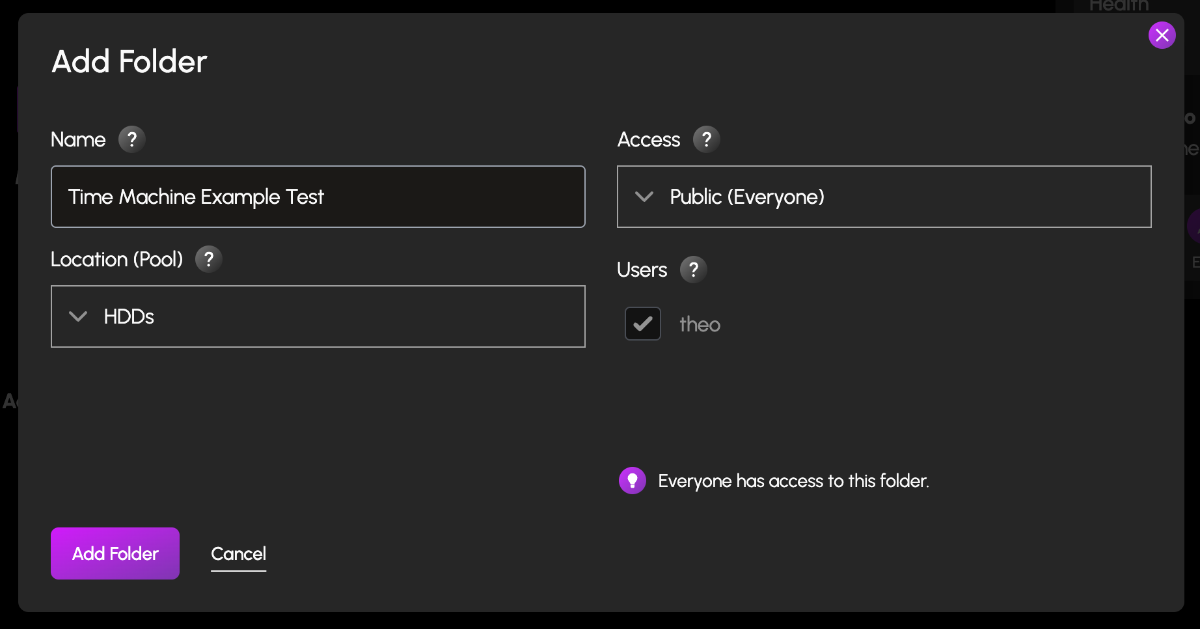
Create a Folder & name it time machine (or a custom name)

-
Set the Folder permissions (I left mine open, add user permissions here to restrict access)
-
Navigate to the TrueNAS UI (Server IP > Username: truenas_admin Password: server password from install)
-
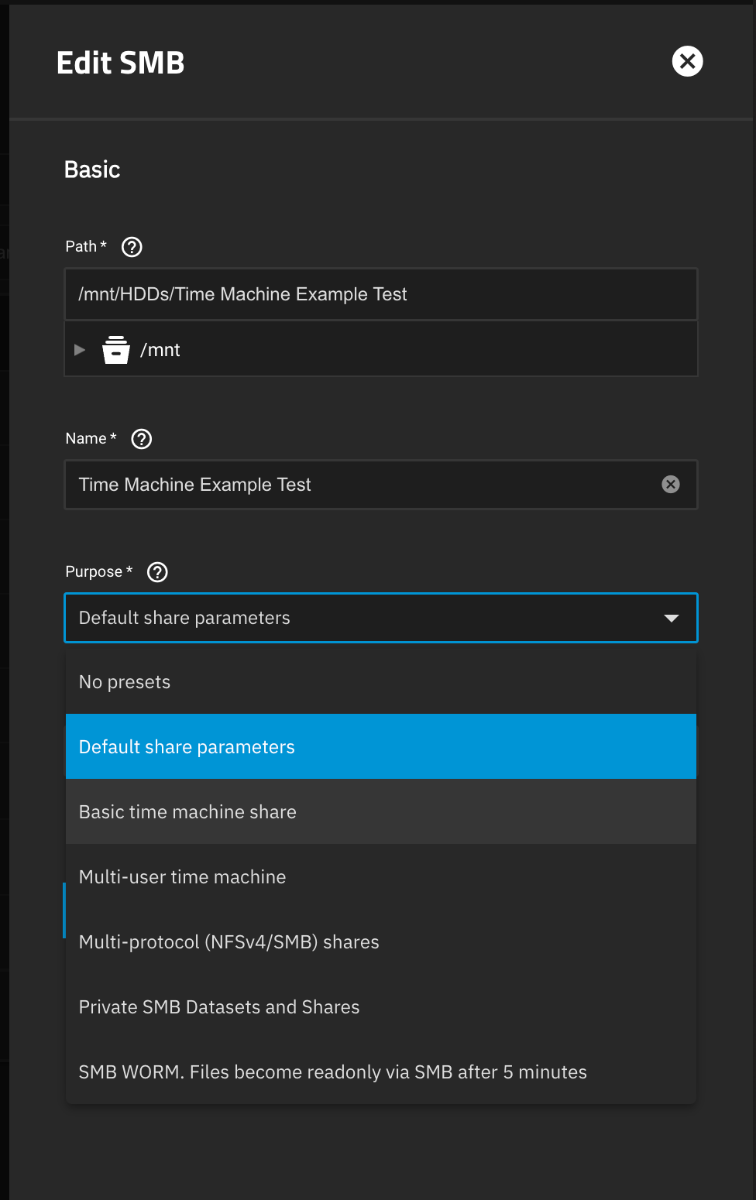
Navigate to the Shares tab, you should see your newly created share. Click on edit (pencil)

-
On the Purpose dropdown change to > Basic or multi user time machine.

-
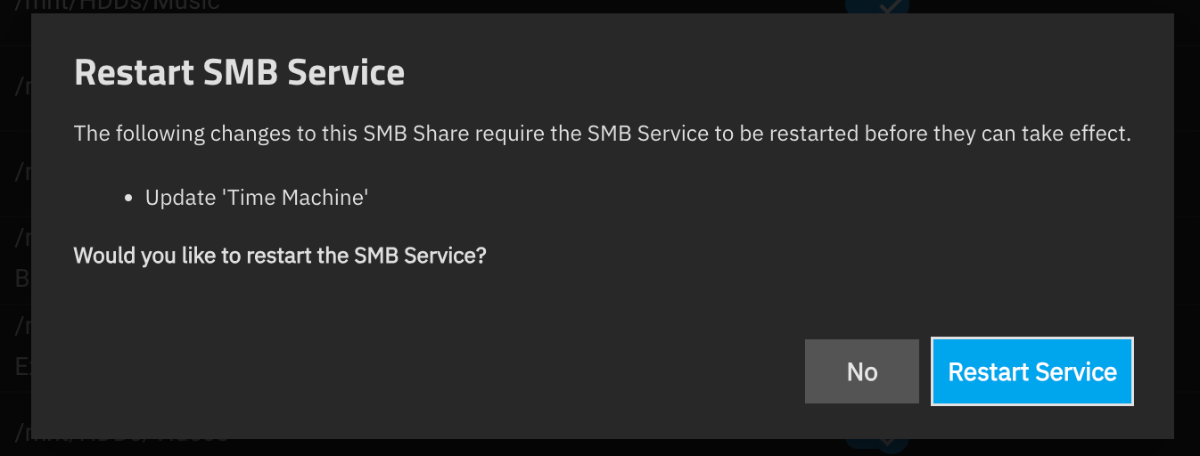
Click save/apply, and it'll prompt a restart of the SMB process.

-
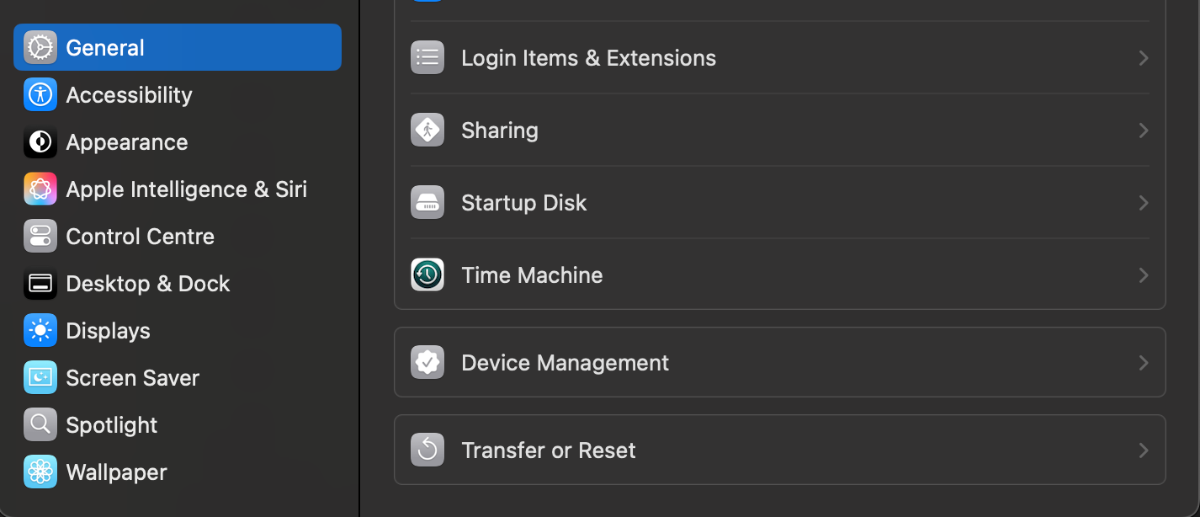
Go to your Mac Settings > General > Time Machine.

-
Click the + icon and locate your time machine share, then click setup disk.
FYI if you aren't already connected to your Hex server, you'd need to do so now. Either search for the server in the network tab of Finder OR connect to the server with Finder > Go > Connect to Server > SMB://[THE IP OF YOUR HEX SERVER]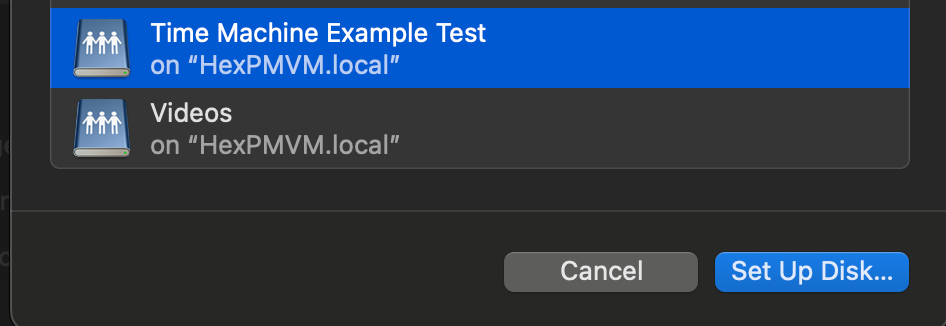
-
You can now choose to encrypt your backup with a password + if you choose, restrict the total disk usage the backup will have.
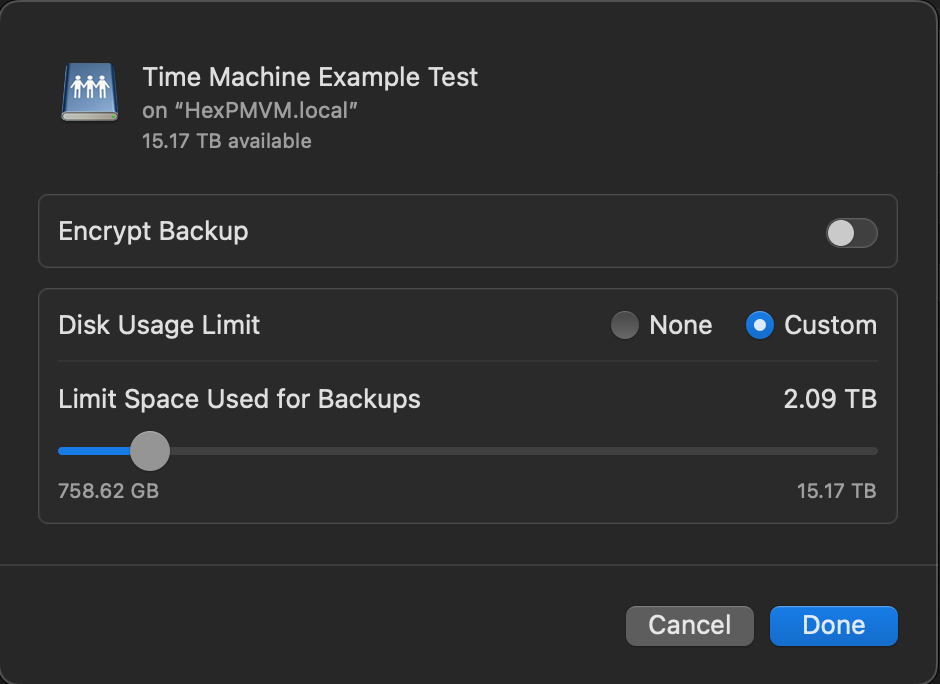
-
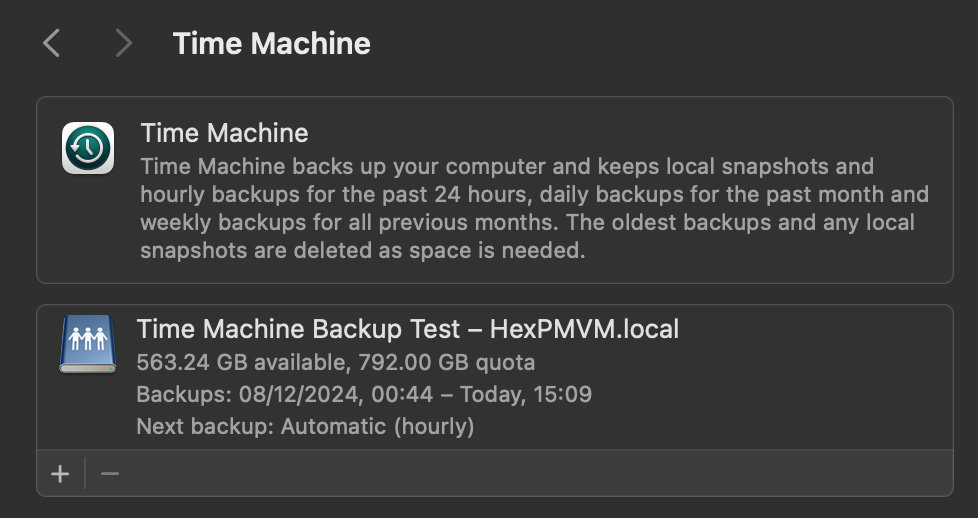
You should now see your Time Machine backup setup. This will start automatically, but you can create a backup straight away if you choose.

AUTO CONNECT SHARED DRIVE SETUP
Now that could be it, but to ensure your Time Machine backup will always occur, you need to ensure your Mac is always connected to your Hex server.
To do this, we need to add the share to the login items
-
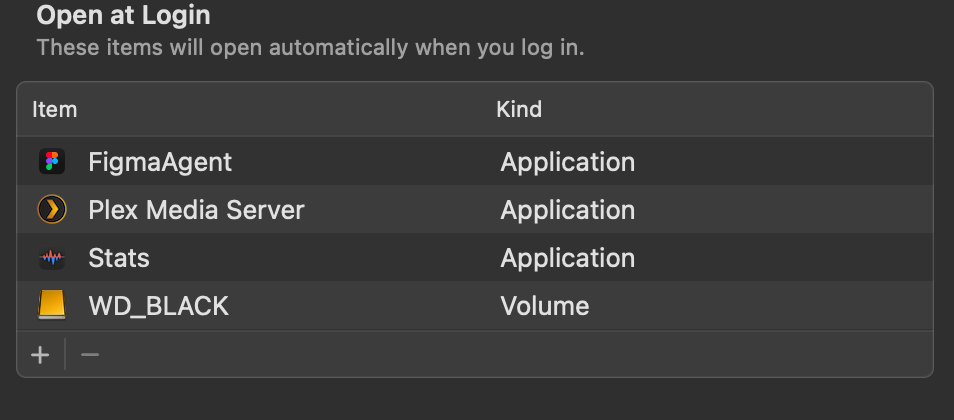
Open Settings > General > Login Items > click the + icon

-
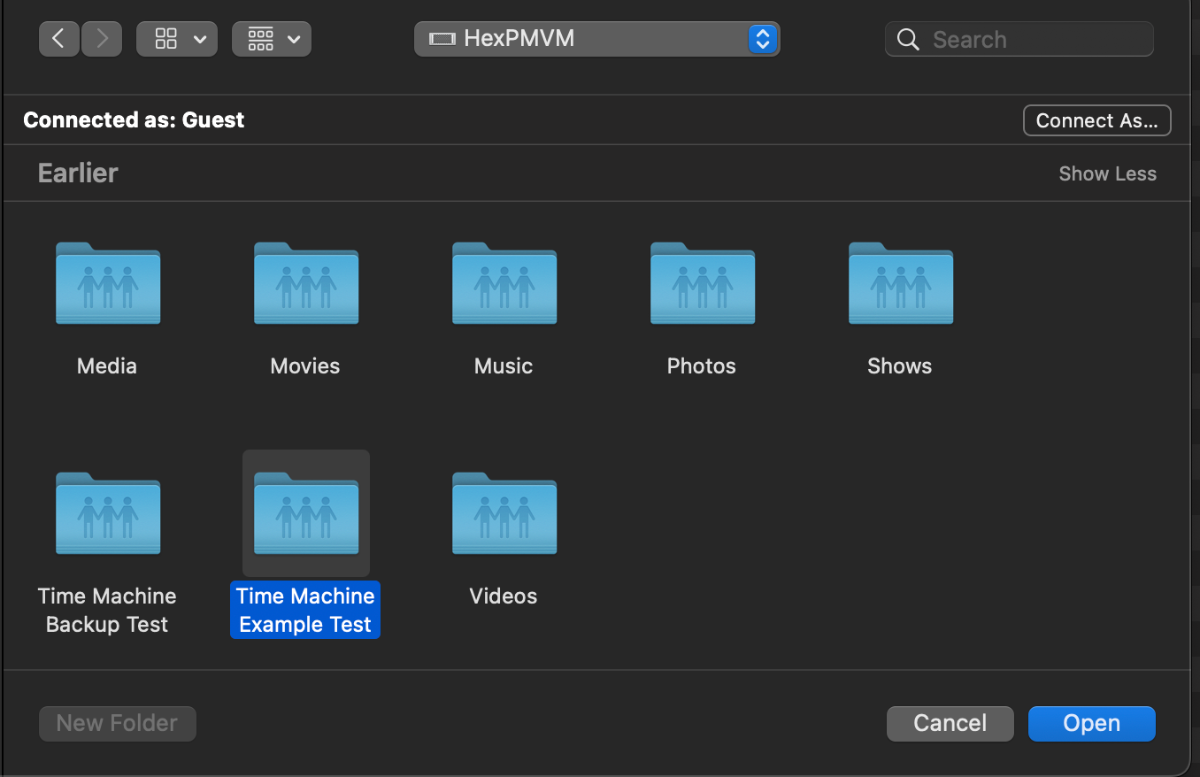
Locate your connected time machine share, then click Open.

-
You should now see the drive in the login items.
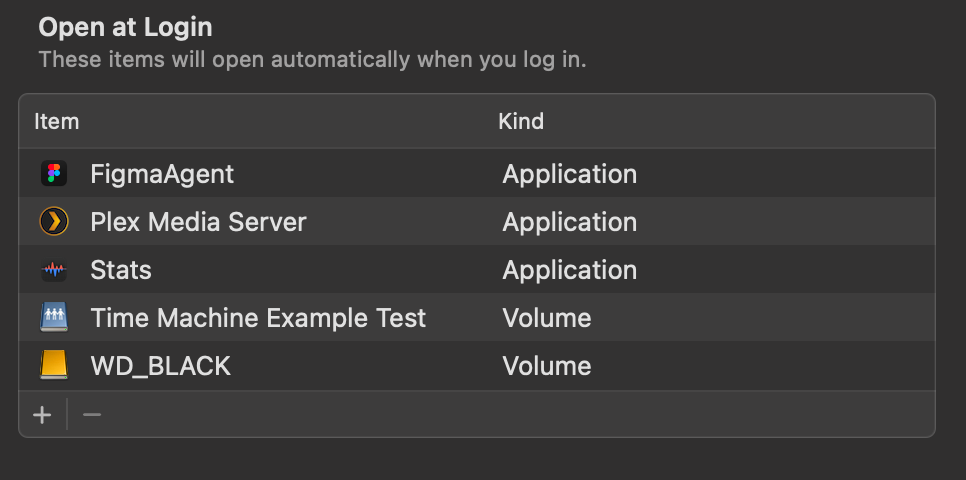
That's it, you should be all set up and running.

Contribute: to help to improve HexOS documentation join the #Docs channel on Discord today! Send feedback, suggestions or contribute a guide.