¶ HexOS documentation style guide
¶ Language
HexOS docs are written to be:
-
Friendly
-
Clear
-
Accessible to a wide variety of people including those with:
- a different first language to English
- different preferences for accessing information
- disabilities
- little or no experience of the subject matter
¶ Writing accessibly
Some ways of writing are much simpler to translate and easier to understand for non-native English speakers. We can avoid phrases which, while feeling natural to native English speakers, can be confusing when translated literally or read by people with a different language background or cultural references.
¶ Metaphors
"HexOS is your gateway to self-hosting" > "HexOS makes self-hosting easier"
The word "gateway" is being used figuratively and the reader may understand the individual words but not the intended meaning.
¶ Turns of phrase and idioms
“HexOS is running TrueNAS under the hood” > “HexOS runs on top of TrueNAS”
The phrase "under the hood" is an idiom borrowed from cars meaning something hidden or working in the background. This meaning may not be obvious to all readers.
¶ Pop culture references
"Type the password and open sesame! Your files will appear." > "Type the password and you will see your files."
"Open sesame", from Ali Baba and the Forty Thieves, is often used to describe something magically opening. However, readers unfamiliar with this cultural reference may be wondering why sesame seeds are involved in their NAS setup!
¶ Referring to the user interface
When directly quoting from the HexOS user interface please follow the exact wording and capitalization. Use bold for the words quoted. For example:
Click Continue
When describing navigation through a menu, each item should be in bold with a non-bold > between. For example:
Apps > Immich
¶ Capitalization
HexOS and TrueNAS are capitalized like this. When directly quoting from the UI please follow the exact wording and capitalization.
For headings, sentence case is used: the first letter of the first word is capitalized and otherwise only proper nouns are capitalized. Even if quoting from the UI in a heading, sentence case is used.
¶ Examples
- Import pools to HexOS - the first letter and HexOS are capitalized but “pools” and “to” are not.
- Preparing server hardware - only the first letter is capitalized
- The folders screen - “Folders” would usually be capitalized to follow UI, however headings are easier to read when they are consistent, so even in this case lower case f is used.
¶ Terminology
Here are the words used to describe the HexOS user interface and the methods of interacting with it.
- Click
- Screen
- Menu
- Card
- System Tray
- Tiles
- Info panel
- Button
- Dialog
- Tab (not tap, press, select)
¶ Examples
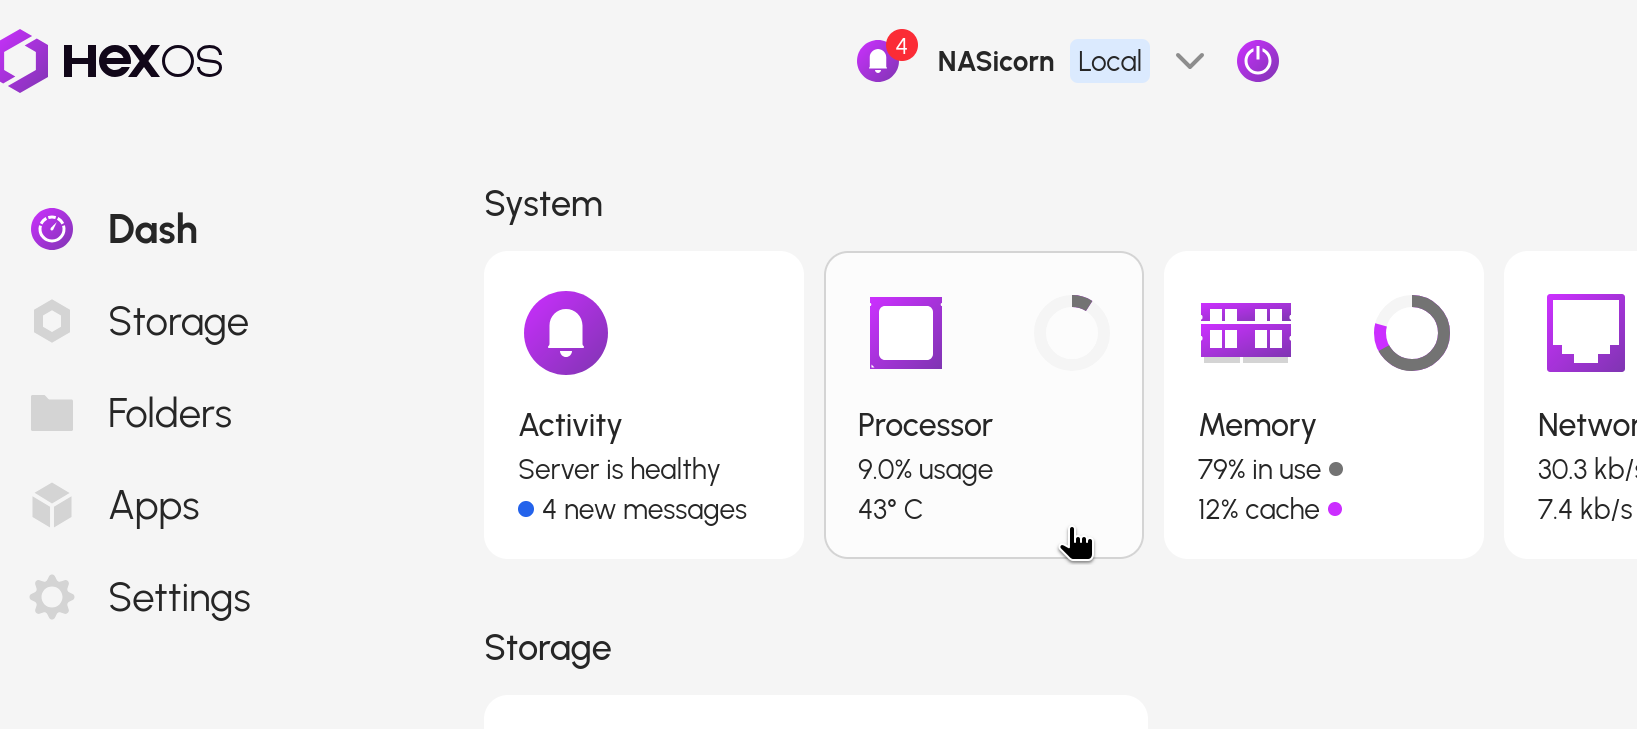
Below is the Processor card in the System tray.
Cards display extra information, in this case CPU usage and temperature. If there is only a single action with no additional information, then the element is called a button, not a card.
System tray and tiles
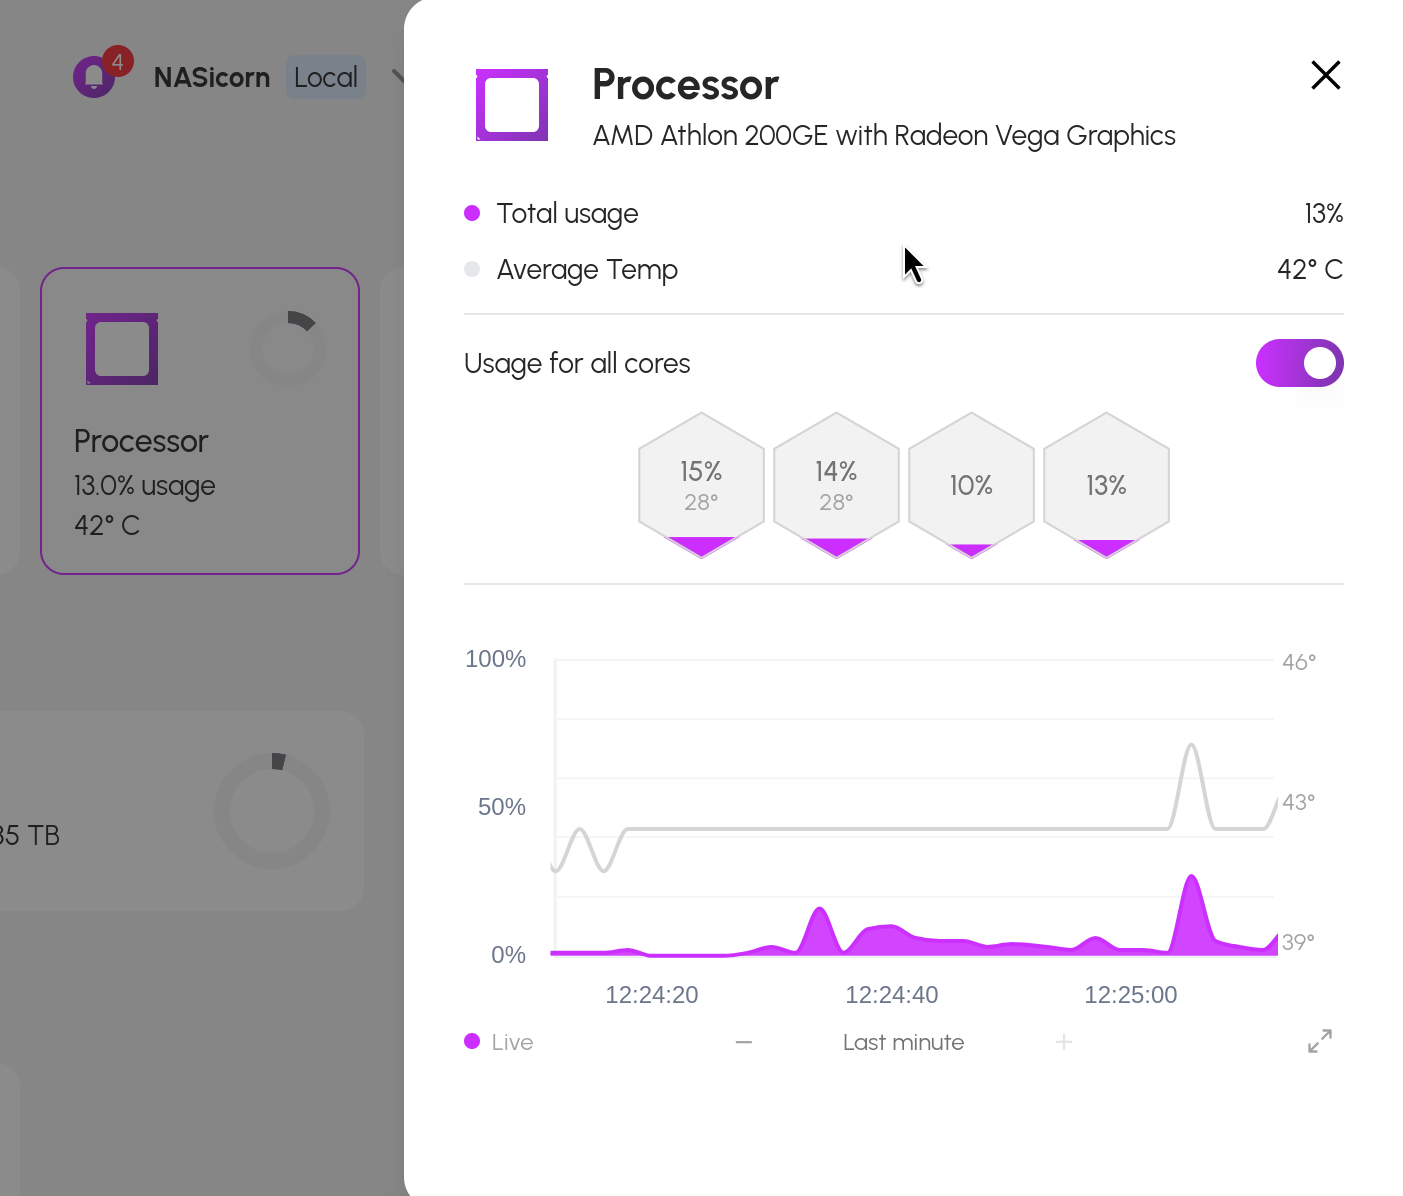
Clicking the Processor card opens the Processor info panel
Processor info panel
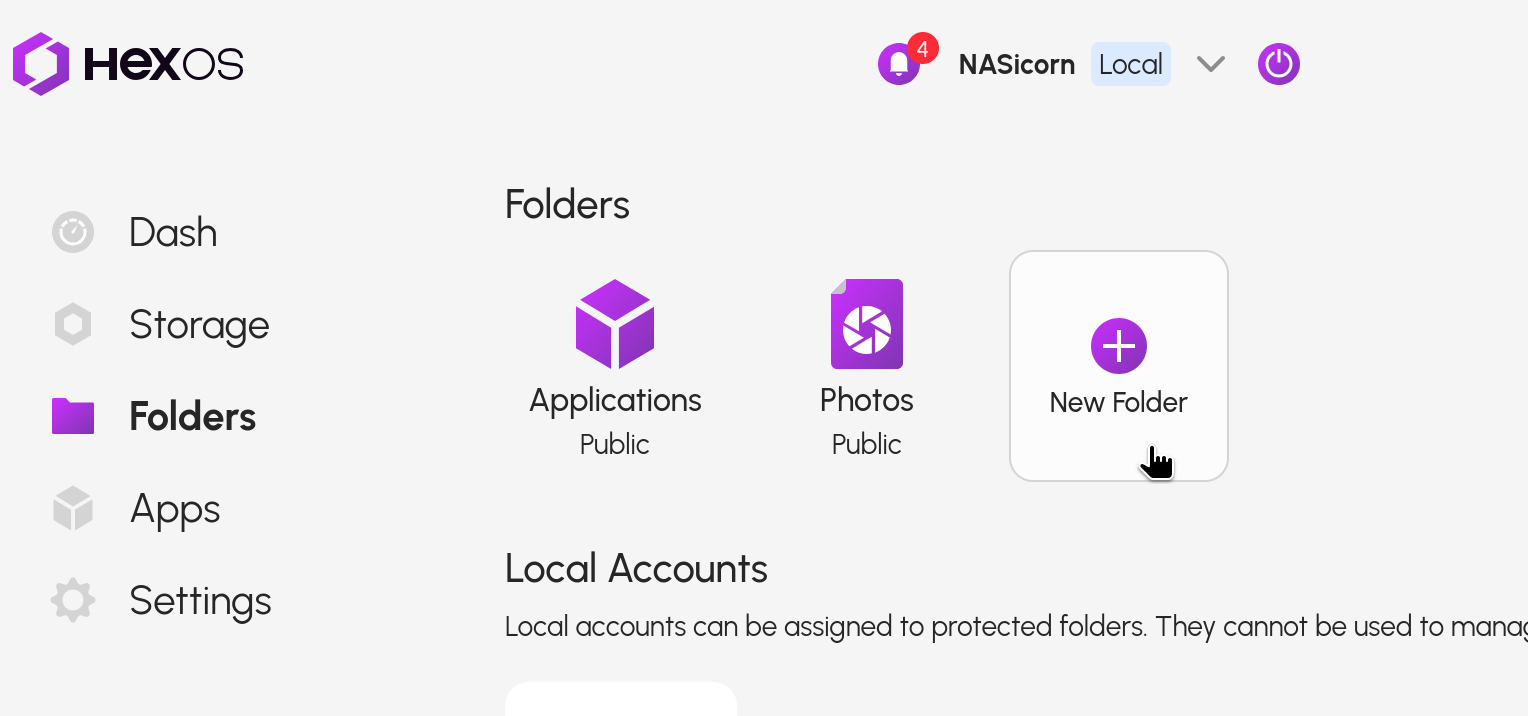
Click the New Folder button
New folder button
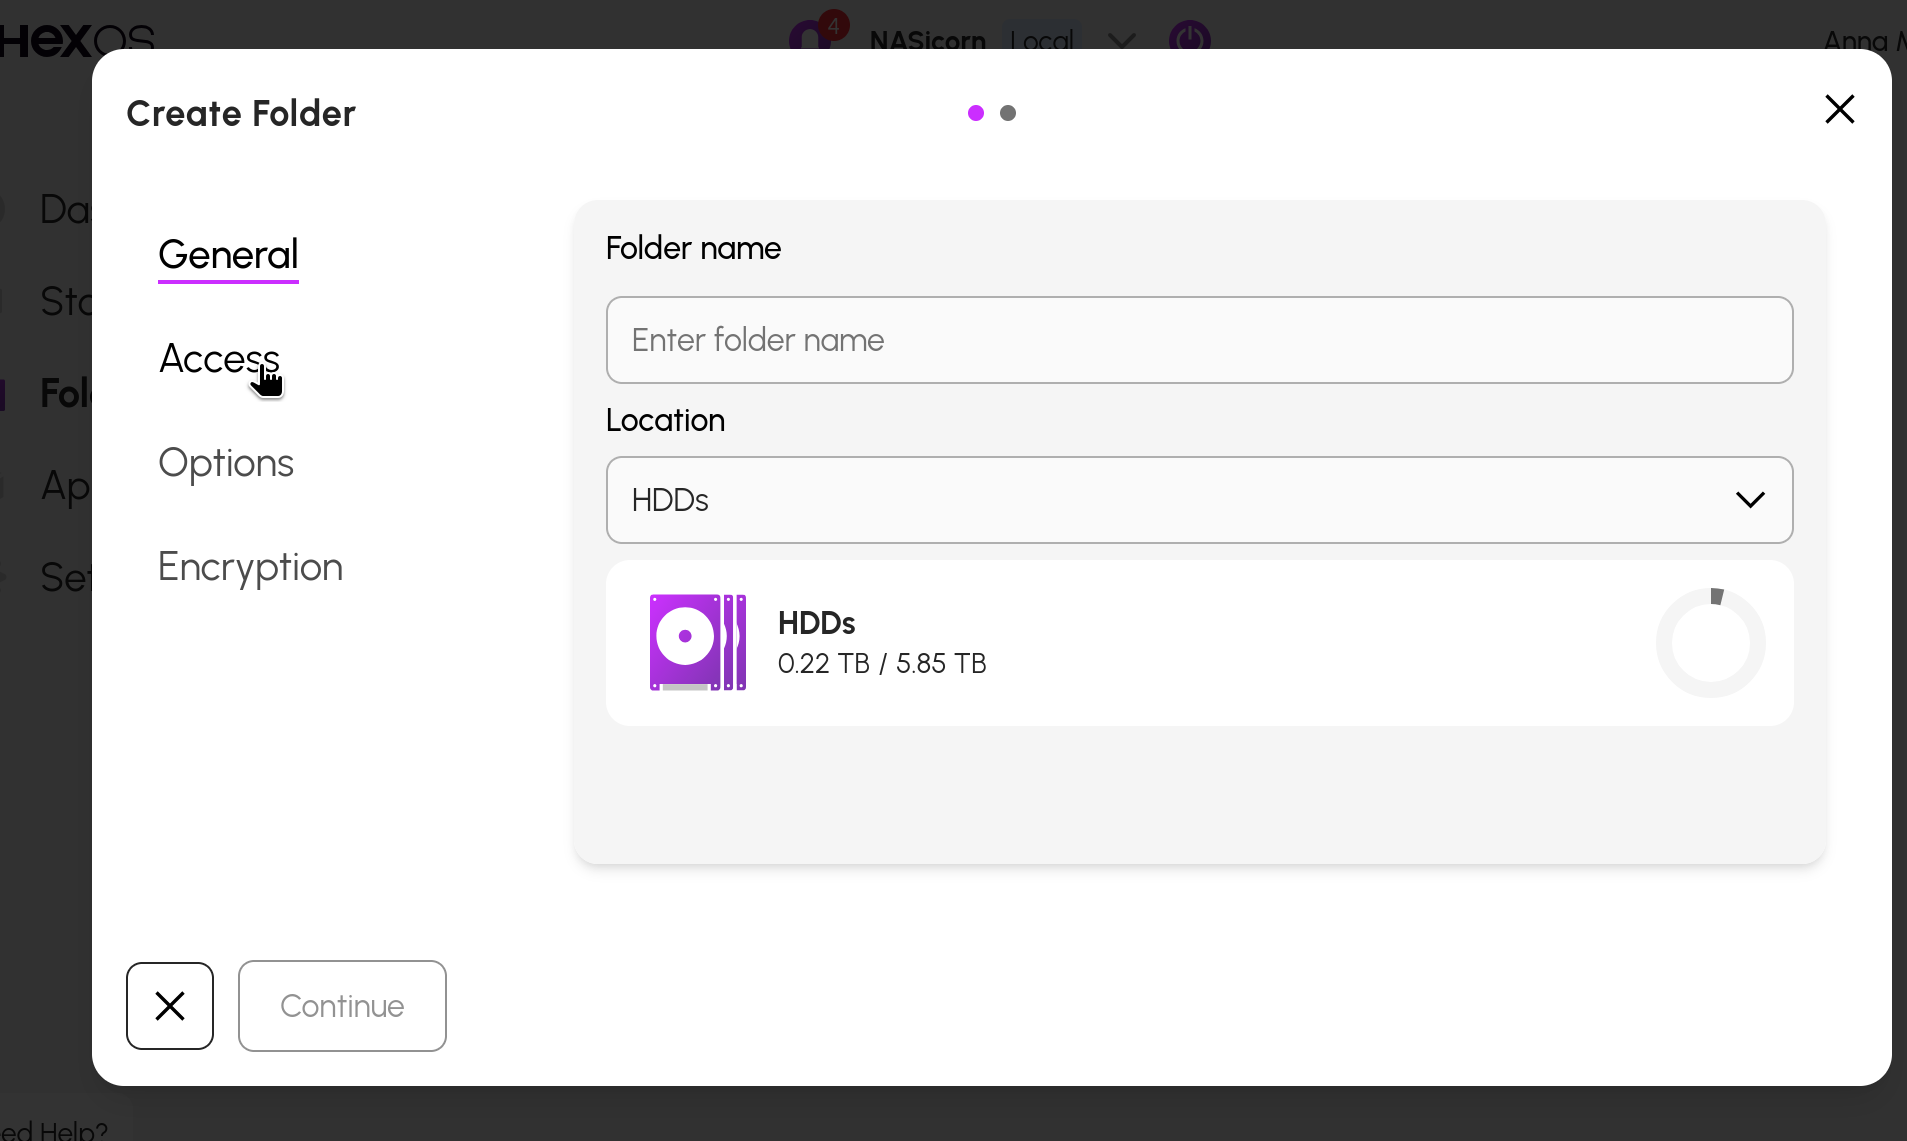
This opens the Create folder dialog. Click the Access tab.
Dialog and tab
¶ Use American English spelling
The HexOS docs use American English and spelling, for example:
- organise > organize
- colour > color
- behaviour > behavior
¶ Referring to typed commands
On the rare occasions when a command is described, please use the inline code format curl ipinfo.io/ip
¶ Callouts
Here are a range of standard callouts for use within documentation with examples of their use. These are important for consistency for the reader. To add a callout to the docs use the blockquote feature of the editor.
Callout text is usually formatted as "bold word: text explanation"
To create a Warning callout select the Warning blockquote from the editor drop down. It looks like this in markdown:
> **Warning:** text is here
{.is-warning}
and this is what the reader sees:
Warning: text is here
¶ Danger callout
The error callout is used for danger, and is the most critical and is used mainly for situations which could cause data loss and other critical outcomes. For example:
Danger: You must have backups of your data. Without adequate backups you could permanently lose data at several points during this process.
¶ Warning callout
This is for important risks or common pitfalls where, for example, time could be wasted or permanent changes made. For example
Warning: Encryption can only be enabled during folder creation and cannot be disabled once the folder is created.
¶ Requirement callout
The success callout is used for requirements. This is when an earlier stage or task is required for the next step to work correctly, but where danger or warning are not needed. For example:
Requirement: Make sure you have updated TrueNAS to the correct version before proceeding.
¶ Info callout
This is for additional context or information that needs to be highlighted to users. Perhaps something they should know before starting a task or a common issue that is non-critical. For example:
Info: System folder locations can only be modified if no apps are using them.
¶ Tip callout
This is for a helpful pointer for the reader. It may be in response to a common problem, misunderstanding or pre-emptive troubleshooting step. For example:
Tip: If boot fails, check that HexOS is at the top in your BIOS boot device order. The instructions are at the top of this guide.
¶ Get help callout (troubleshooting callout)
This is for direct references to troubleshooting pages or links to get support directly. For example:
Help: If you have any doubts or questions, please contact HexOS support: this step is critical to get right.
¶ Contribute callout
This callout is used to thank community members who worked on a guide, or to encourage readers to get involved in working on HexOS documentation writing.
For example a thank you should be added at the top of each community guide:
Thank you: lnkd and ShinobiRen for the original guide
And the following should be added to the bottom of each page:
Contribute: to help to improve HexOS documentation join the #Docs channel on Discord today! Send feedback, suggestions or contribute a guide.
¶ Screenshots
In HexOS docs each instruction/action is provided as text, followed by a screenshot in a dropdown box.
The screenshots are taken with surrounding UI elements included, to help orient the user.
Filenames are carefully chosen both to keep the wiki organized and to serve as acceptable alt-text for those accessing the docs with a screen reader.
Together, these make the docs accessible to a wide variety of HexOS users.
¶ Image style
Please take screenshots as follows:
- On a desktop/laptop (not mobile)
- In light mode (white background, not black)
- Include surrounding UI elements to help orient the user. For example:
- logo
- menu
- side bar
- A brief, descriptive filename, which:
- can serve as the alt-text for screen reader users
- helps other editors find images more easily
¶ Example screenshots
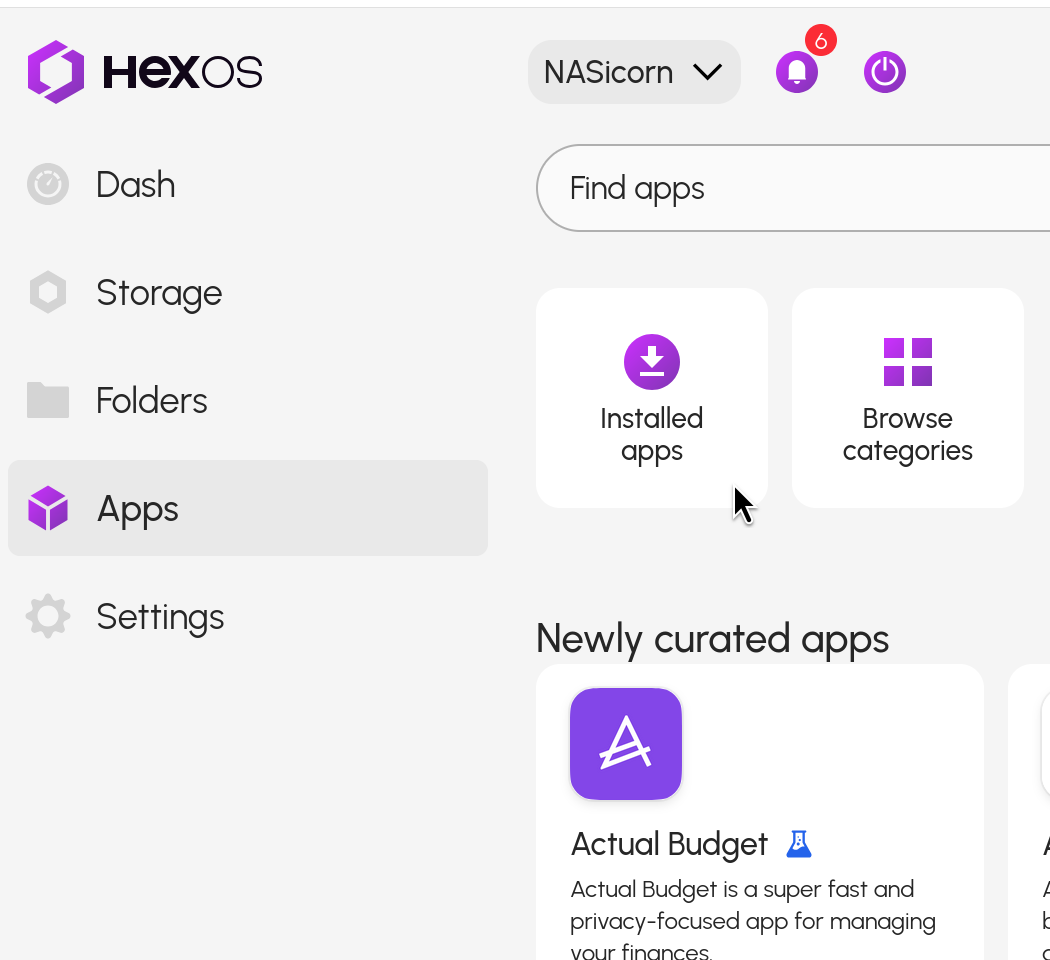
- In this example, the user is being asked to click on the Installed apps button. The menu to the left is included in the screenshot too. This shows the user:
- which screen they need to be on, as Apps is highlighted in the menu.
- where the button is on the screen relative to the menu, but also,
Example of including menu in a screenshot
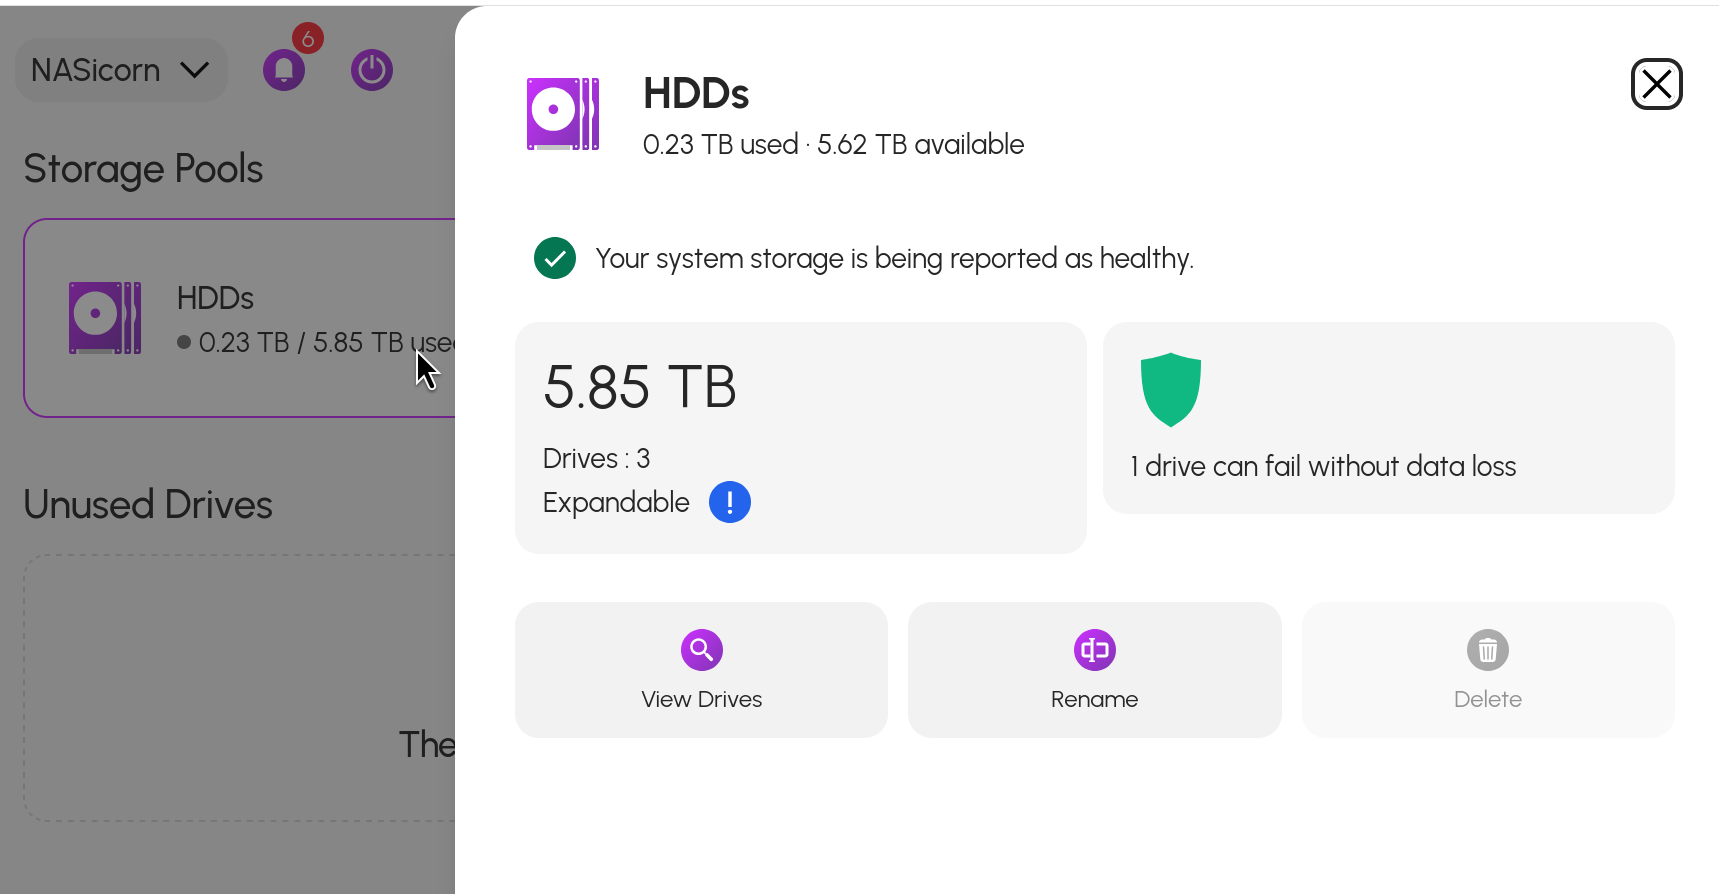
- In the next example, the user is being asked to look at the HDDs system tray. The screenshot includes the Storage screen showing in the background, with the cursor left on the HDDs button that was just clicked to open the system tray.
Example of including background in a screenshot
¶ Things to pixelize
When taking screenshots for HexOS documentation you may wish to hide the following:
- Your HexOS username
- Your LAN IP address
You must not show any of the following in HexOS documentation:
- Passwords, encryption keys and API keys
- App-specific tokens/passes that are paid (e.g. Plex Pass)
- Copyrighted media, if documenting e.g. Jellyfin or Plex
- Personal photographs of people
In the latter two cases, please use copyright free content as placeholders or blur any images.
¶ Image sizing
By default images display at their full width, which can make large screenshots overwhelm a page. Add a size class in curly braces directly after the image markdown to cap its width and center it:
{.medium .framed}
Available classes:
| Class | Effect |
|---|---|
{.small} |
Max width 320px, centered |
{.medium} |
Max width 560px, centered |
{.large} |
Max width 800px, centered |
{.framed} |
Border, rounded corners, and drop shadow |
Classes combine inside a single set of braces — {.medium .framed} is the recommended style for UI screenshots. Note that a second set of braces will not work: write {.medium .framed}, not {.medium}{.framed}.
You don't need to remember the class names: the markdown editor toolbar has an image size menu (the image icon between the blockquote menu and the bullet list button). Place your cursor immediately after the image markdown, open the menu, and pick a size — with or without a frame — and it inserts the classes for you.
Example of the same image at each size
Small, framed:
Medium, framed:
¶ Screenshot folder names
When adding a screenshot, please add the image to the correct folder.
Folders can be identified by their name, which should be the same as the page name (or similar)
Choose the correct folder
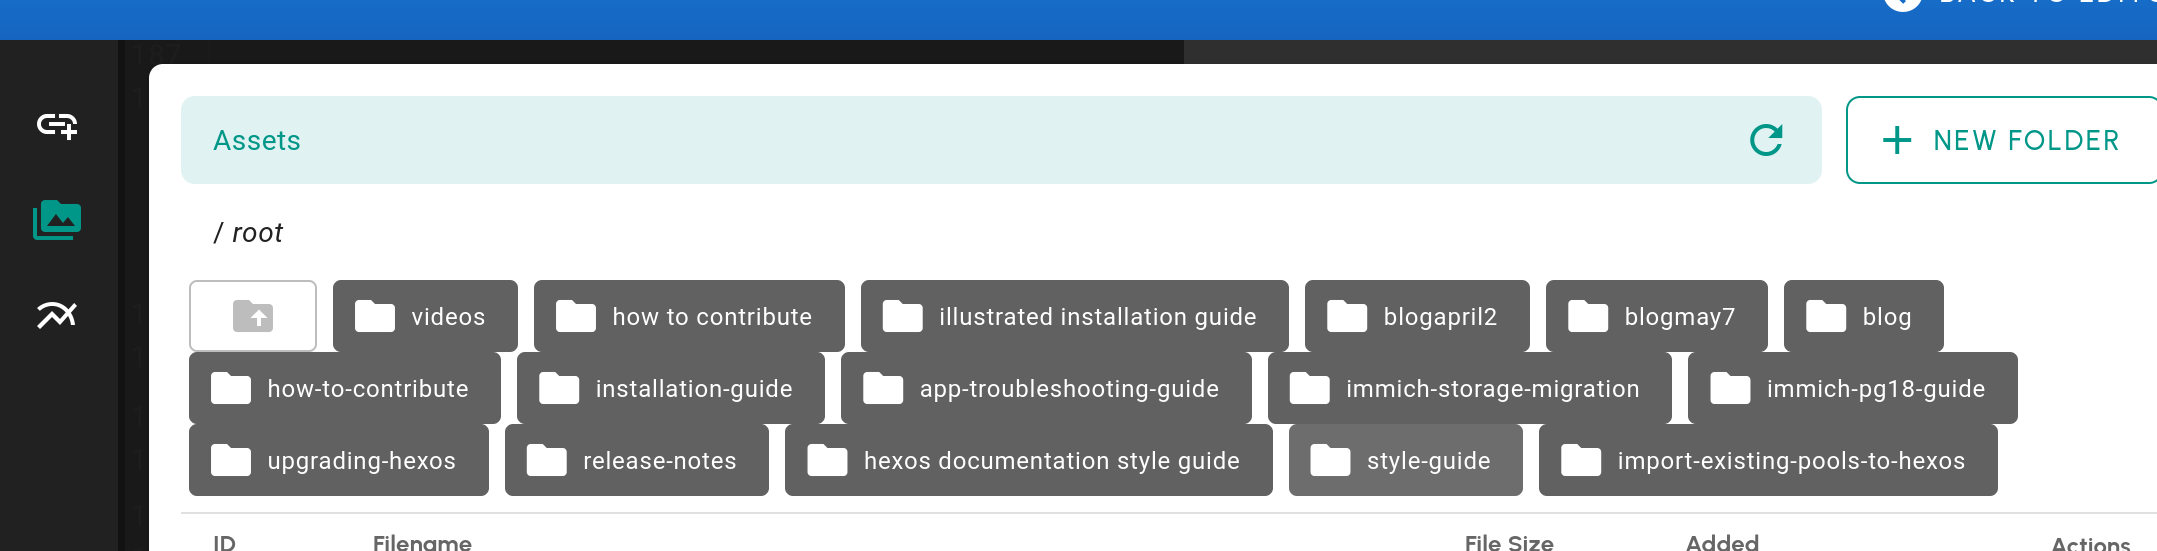
If you are writing a new guide please create a matching folder for the images. Hyphens between words must be used (instead of spaces) as otherwise images in the folder will not show in the documentation. Please name the folder carefully as folder names cannot be easily edited.
¶ Screenshot filename and alt-text
The filename of the screenshot is important as it:
- allows future editors to be able to find or identify the image, for example to re-use or replace it
- is used by the wiki as the default alt-text for the image
Screenshot filenames should be all lower case with hyphens between words.
They should be short, descriptive, and specific enough to work as both a filename and default alt text.
For example, use new-folder-button.png rather than screenshot3.png. Not every detail included is needed, for example select-storage-folder.png is more useful than storage-screen-with-menu-and-cursor.png.
If needed the alt-text may be edited further by changing the text within the square brackets

¶ Placing the screenshot in the dropdown
The html needed to put the screenshot in the dropdown is as follows:
<summary> Choose folder </summary>

</details>
the central element {.medium .framed} is automatically generated by the editor when adding an image to the page. The space after </summary> is important, without it the image will not display. Check that the image is displaying inside the dropdown each time, with even a small error, only the url will display.
¶ License
By contributing you are agreeing to make your work available to the public under CC BY-SA 4.0 and to grant Eshtek, Inc. a perpetual, worldwide, non-exclusive, royalty-free, irrevocable license to it. Read all about the license here.