¶ Migrating Immich to a new storage configuration
Thank you: @G-M0N3Y-2503 and @forsaken, whose community guides on moving Immich storage informed this walkthrough.
¶ Prerequisites
- This guide requires at least enough storage space free on a pool to create another copy of your current Immich installation including media such as photos and videos.
- This guide only applies to
- curated Immich installations that have not been customized
- users that can still access the Immich web UI
- users with Immich version
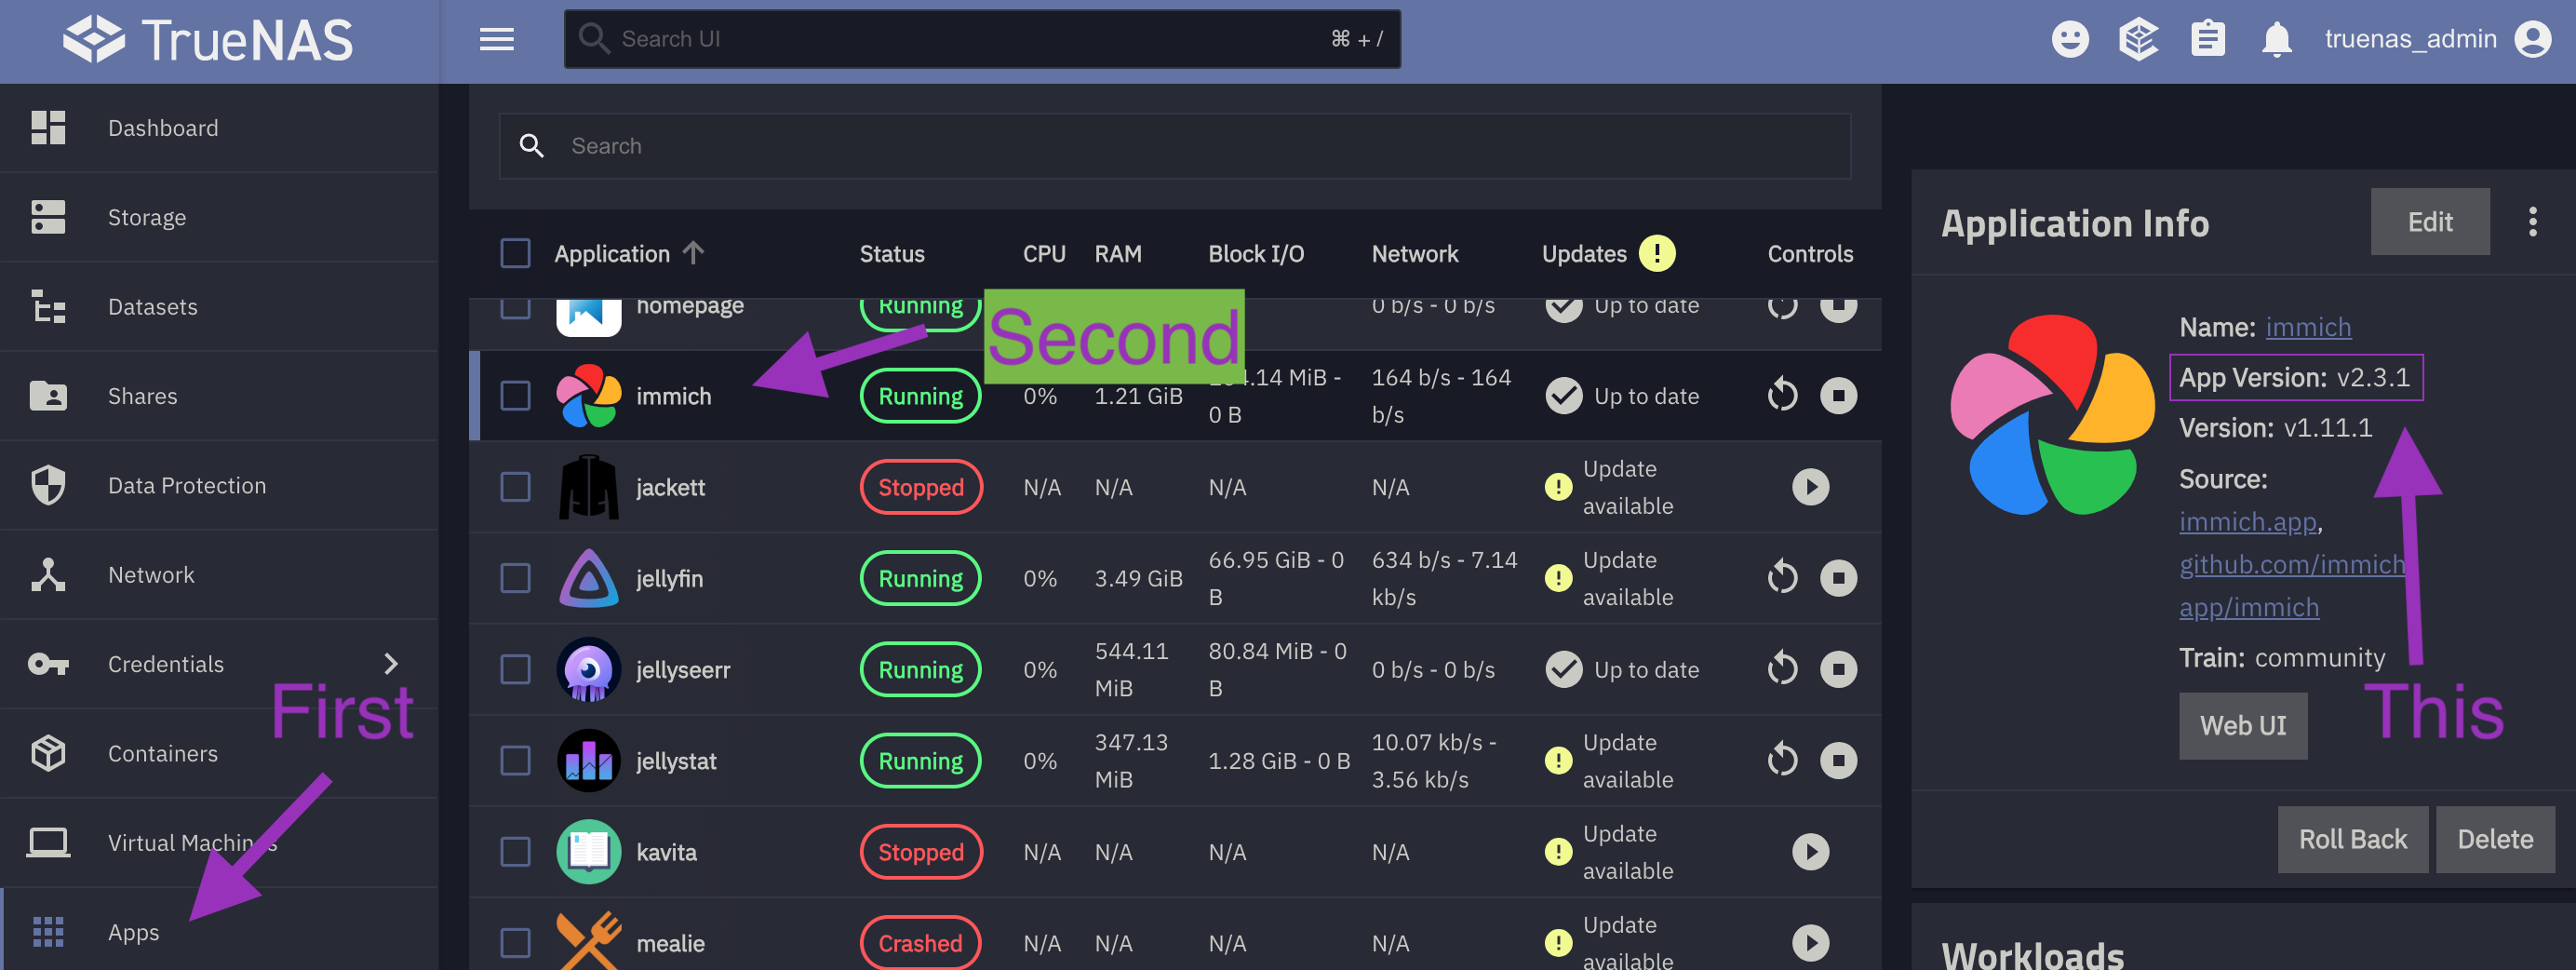
v1.135.0and higher- Click Apps on the left sidebar
- Click on the immich app on the list (not the checkbox)
- View the Application Version in the Application info card
Application version in info card
¶ Preparation
- Note the contents of the Photos folder
- This can be done by viewing the Photos folder via SMB shares.
- Instructions for how to access folder contents can be found here
- Stop the immich application
- Log in to the TrueNAS UI
- Navigate to HexOS Deck
- Navigate to the settings panel by clicking it on the left sidebar
- Click the TrueNAS button
- Log in
- The username will be
truenas_admin - The password will be what you selected when first installing HexOS
- The username will be
¶ Creating datasets
Once in the TrueNAS interface we will
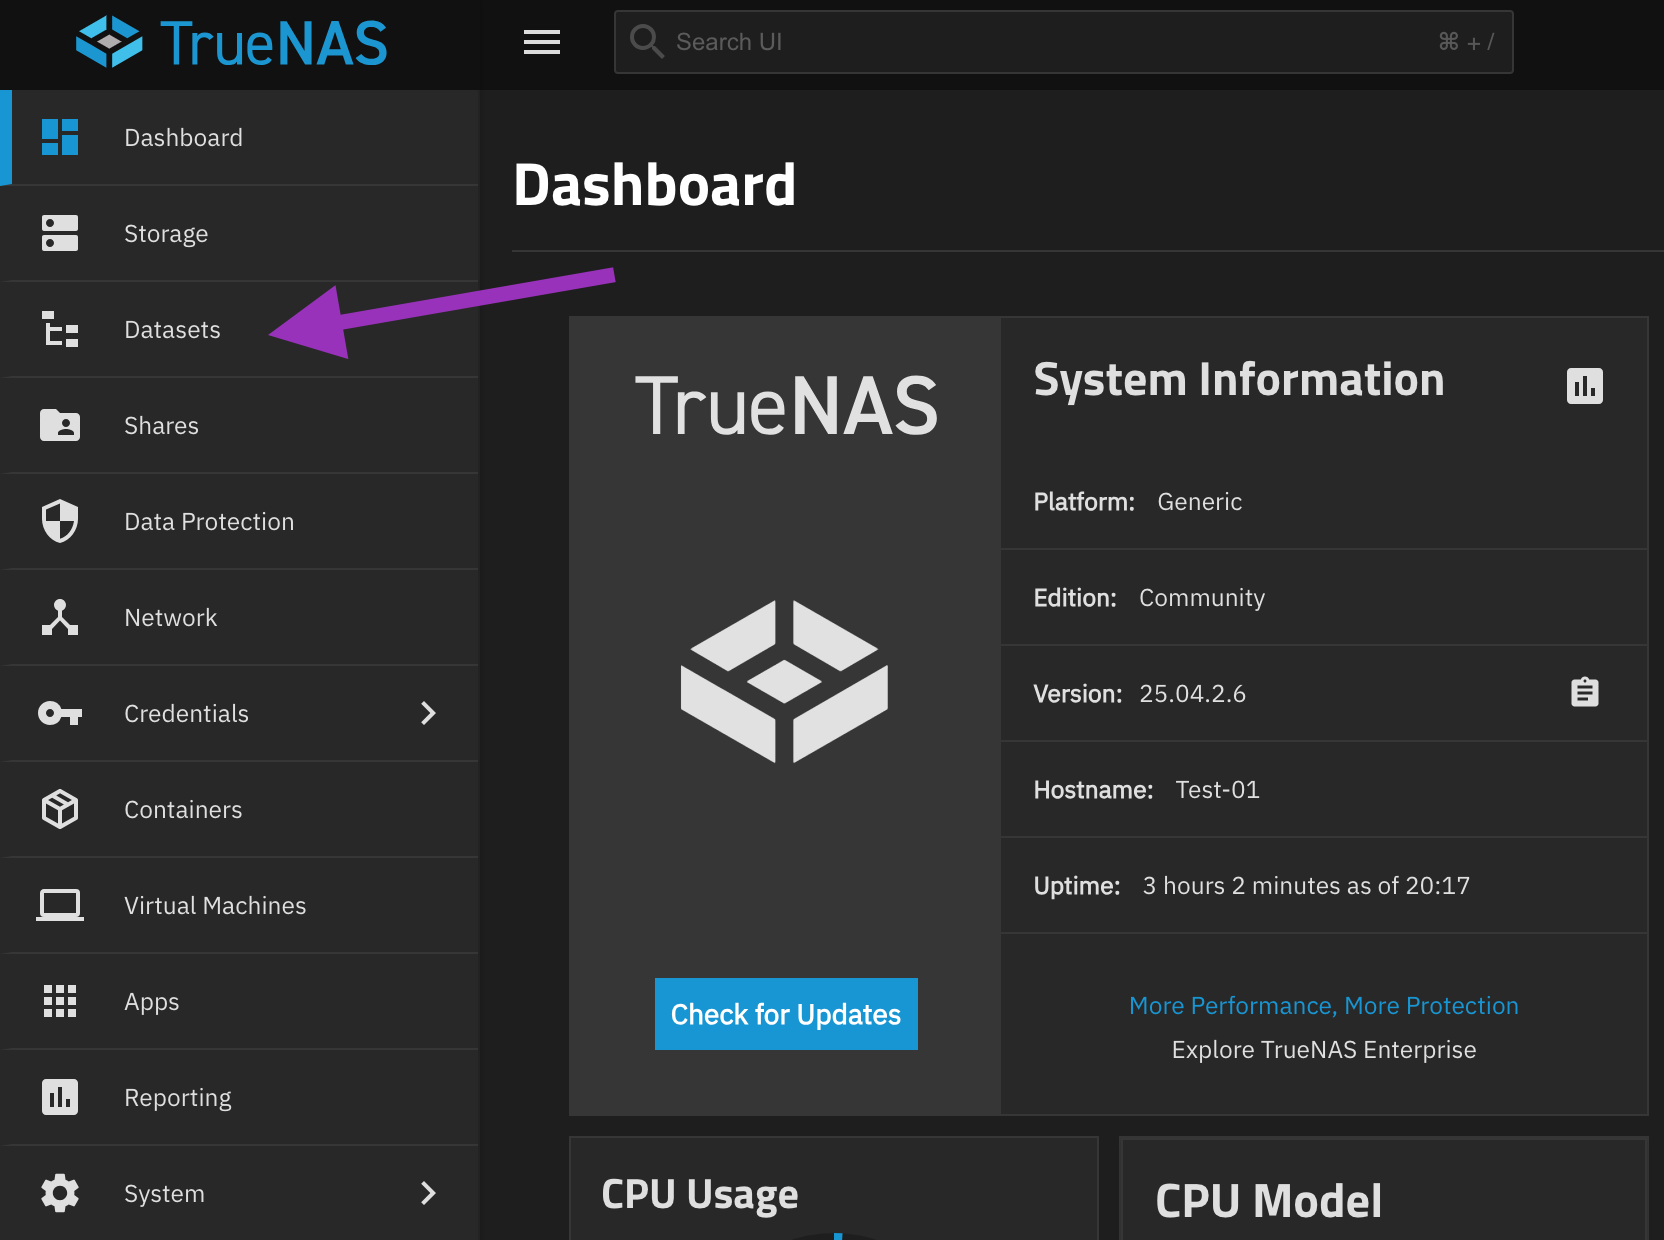
- Click Datasets in the left sidebar
Datasets option in sidebar
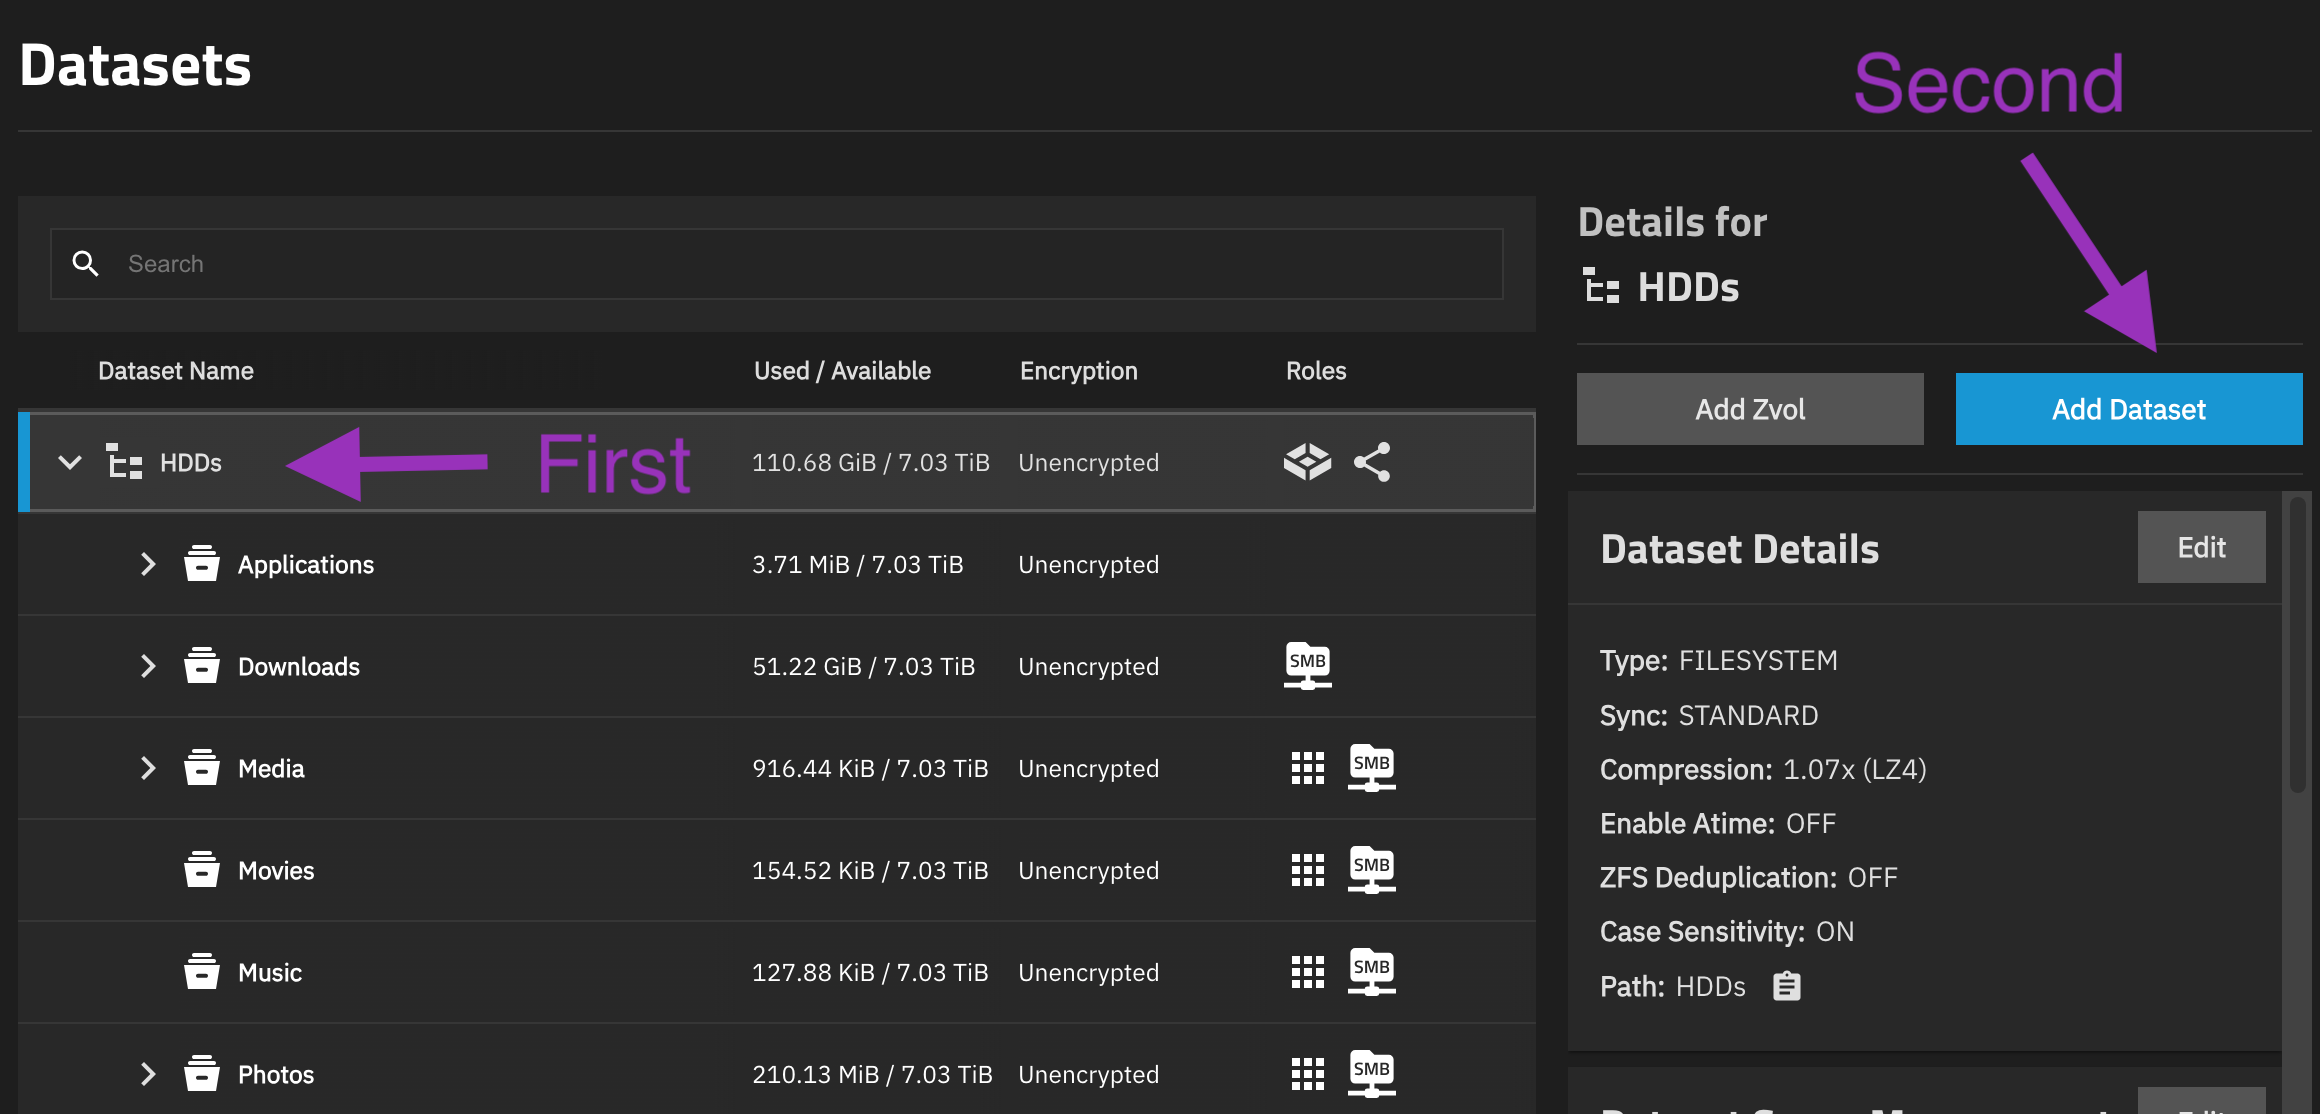
2) Click on the pool with your **Photos** folder and click **Add Dataset**
Add Dataset button
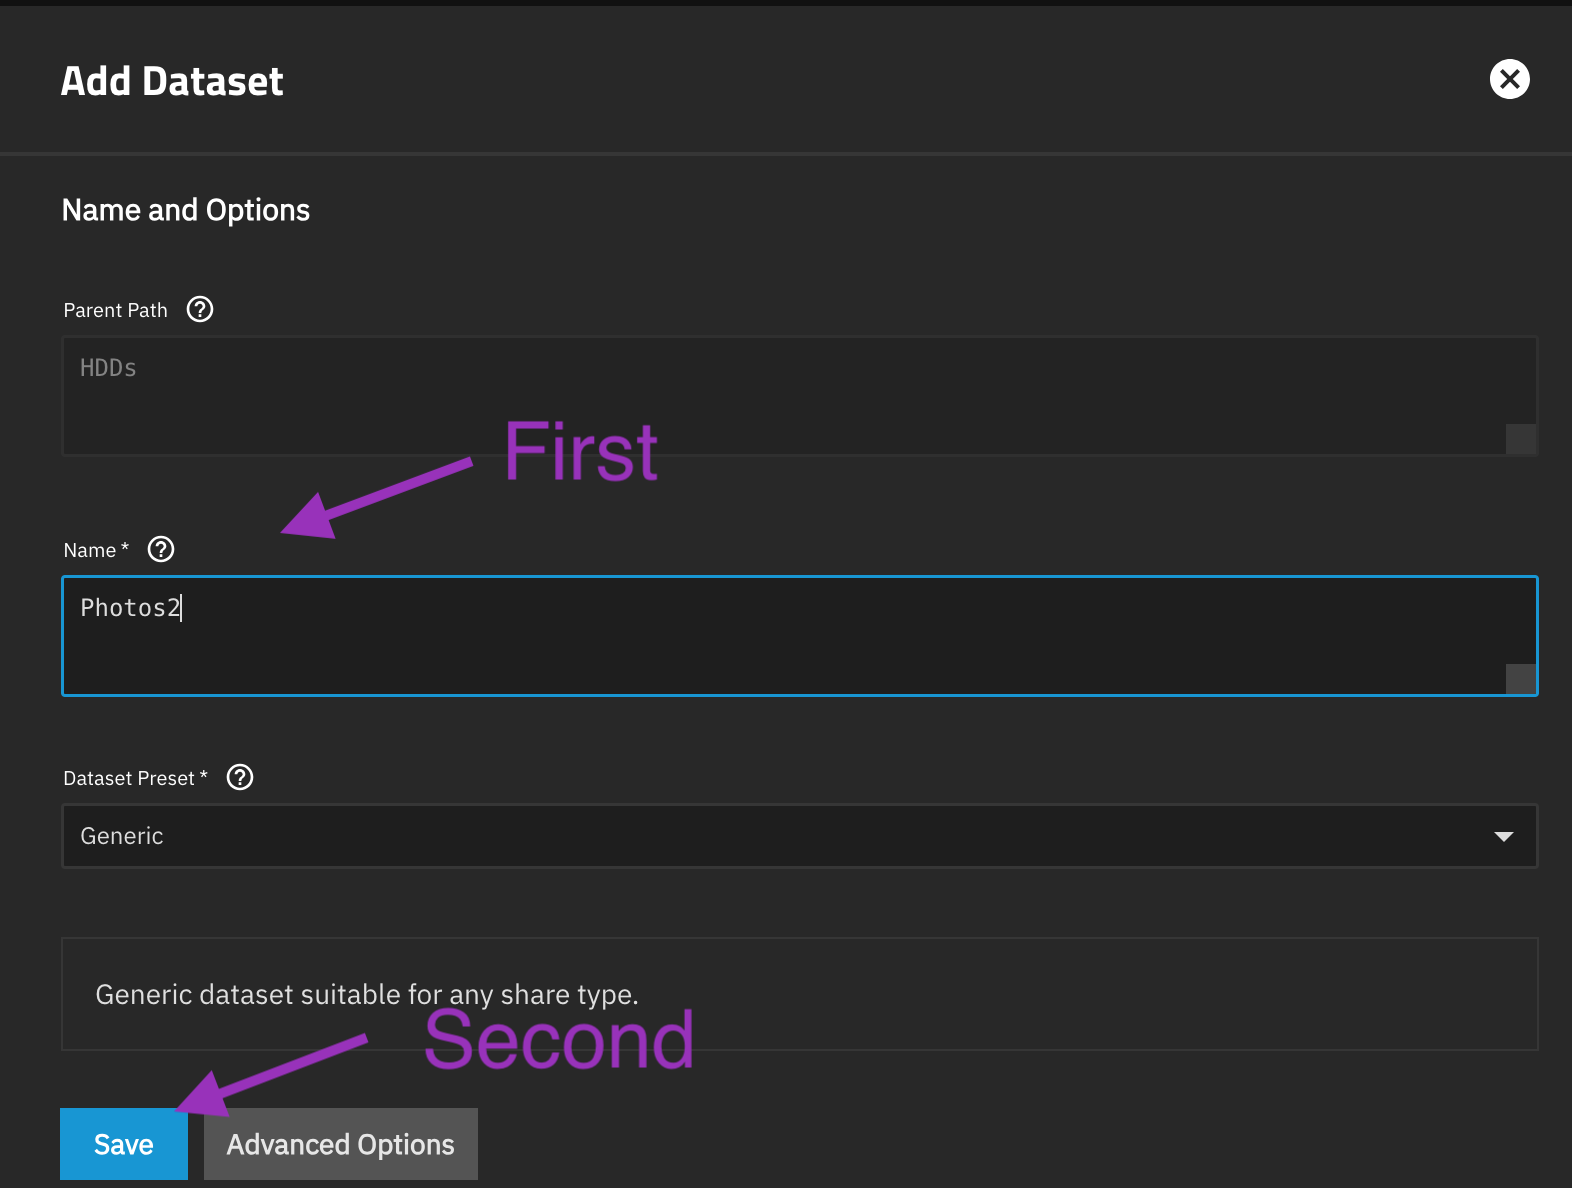
3) Name the dataset `Photos2` and click **Save**
Naming the Photos2 dataset
4) Click on the original `Photos` dataset and then click **Add Dataset**
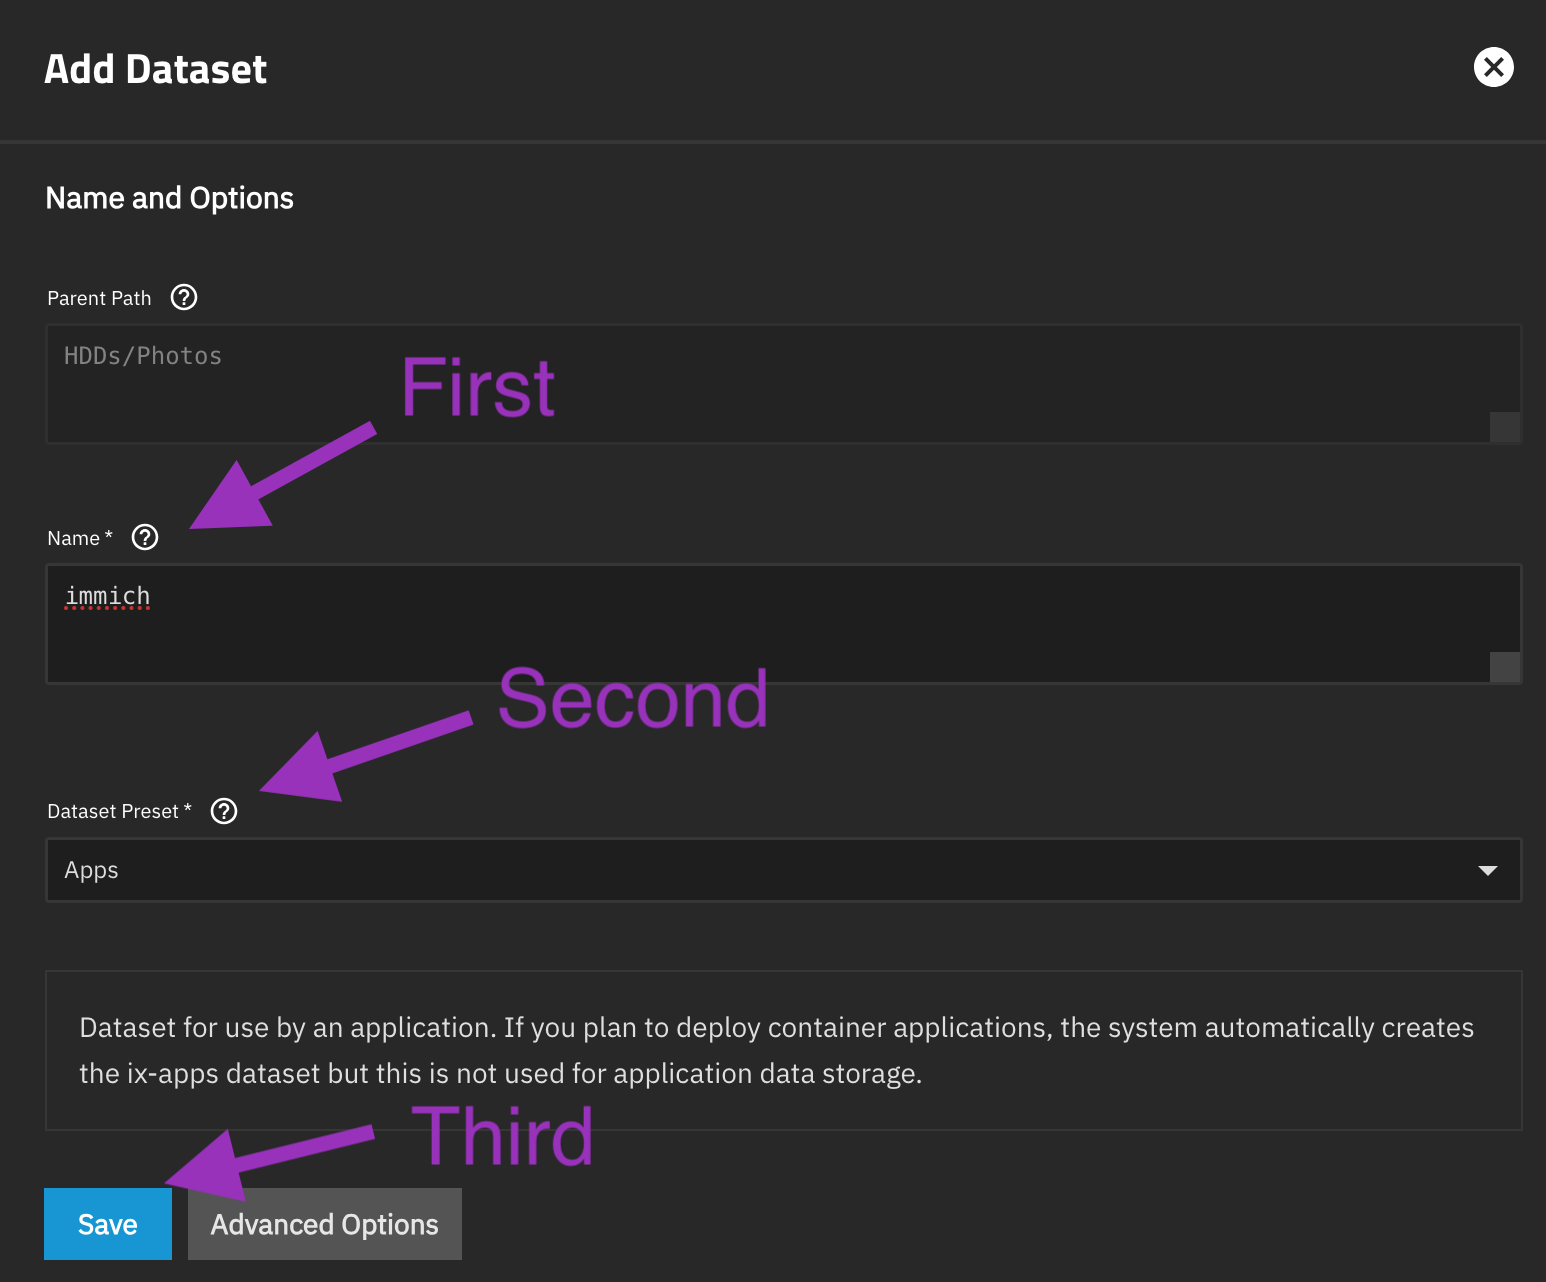
5) Name the dataset `immich`, set the Dataset Preset to **Apps** and then click **Save**
Immich dataset with Apps preset
¶ Copying files
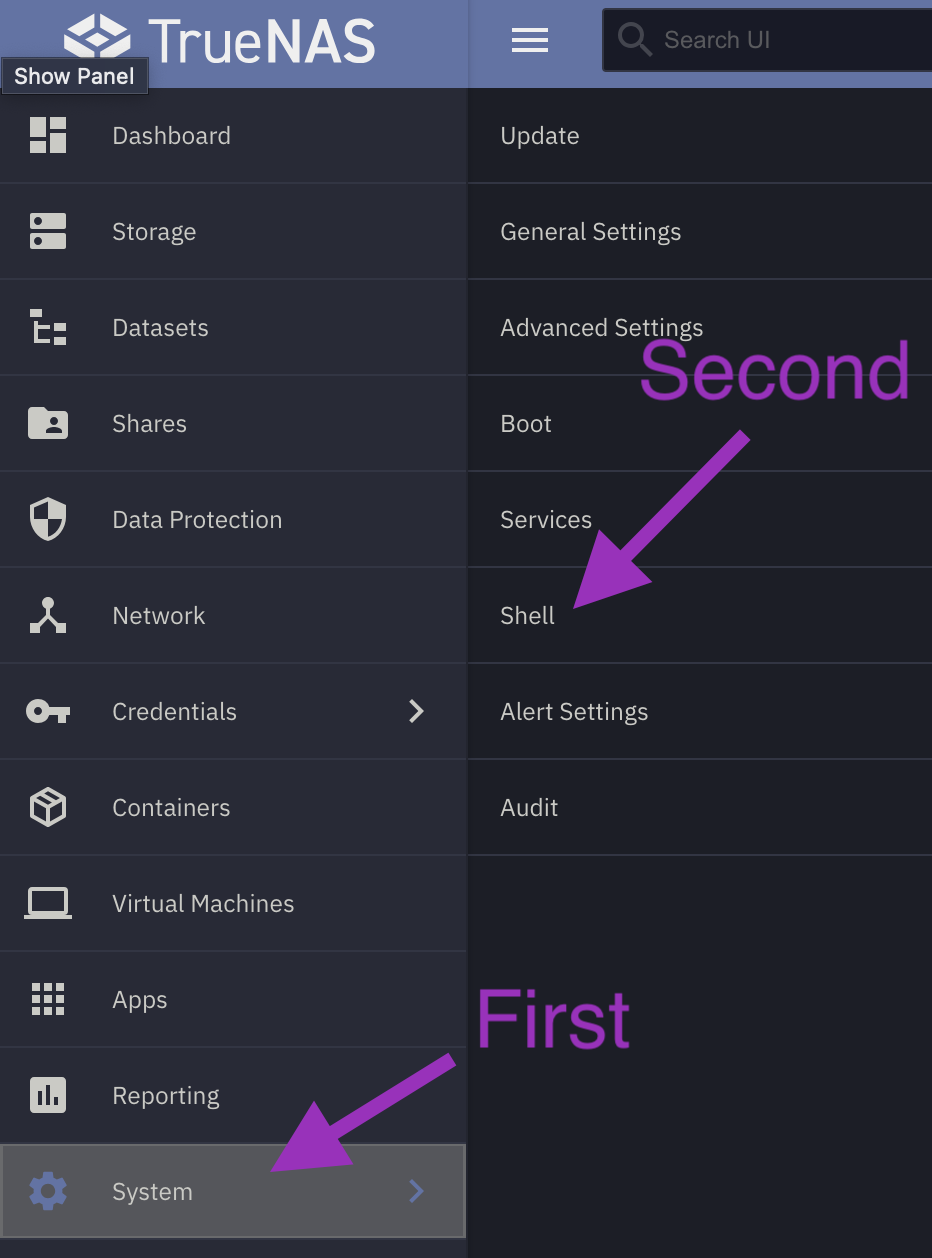
- Click System in the left sidebar
- Click Shell in the new sidebar
Shell option in sidebar
3) Type `tmux` into the shell and press enter
- This creates a session of the terminal that will keep going even if the TrueNAS web UI times out
- If the TrueNAS web UI times out you can return to **Shell** and type `tmux attach` to re-enter the session
4) Input the following commands in sequential order
- There will be a prompt for the admin password
- When you enter the admin password the screen will not show any characters as a security feature
- When the password is fully entered the command will run after pressing `enter`
Info: The following commands are for users that have their Photos and Applications on HDDs
Tip: When accessing shell from a Windows computer, the paste command is changed to
Shift + Insert
sudo rsync -avh --stats --progress /mnt/HDDs/Photos/ /mnt/HDDs/Photos2/
sudo rsync -avh --stats --progress /mnt/.ix-apps/app_mounts/immich/backups/ /mnt/HDDs/Photos/immich/backups/
sudo rsync -avh --stats --progress /mnt/HDDs/Applications/immich/profile/ /mnt/HDDs/Photos/immich/profile/
sudo rsync -avh --stats --progress /mnt/HDDs/Applications/immich/thumbs/ /mnt/HDDs/Photos/immich/thumbs/
sudo rsync -avh --stats --progress /mnt/HDDs/Applications/immich/encoded_videos/ /mnt/HDDs/Photos/immich/encoded-video/
sudo rsync -avh --stats --progress /mnt/HDDs/Applications/immich/uploads/ /mnt/HDDs/Photos/immich/upload/
sudo rsync -avh --stats --progress /mnt/HDDs/Photos2/ /mnt/HDDs/Photos/immich/library/
¶ Updating Immich
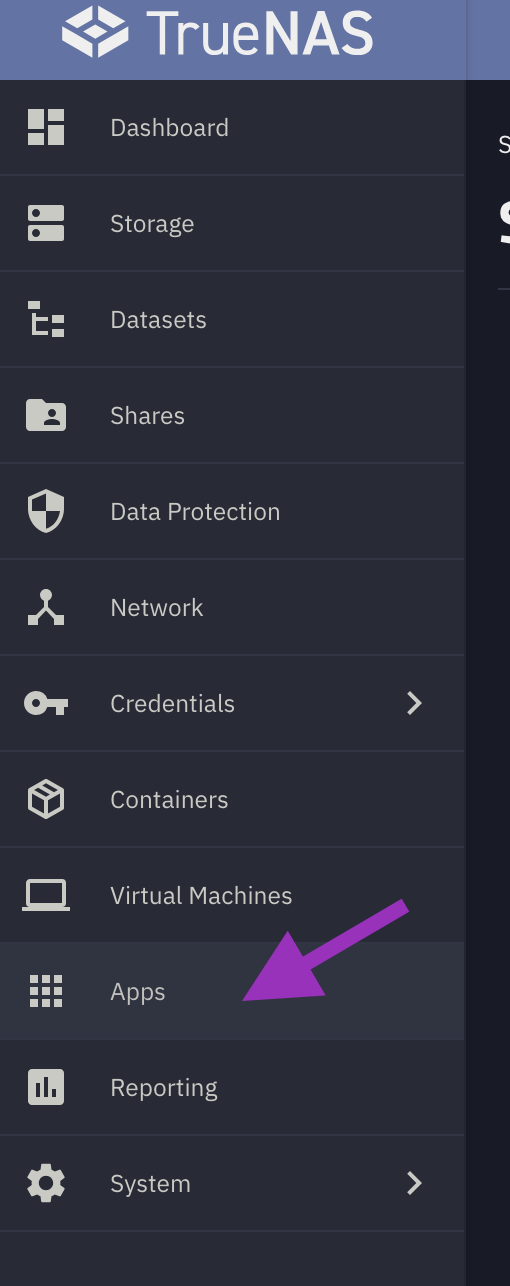
- Click Apps in the left sidebar
Apps option in sidebar
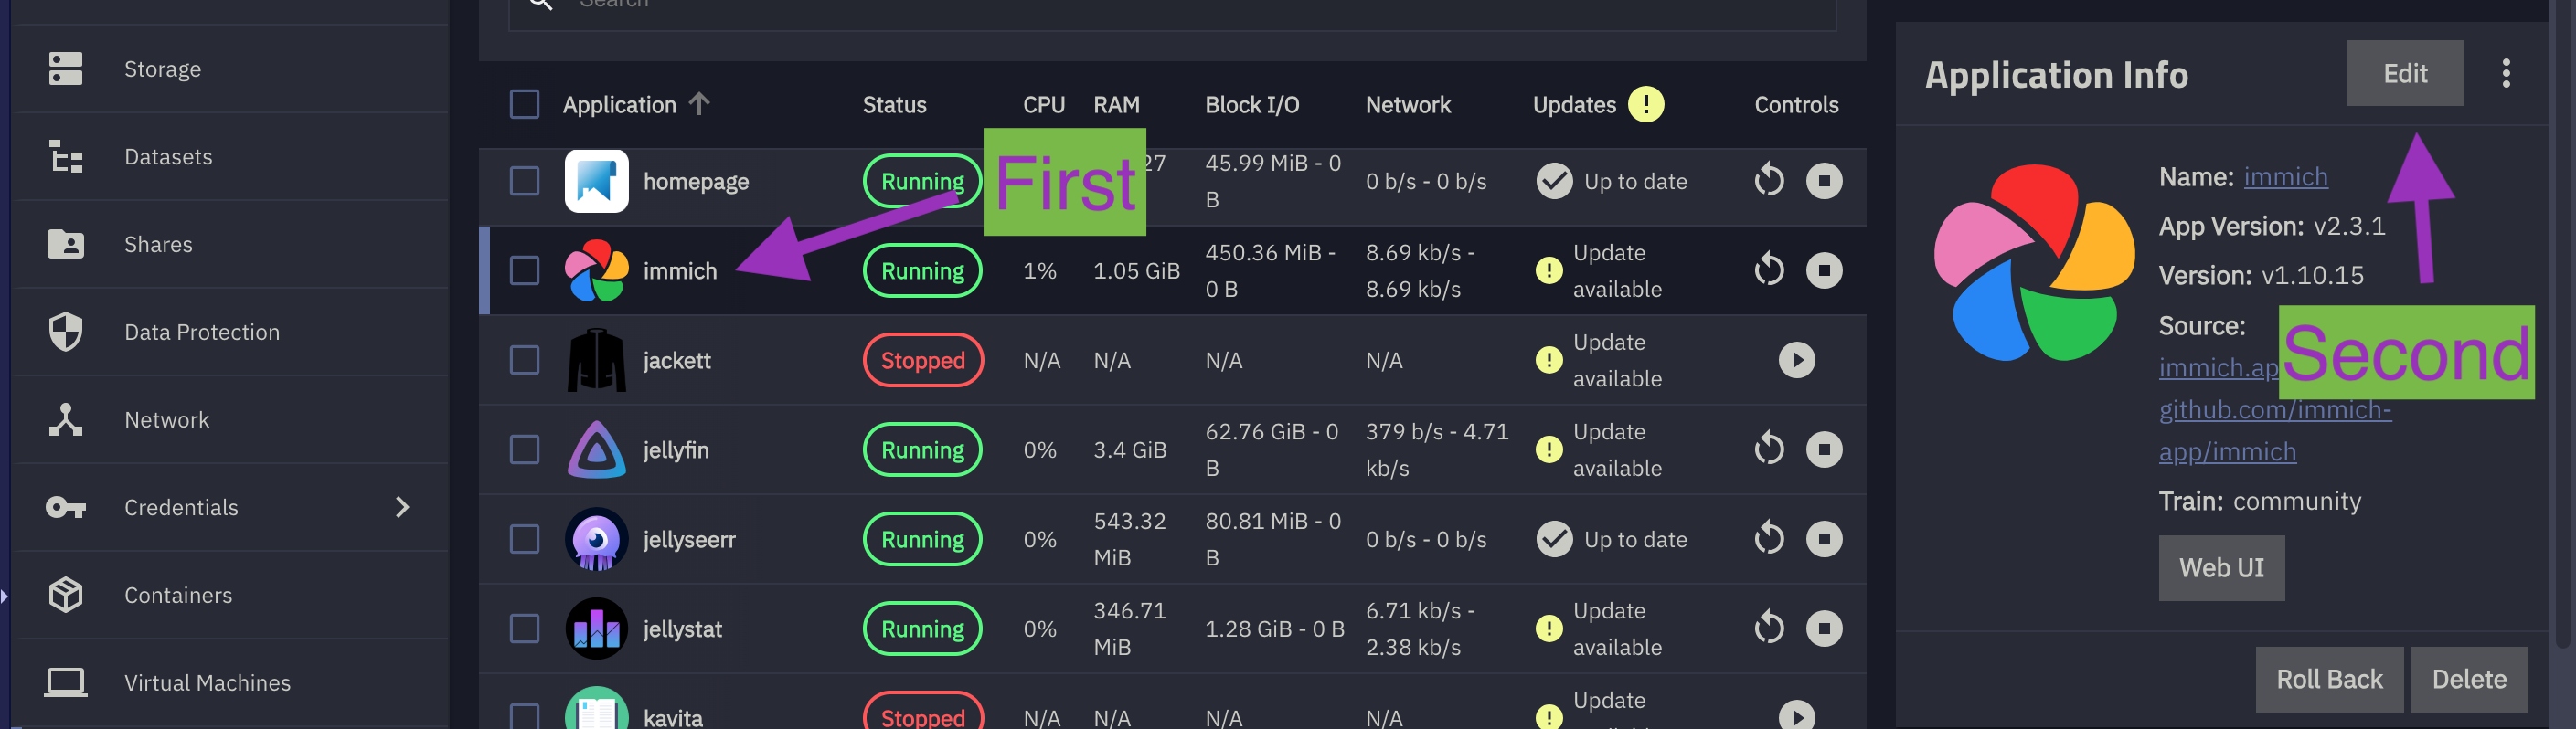
2) Click **immich**
3) Verify the **immich** app version is **1.132.0 or higher** in the application information card again
4) Click **Edit** in the application information card
Edit button on info card
5) Scroll down to the storage section
6) Uncheck **Use old storage configuration**
Old storage configuration checkbox
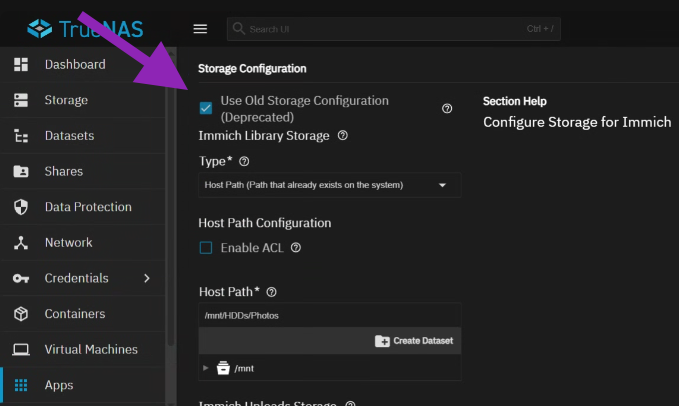
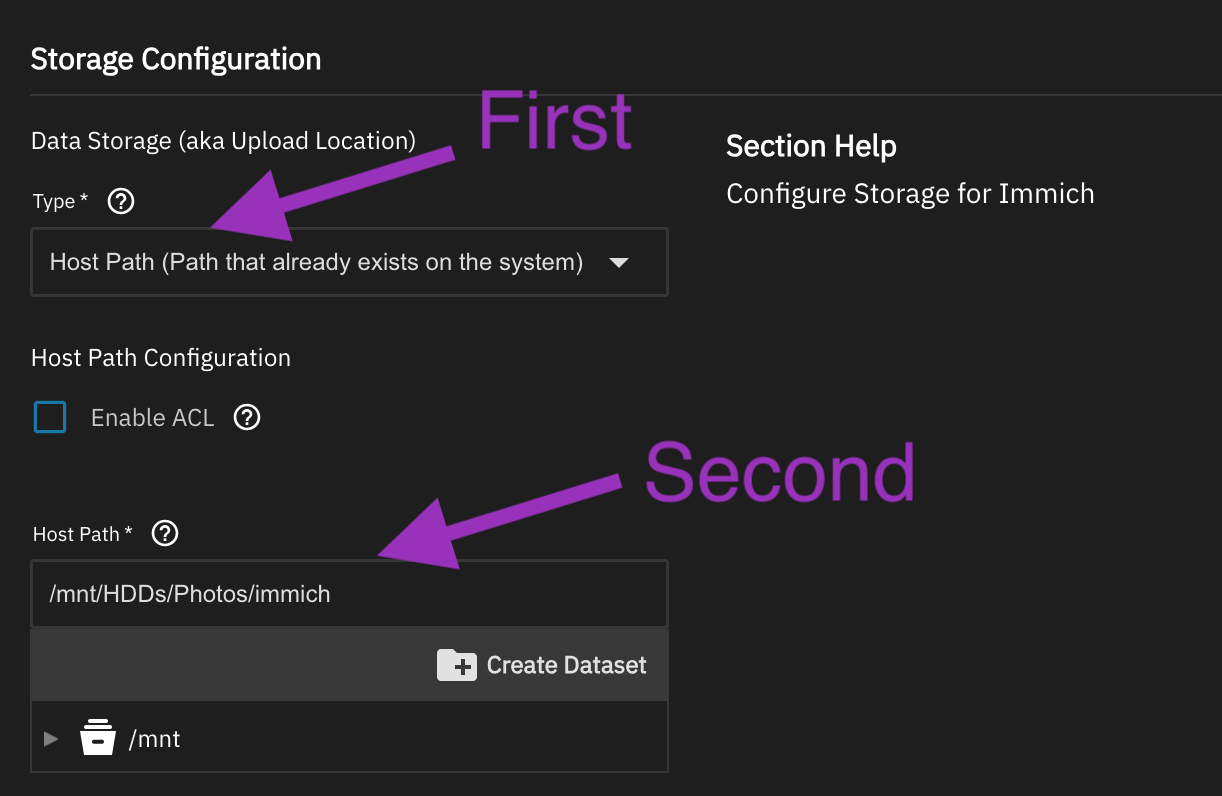
7) Click **Host Path** for Data Storage (also known as Upload Location)
8) Set the Host path to `/mnt/HDDs/Photos/immich`
Host path setting
9) Scroll down to the bottom and click the **Update** button
10) Verify that the Immich web UI is working
11) If the Immich web UI is working as expected, update the Immich app in [HexOS Deck](https://deck.hexos.com)
12) Verify that the Immich web UI is working and shows the most up-to-date version of Immich
¶ Cleaning up
- Stop the Immich application
- We will be deleting the old datasets to free up storage space (optional)
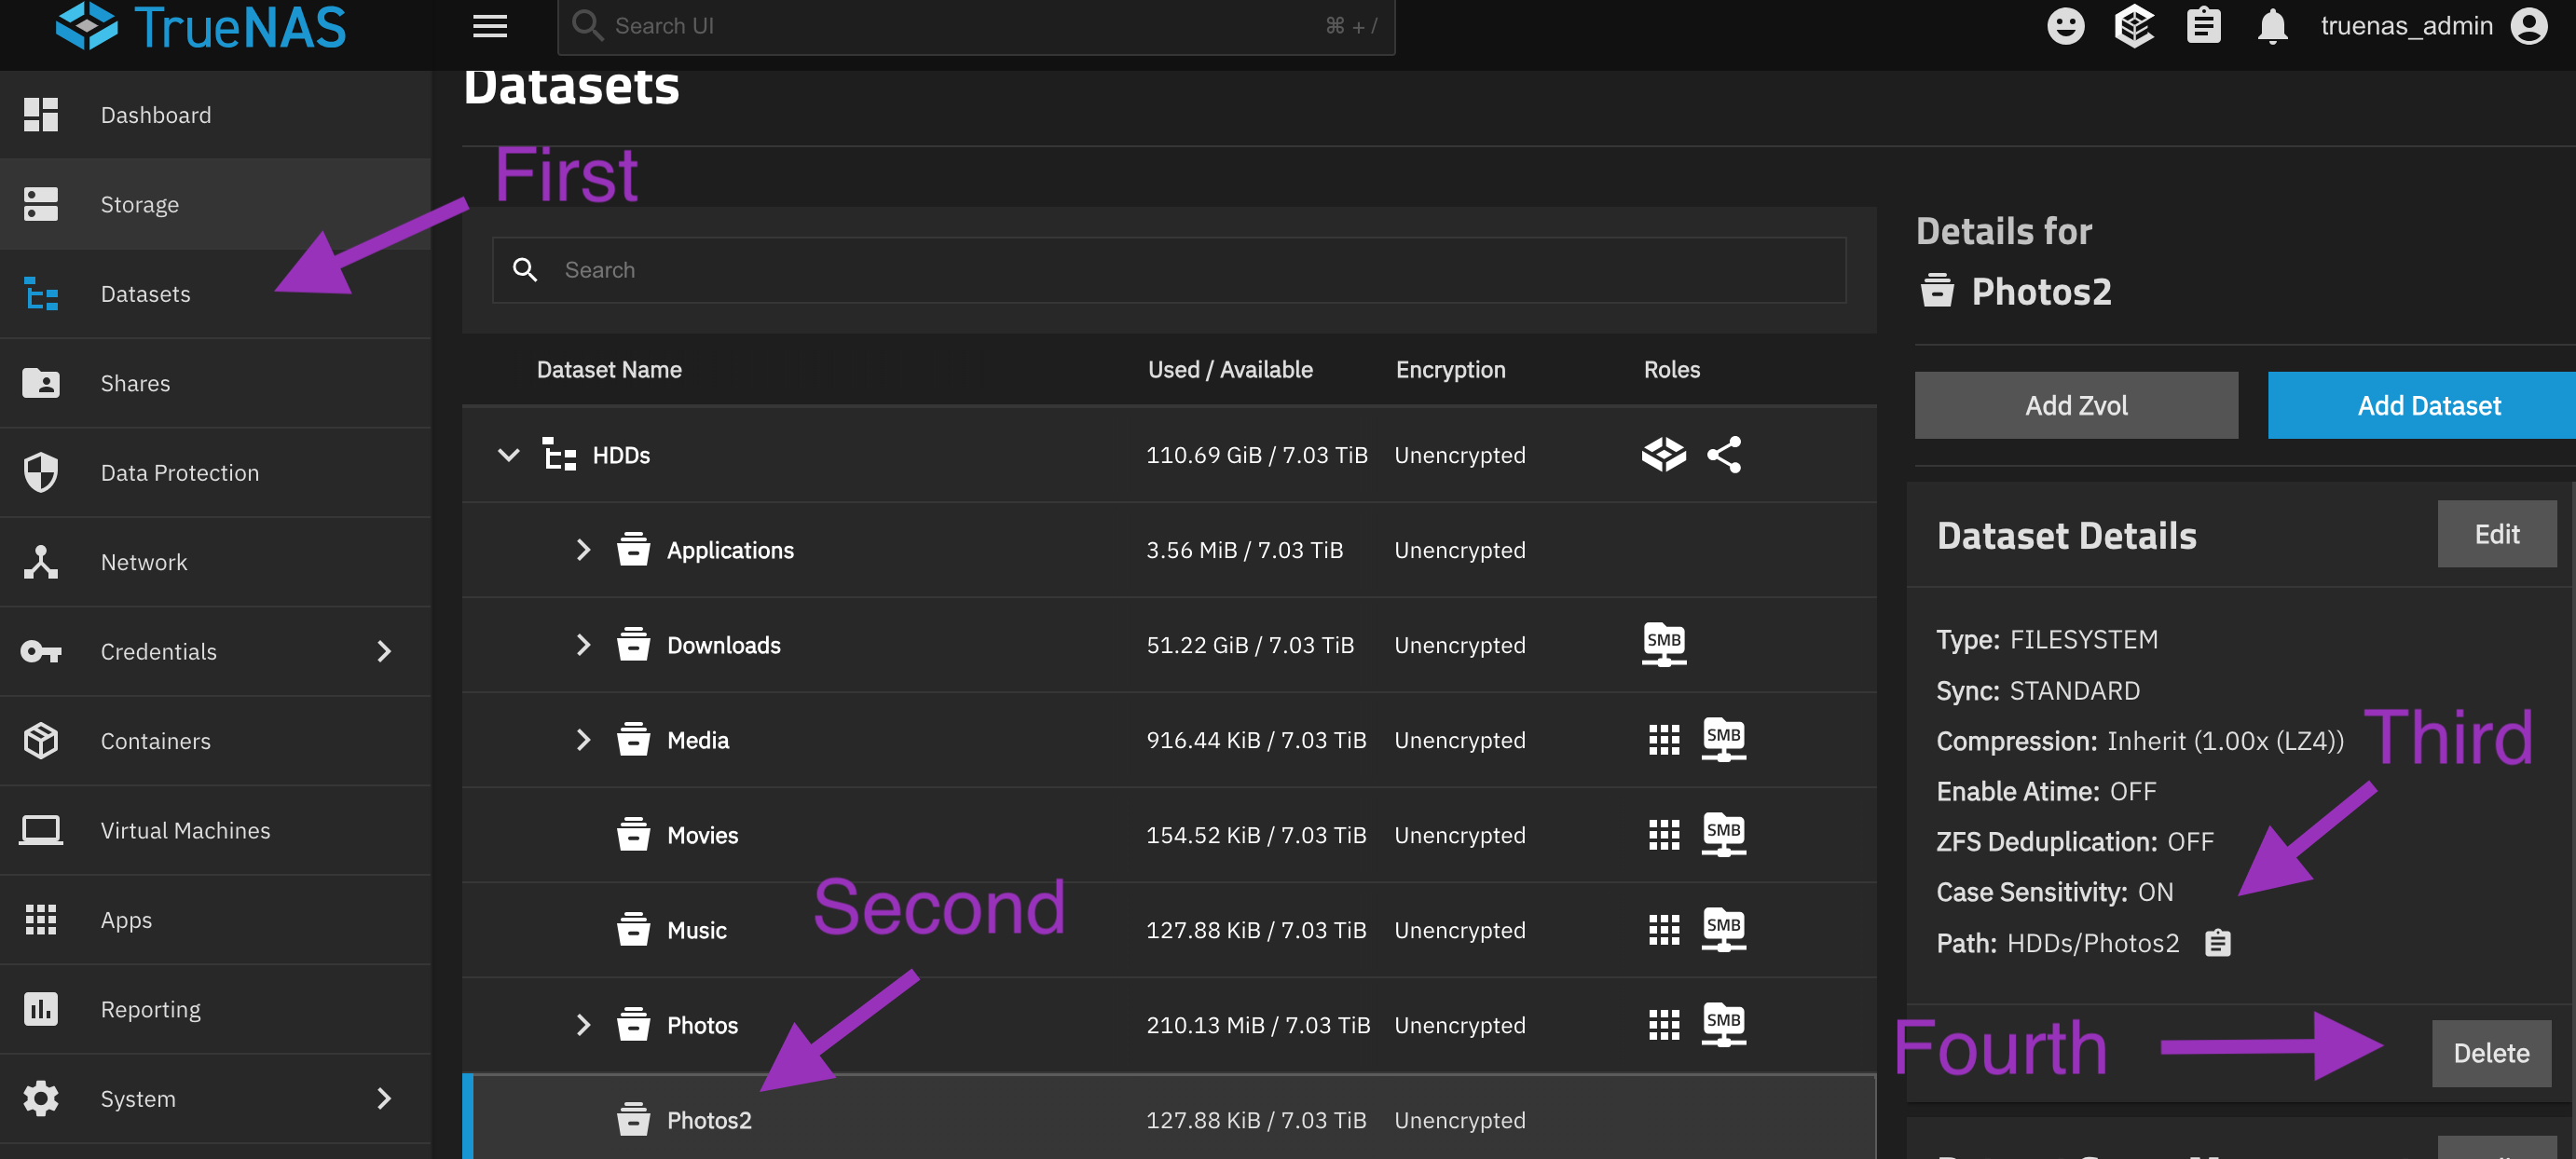
- Click Datasets in the left sidebar
- Click on the
Photos2dataset created earlier, click the clipboard to copy and click Delete
Deleting the Photos2 dataset
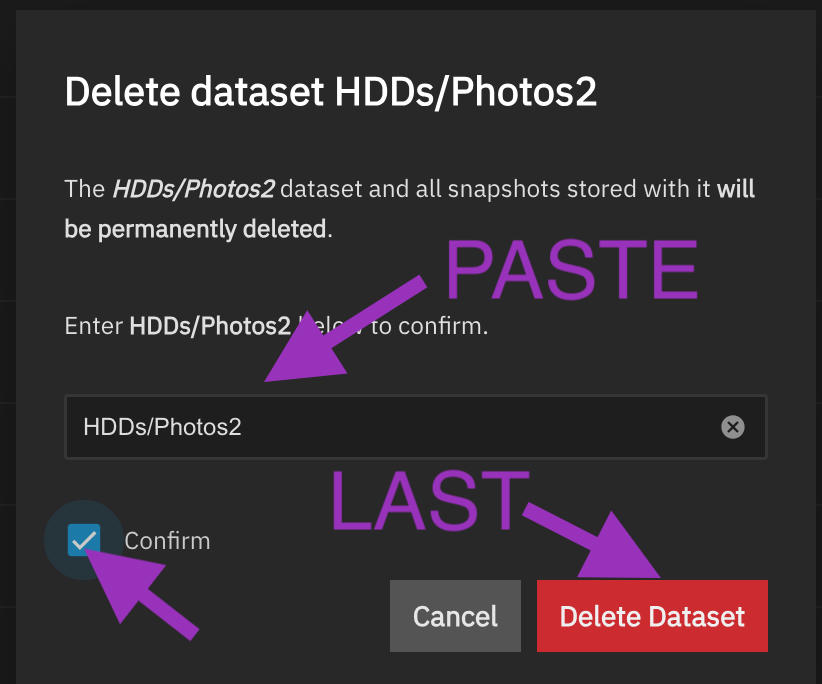
3) Follow the on-screen prompts to confirm deletion
Dataset deletion confirmation
4) Navigate to the ~/Applications/immich/ dataset
5) Delete the `Backups`, `encoded-video`, `profile`, `thumbs` & `upload` datasets.
Danger: Do not delete the
postgres_datadataset in the ~/Applications/immich/ dataset
- Open the original Photos folder using SMB again.
- Refer to the contents noted in the preparation section of this guide
- Make your hidden files visible
- Mac: In the Finder app, while in the Photos folder, press
Command + Shift + Periodto toggle hidden files. - Windows: Refer to these instructions
- Mac: In the Finder app, while in the Photos folder, press
- Delete all files & folders other than the
immichfolder and any files & folders you added to the Photos folder
- Re-enter shell
- Type
tmux kill-serverand press enter - Verify the tmux session has ended by entering
tmux attach - Restart the Immich application and verify that the web UI is working.