Thank you: @ShinobiRen for the original guide
¶ Replicating virtual machines from one TrueNAS server to another
This guide copies the disks of your virtual machines from one TrueNAS server to another over your network. You then set each virtual machine up again on the new server, using its copied disk. The same steps copy any other dataset, such as your folders.
Info: This guide was contributed by a member of the HexOS community and updated for TrueNAS 25.10. If a step does not match what you see, ask in the #Docs channel on Discord.
In this guide, the old server has your virtual machines now, and the new server is where you are moving them. Every step happens in the TrueNAS interface of one of the two servers. To open it, go to https://<server-ip> in your browser and log in.
¶ Before you start
- Put both servers on the same network, and write down the new server's IP address.
- Write down the virtual machines you want to move. HexOS keeps their disks in a dataset named Virtualization Virtual Disks, which you can see on the Datasets screen.
- Shut down the virtual machines before you copy them, so their disks do not change during the copy.
Info: TrueNAS can set up the connection between the servers for you, with the Semi-automatic setup method. It does not always work, so this guide sets it up by hand.
¶ Step 1: Create a keypair on the old server
A keypair lets the old server log in to the new server without a password.
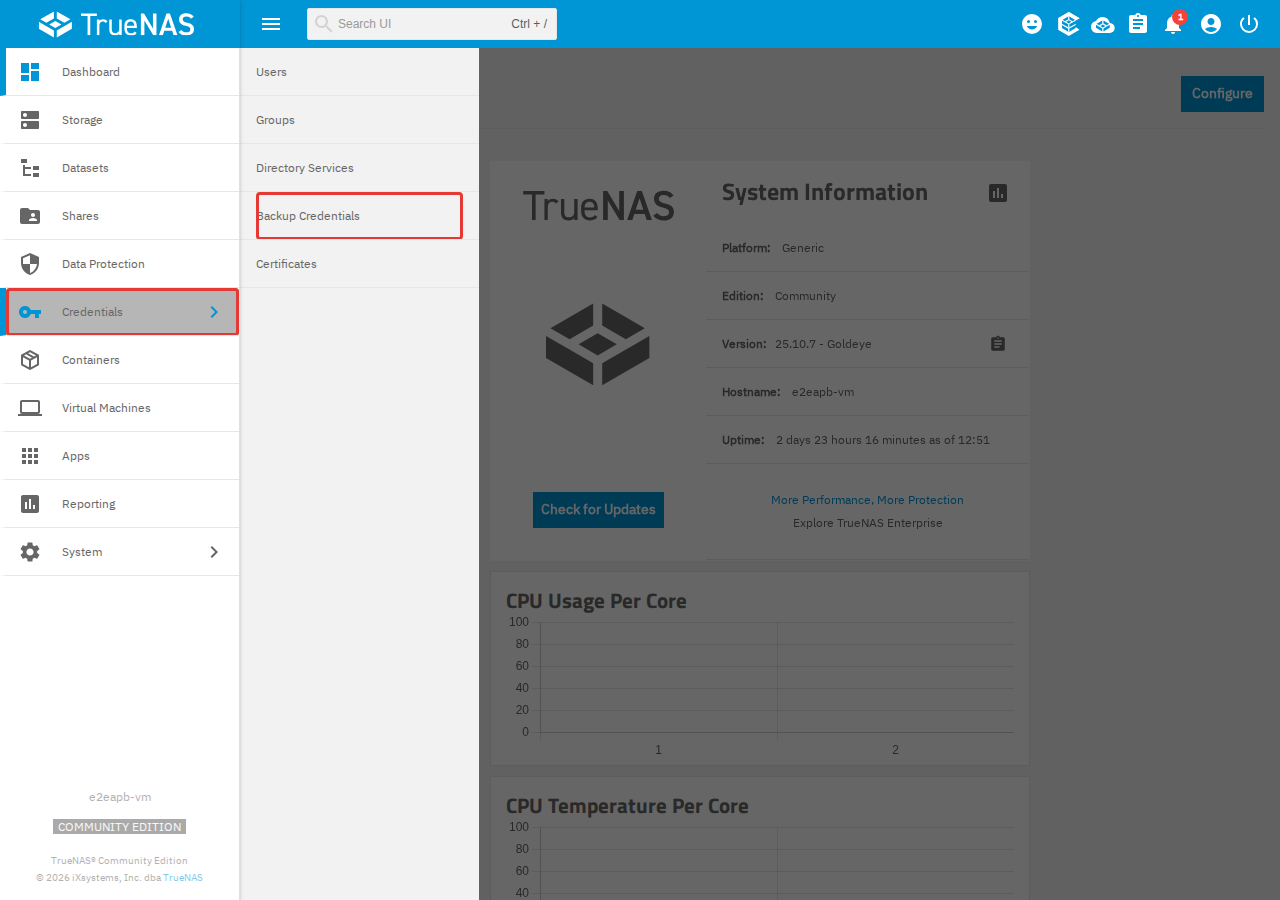
- On the old server, click Credentials > Backup Credentials.
Backup credentials in the credentials menu
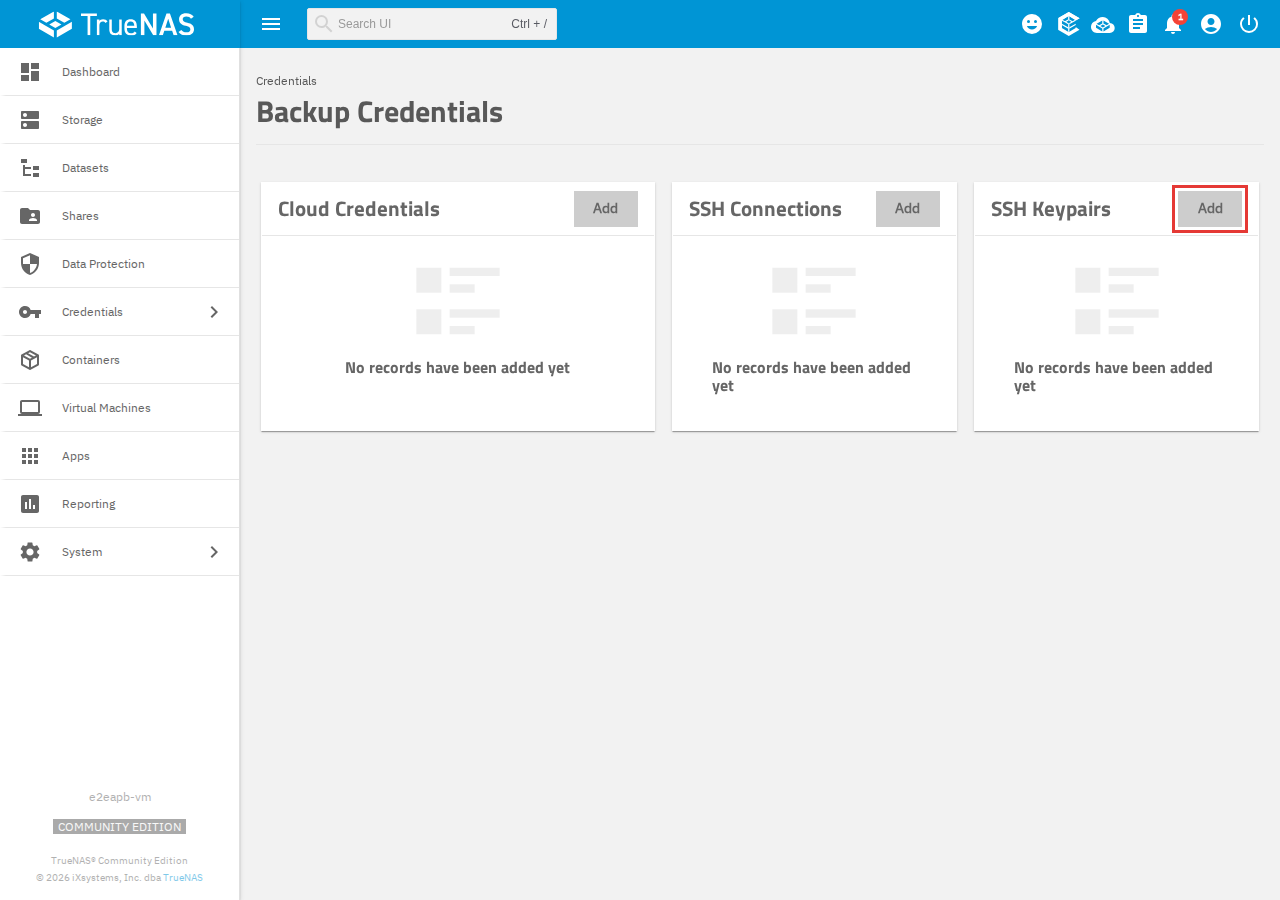
- On the SSH Keypairs card, click Add.
Add button on the SSH keypairs card
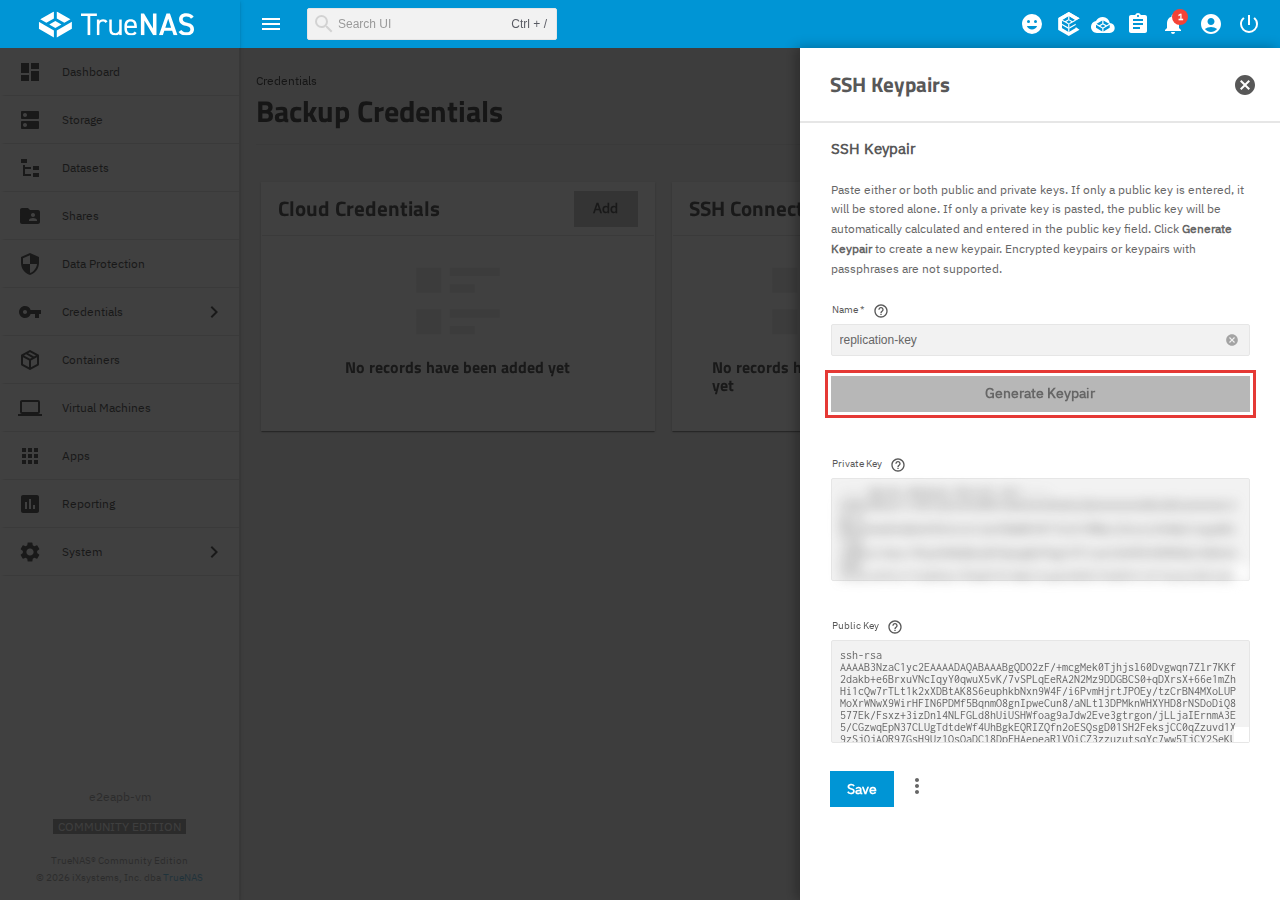
- Give the keypair a name, for example
replication-key, and click Generate Keypair. - Copy everything in the Public Key box and keep it for Step 2. Then click Save.
A generated keypair
Warning: Never share the Private Key. Only the public key goes to the new server.
¶ Step 2: Add the public key on the new server
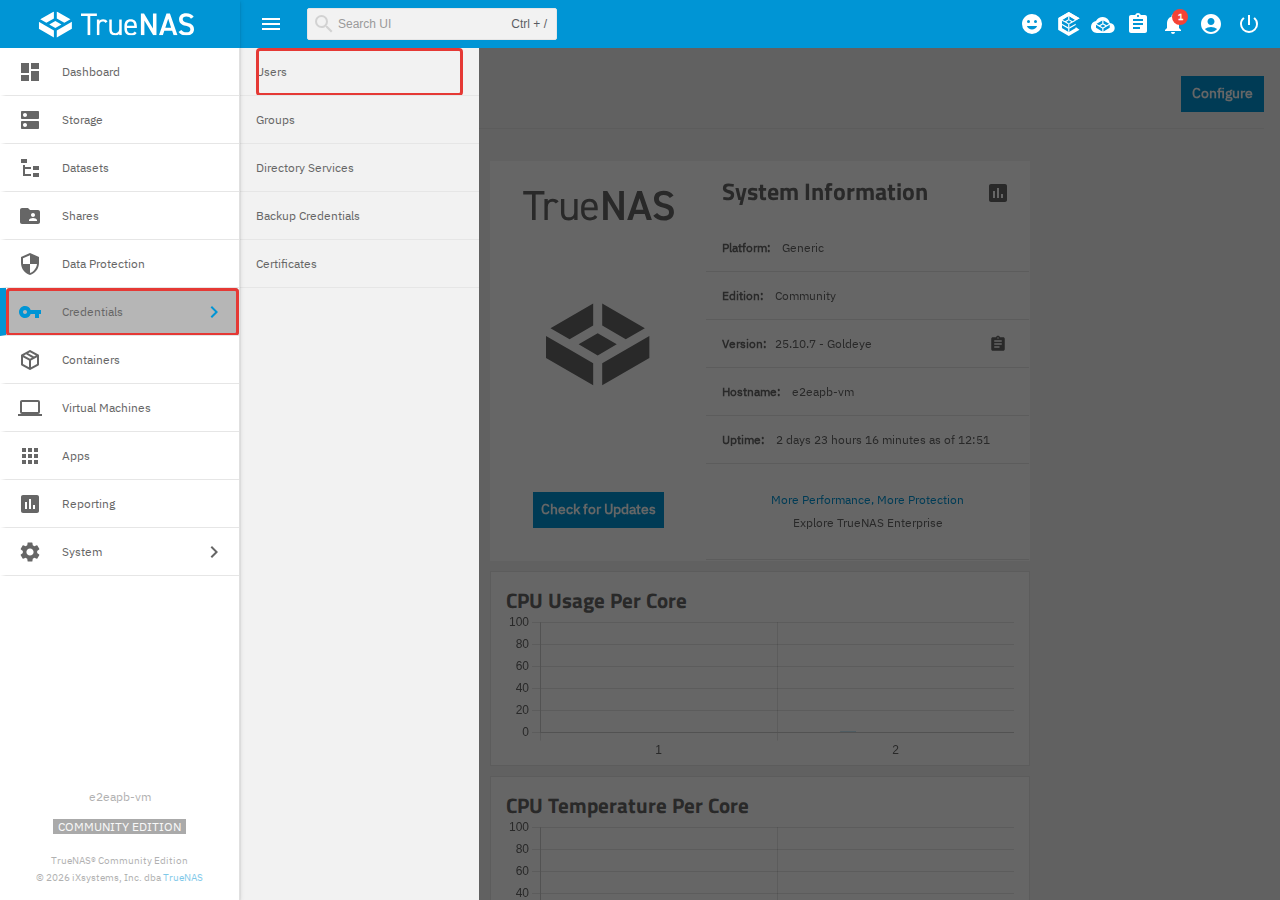
- On the new server, click Credentials > Users.
Users in the credentials menu
- Click the user the old server will log in as, usually
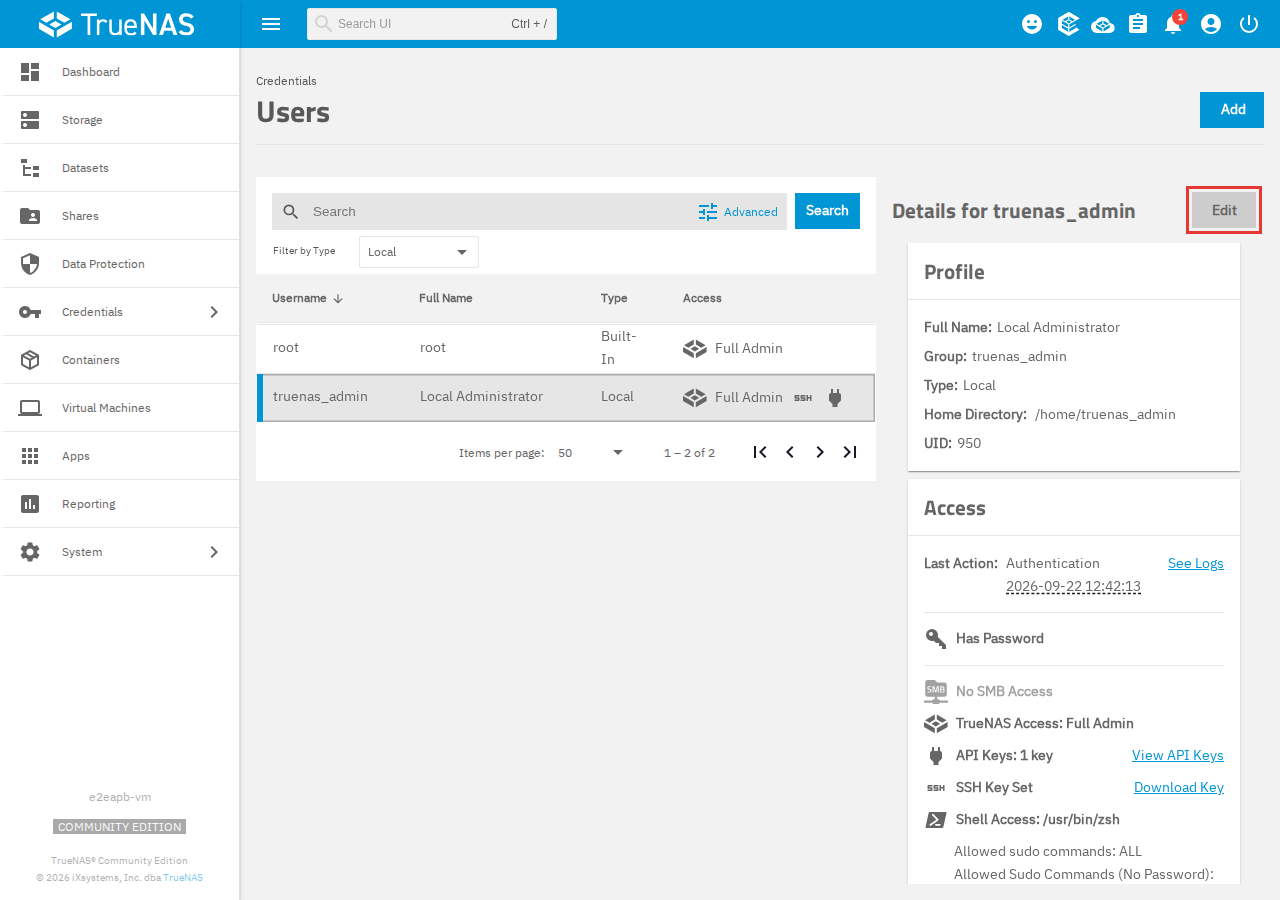
truenas_admin, then click Edit.
Edit button for the selected user
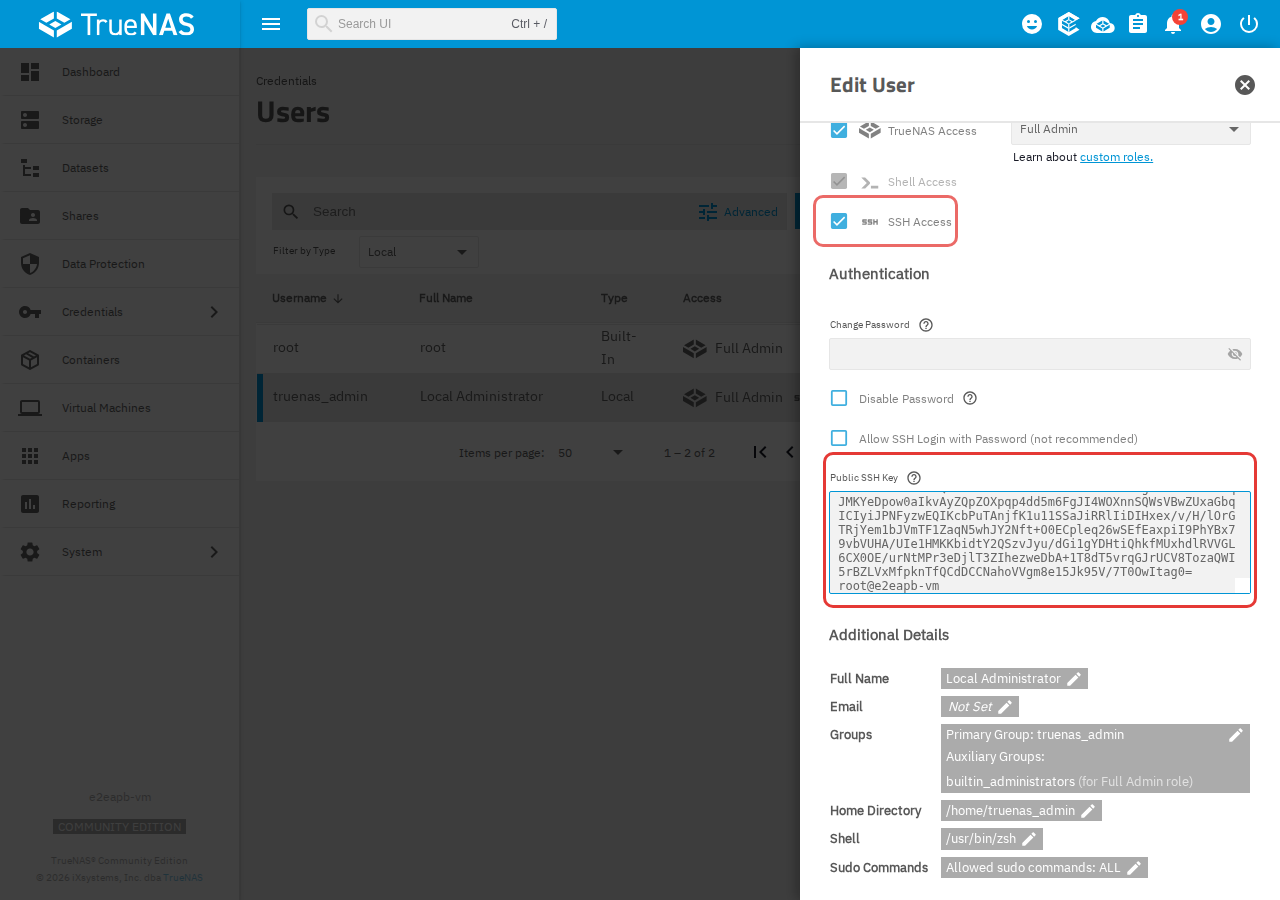
- Check that SSH Access is checked.
- Paste the public key from Step 1 into the Public SSH Key box. If the box already has a key, keep it and paste the new one on a new line.
SSH access and the public SSH key box
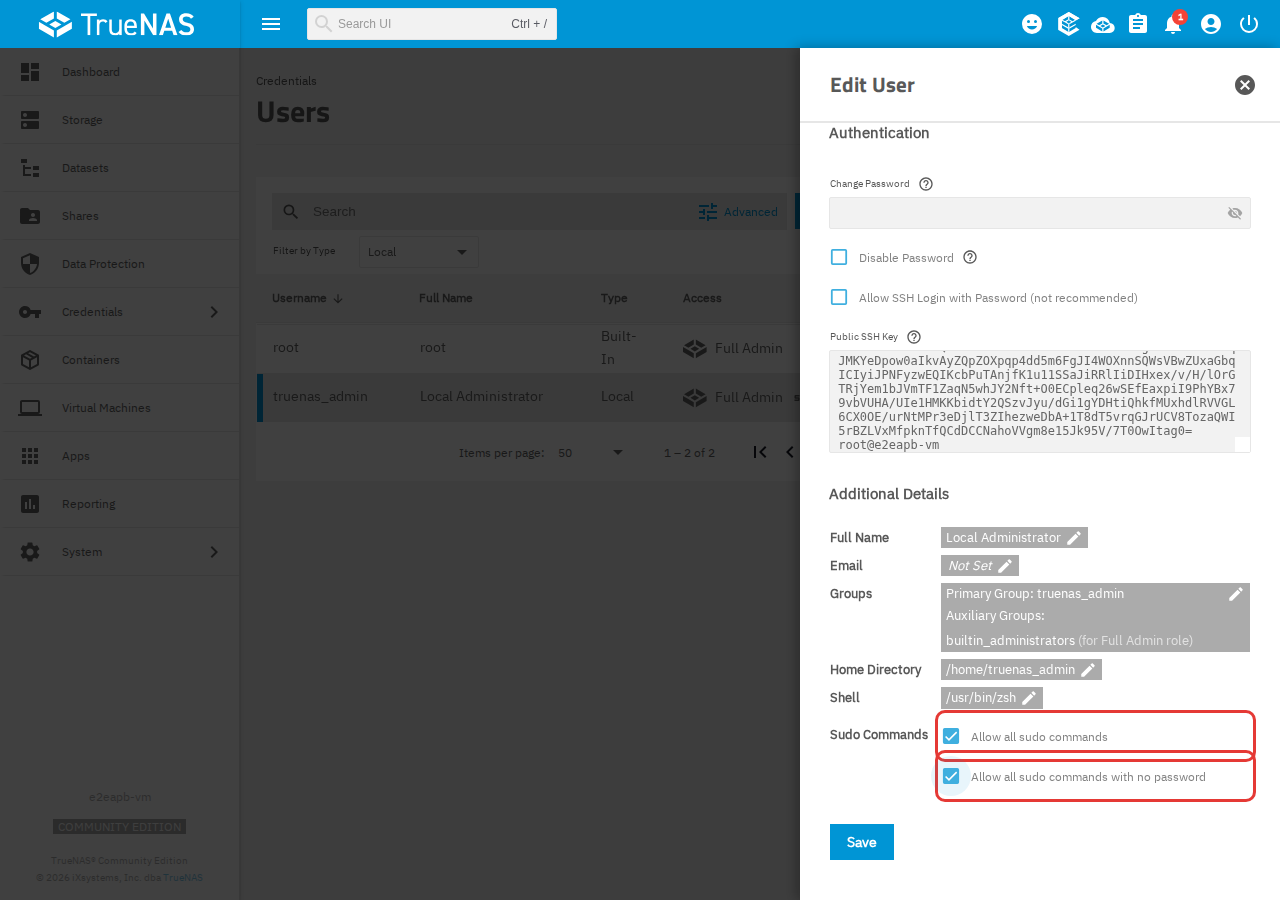
- Scroll down to Additional Details and click Sudo Commands.
- Check Allow all sudo commands and Allow all sudo commands with no password, then click Save.
Sudo commands for the user
- Click System > Services. On the SSH row, click the start button so Status shows Running. SSH is off on a new TrueNAS install, and the old server cannot connect until it is on.
The SSH service on the services screen
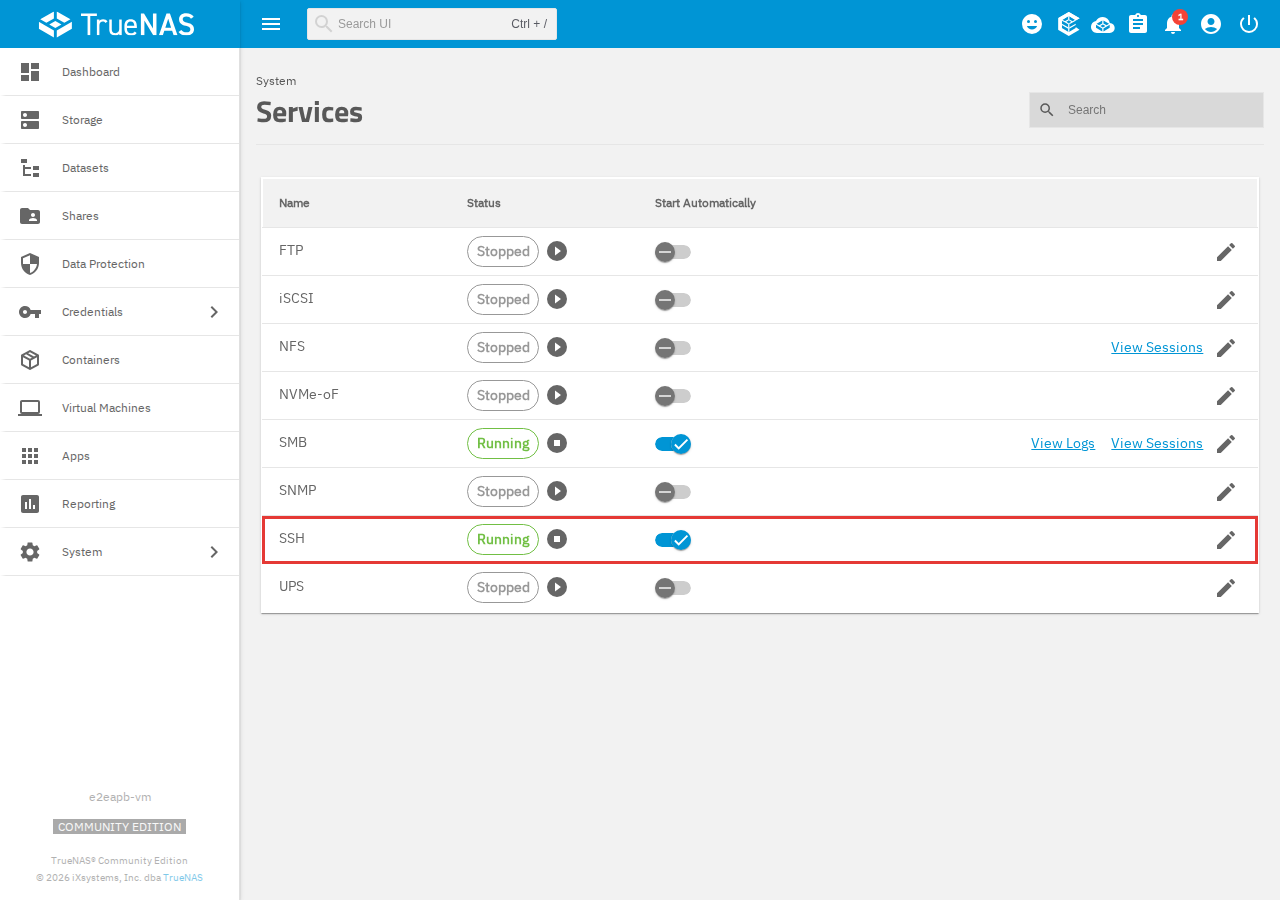
Tip: When the move is finished, you can stop the SSH service again on the same screen.
¶ Step 3: Connect the old server to the new server
- On the old server, click Credentials > Backup Credentials again.
- On the SSH Connections card, click Add.
Add button on the SSH connections card
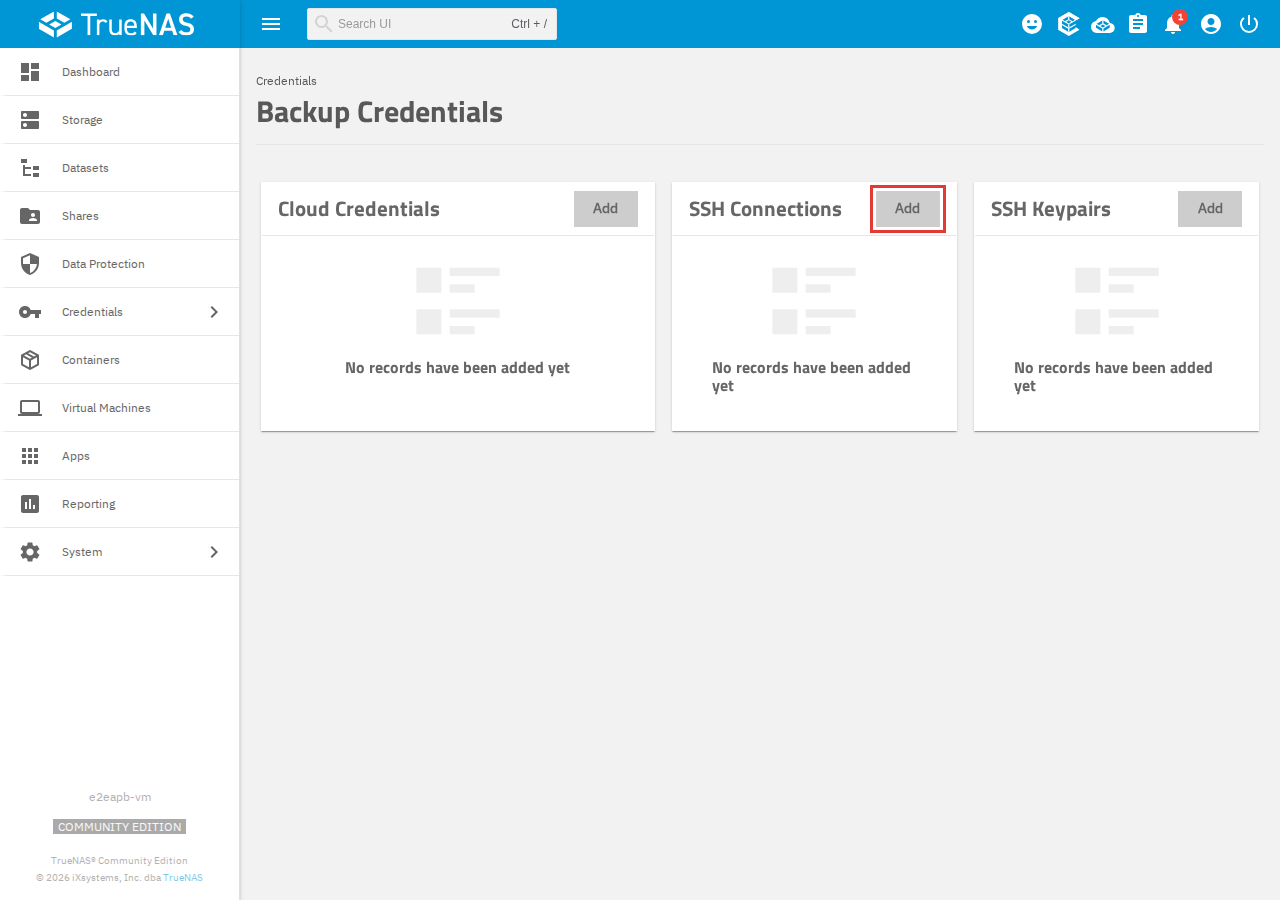
- Fill in the form:
- Connection Name: a name you will recognize, for example
new-server - Setup Method: Manual
- Host: the new server's IP address
- Port:
22 - Username: the user from Step 2, for example
truenas_admin - Private Key: the keypair from Step 1
- Connection Name: a name you will recognize, for example
The new SSH connection form
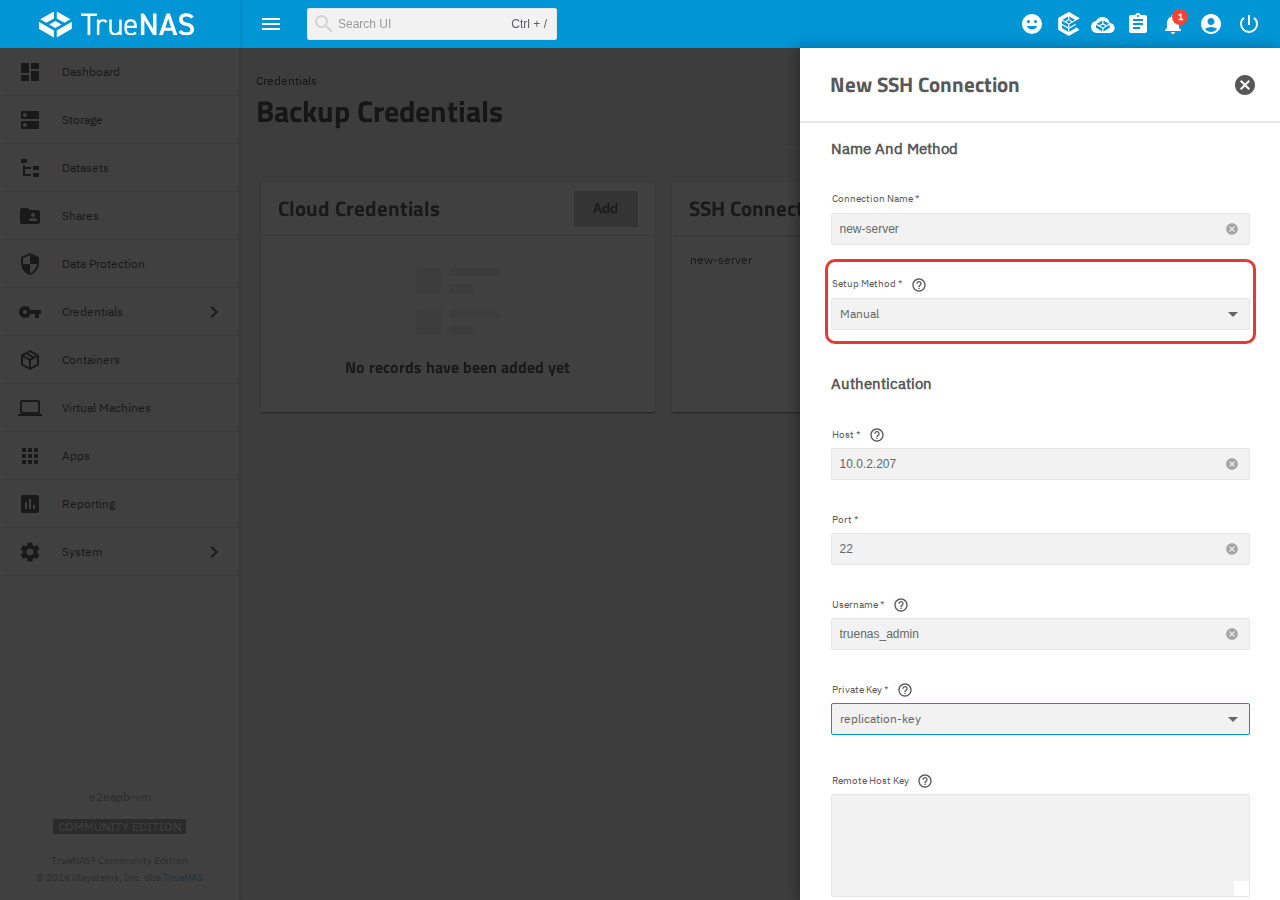
- Click Discover Remote Host Key. The Remote Host Key box fills in.
- Click Save.
Discover remote host key
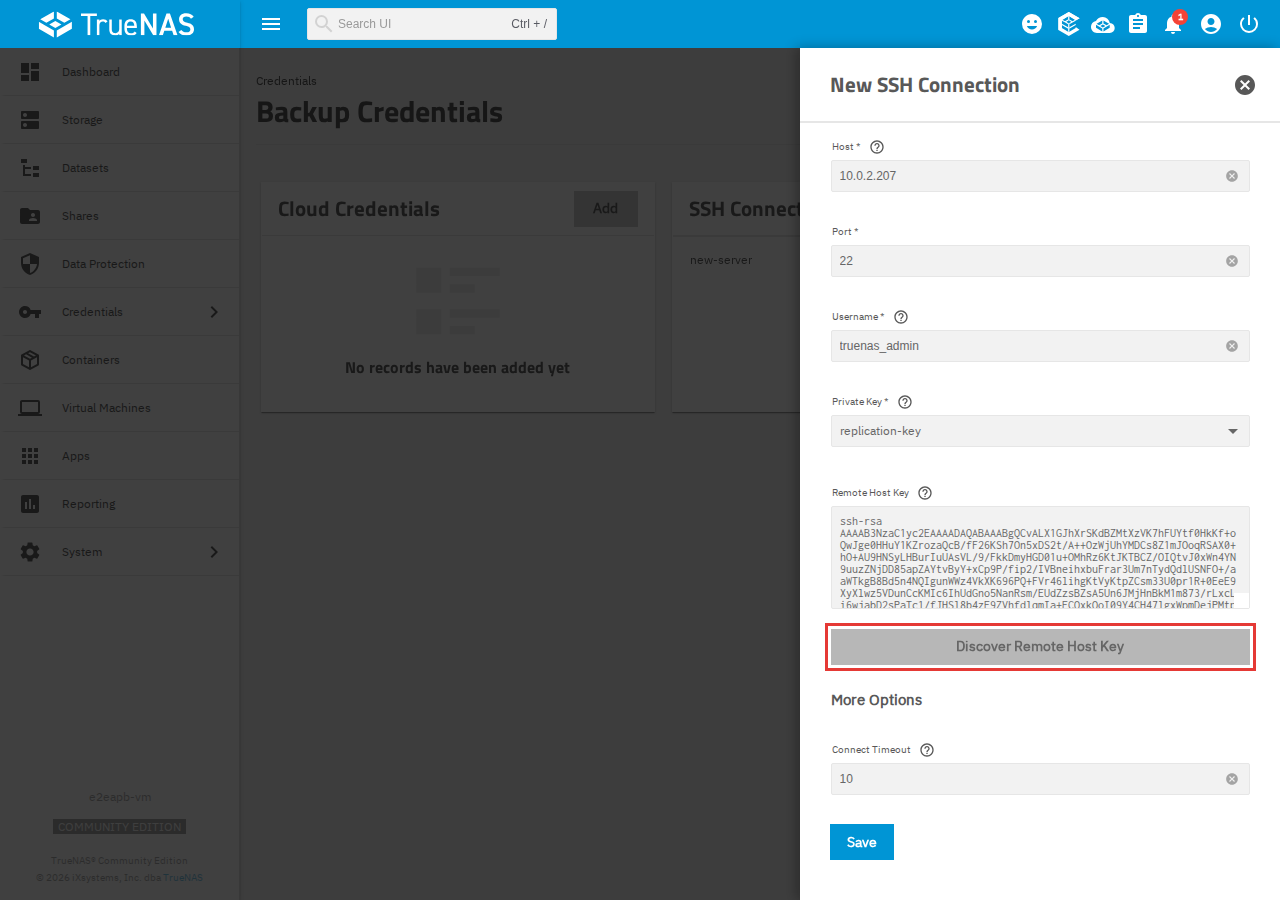
Help: If you see ssh-keyscan failed with nothing after it, the old server cannot reach SSH on the new server. Check that the SSH service is Running on the new server (Step 2) and that the Host is the new server's IP address.
¶ Step 4: Copy the disks with a replication task
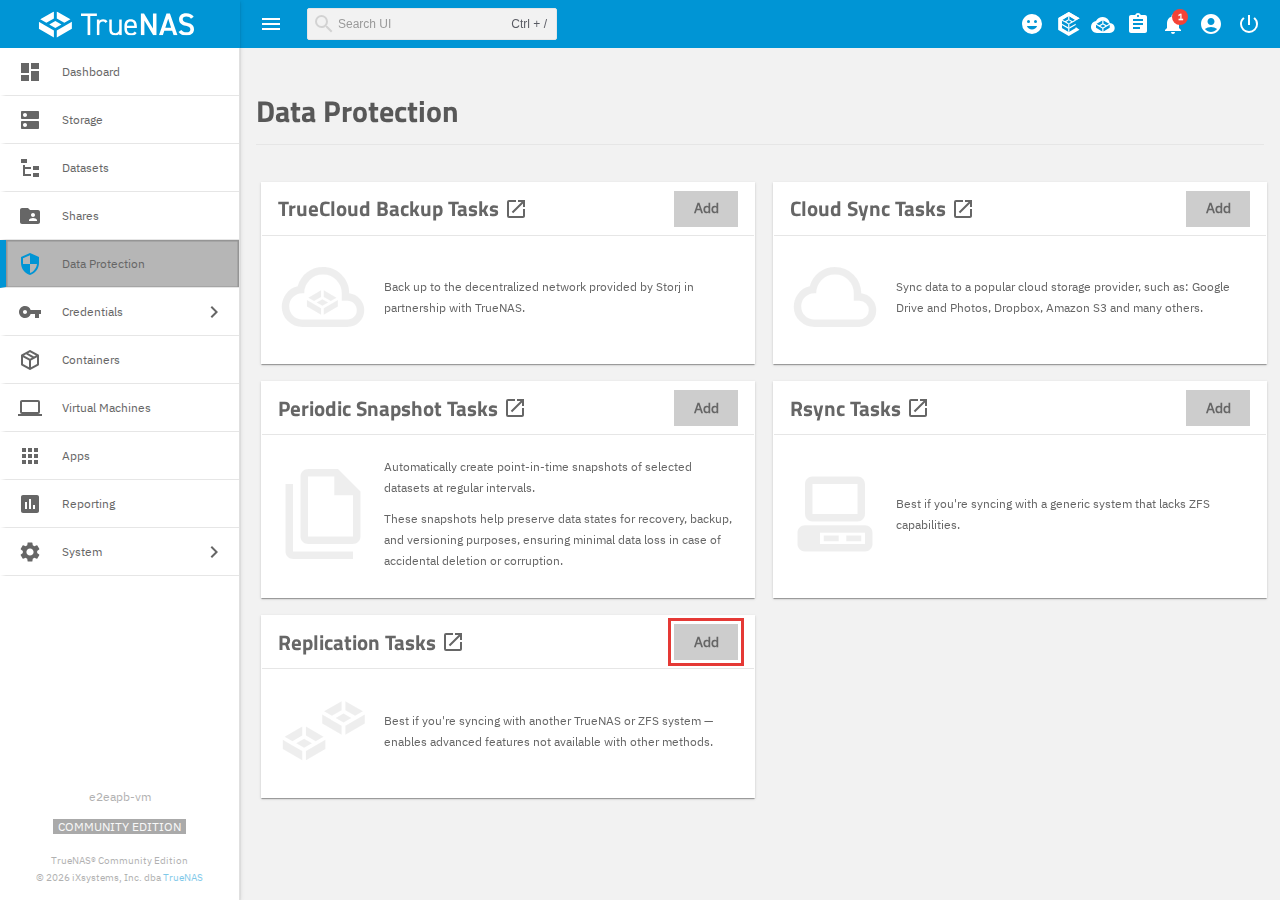
- On the old server, click Data Protection.
- On the Replication Tasks card, click Add.
Add button on the replication tasks card
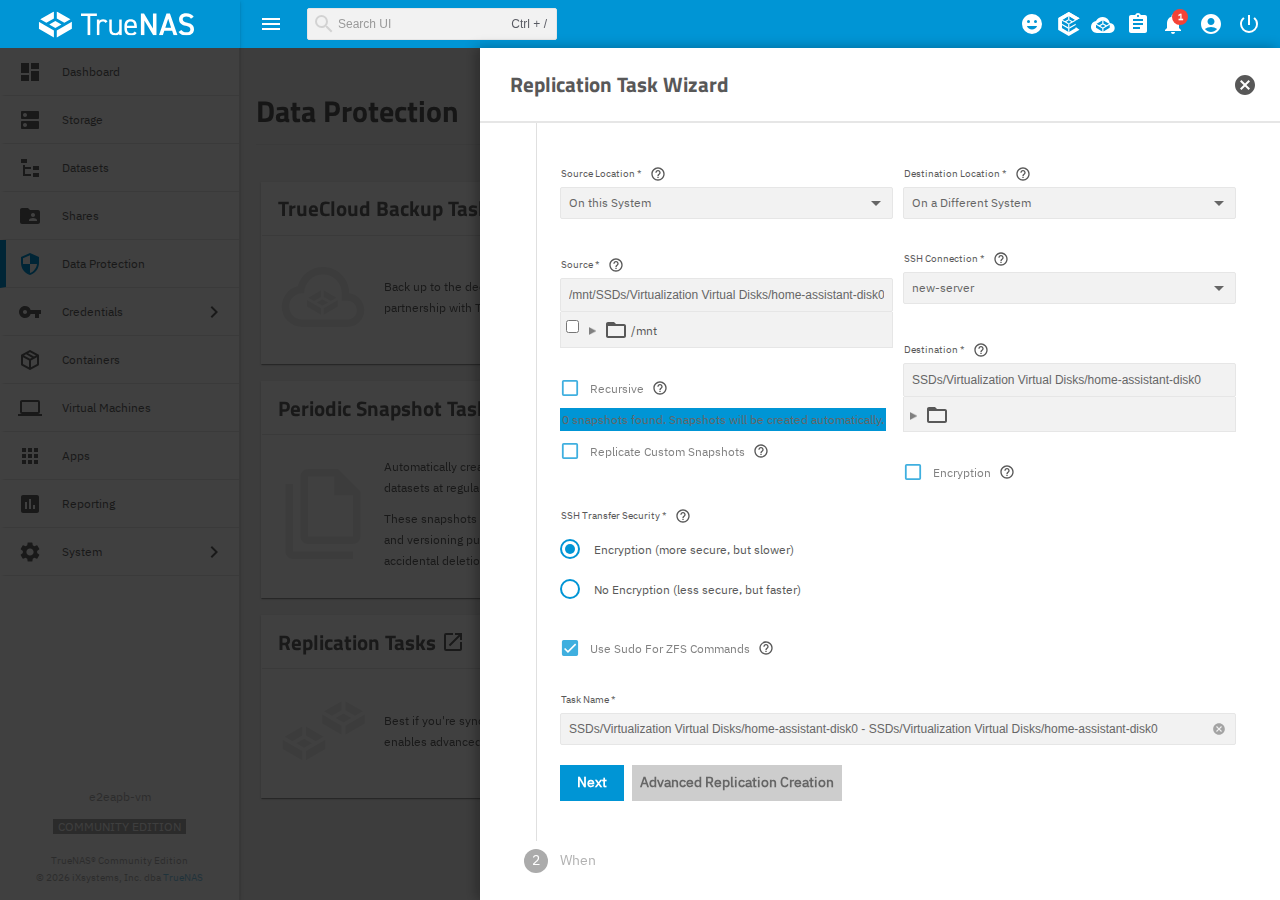
- Set Source Location to On this System and Destination Location to On a Different System.
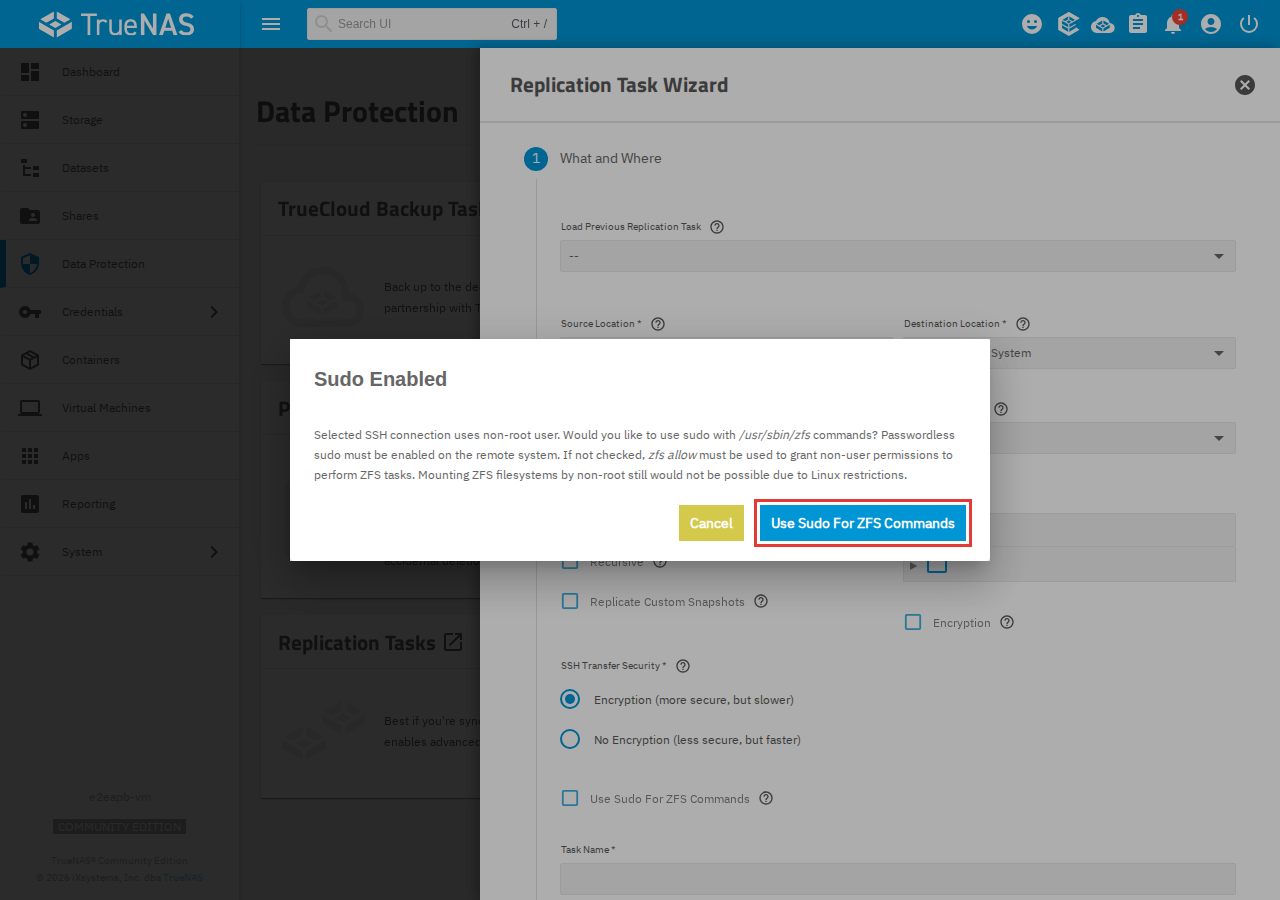
- Set SSH Connection to the connection from Step 3. The Sudo Enabled dialog opens. Click Use Sudo For ZFS Commands.
The sudo enabled dialog
- In Source, pick the disk of your virtual machine. You can pick more than one.
- In Destination, type where the copy goes on the new server. Use the same pool and dataset names as on the old server, so the paths stay the same.
- If you keep snapshots of your virtual machines, check Recursive to copy them too.
- Keep the Task Name TrueNAS fills in, or type your own, and click Next.
The what and where step
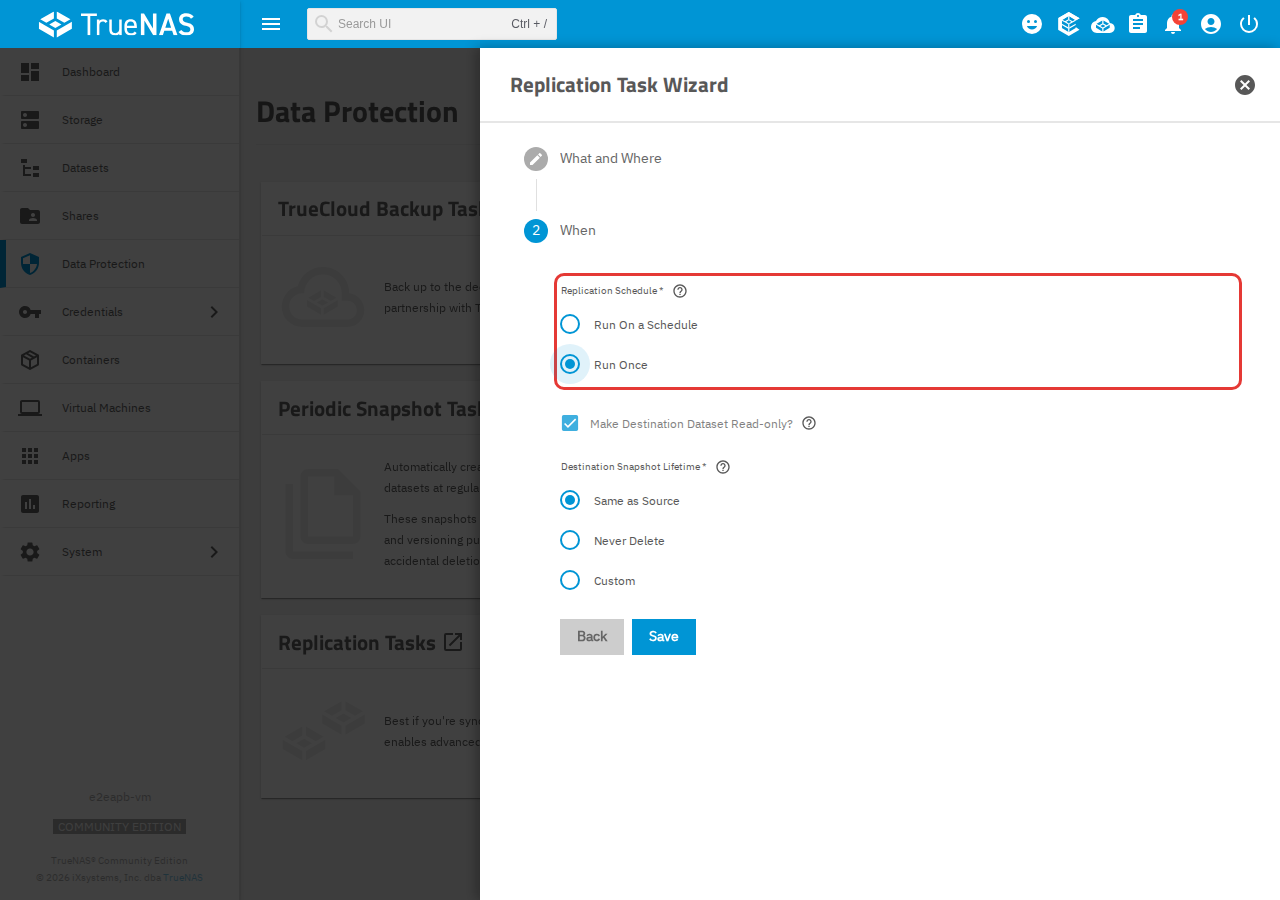
- Under Replication Schedule, click Run Once, then click Save. The copy starts.
Run once
The copy runs directly between the two servers. On a home network it is fast: the original author moved two virtual machines of about 120 GB in less than 5 minutes.
¶ Step 5: Set up the virtual machines on the new server
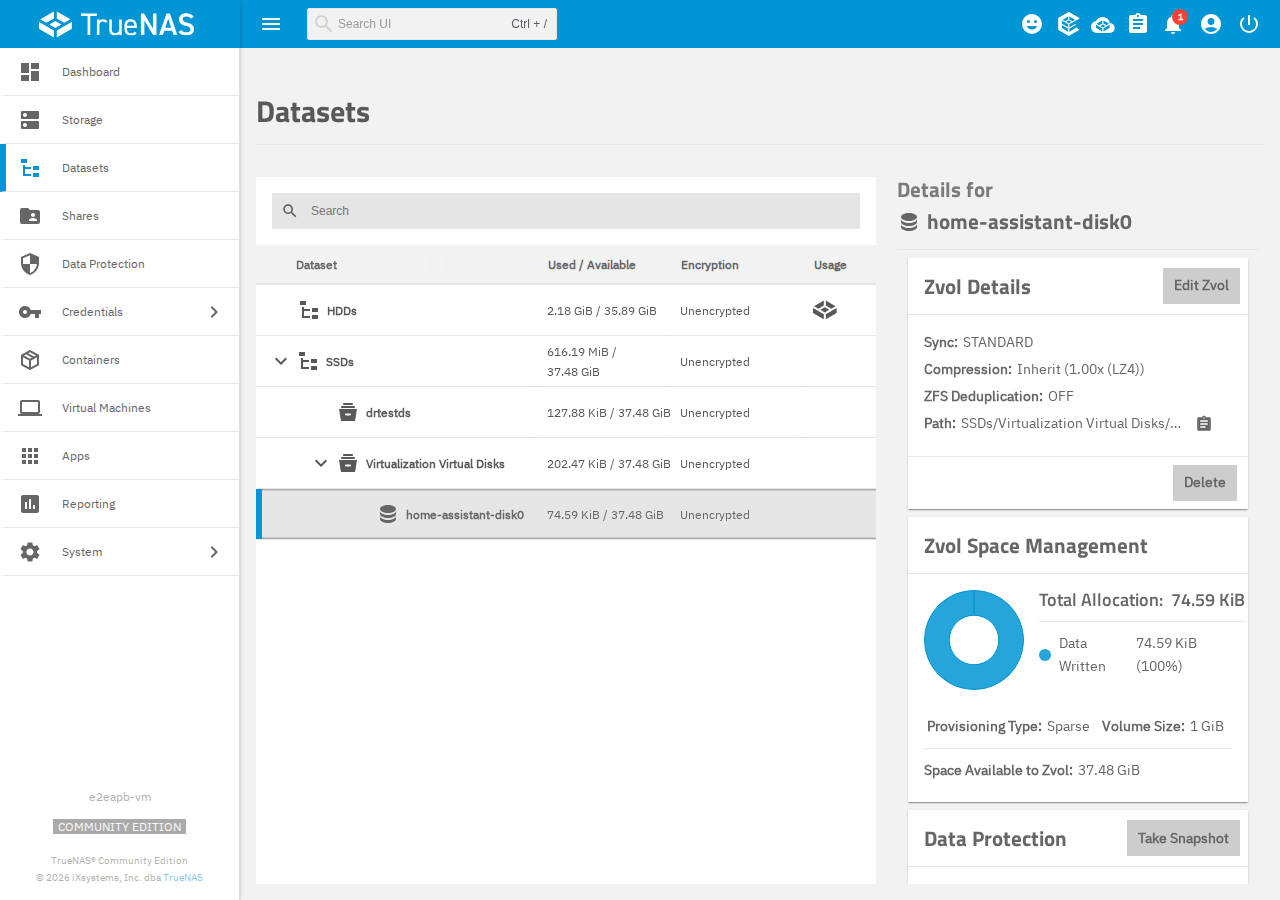
- On the new server, click Datasets and check that each copied disk is there.
A copied disk on the datasets screen
- Click Virtual Machines > Add and set up the virtual machine the way it was on the old server.
- On the Disks step, click Use existing disk image. Set Select Disk Type to the type the virtual machine used before, then pick the copied disk in Select Existing Zvol.
Use an existing disk image
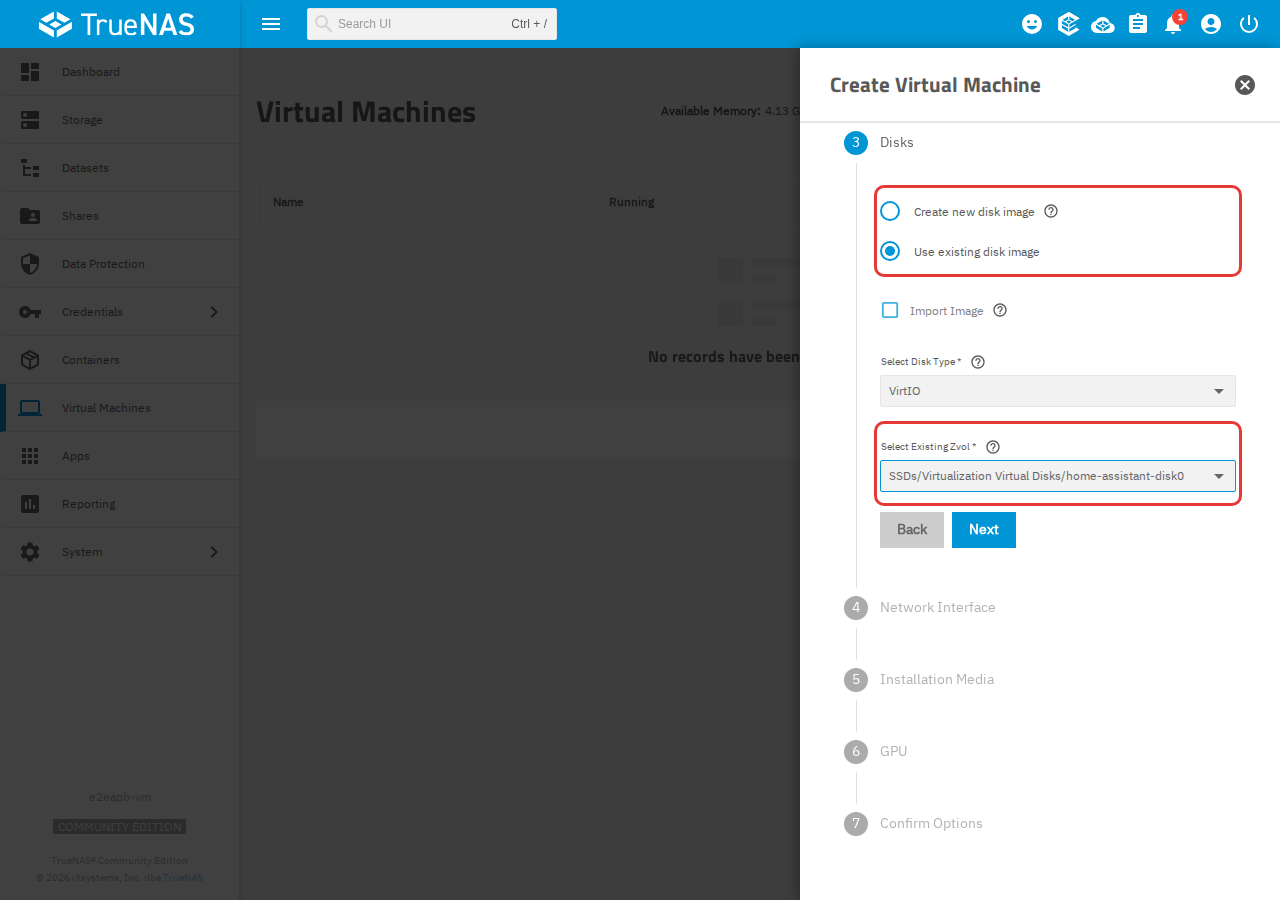
- Finish the remaining steps and start the virtual machine.
Info: Virtual machines made in TrueNAS also show in HexOS under VMs. Uninstall in HexOS keeps a disk it did not make unless you tick it, so the copied disk stays unless you tick it. See VMs made in TrueNAS.
Tip: Keep the virtual machines on the old server until the new ones start and work as expected. If something goes wrong, you can still go back.
Contribute: to help to improve HexOS documentation join the #Docs channel on Discord today! Send feedback, suggestions or contribute a guide.