¶ Illustrated installation guide
¶ Before you begin
You will need:
- To purchase a HexOS license
- Server hardware
- An 8 GB or larger USB drive that can be safely erased
- An ethernet cable to connect your server to your router or network switch
- A display, keyboard and optionally a mouse to connect to your server
- A separate computer to create a bootable USB installer and set up your server after installation
¶ Create the installation USB
The recommended way is HexOS Imager. It downloads the latest HexOS installer, checks that the download is complete and unmodified, and writes it to your USB drive in one step. There is no separate ISO to find or verify.
Warning: The USB drive will be erased during this process. Make sure there is nothing on it you want to keep.
¶ Install HexOS Imager
Download the version for your computer. These are all the same release, built for each operating system:
| Your computer | Download |
|---|---|
| Windows | HexOS-Imager-v2.1.6-20261011-Setup.exe |
| Mac with Apple silicon (M1 or newer) | HexOS-Imager-v2.1.6-20261011-arm64.dmg |
| Mac with an Intel processor | HexOS-Imager-v2.1.6-20261011-x64.dmg |
| Linux, Debian or Ubuntu (x64) | HexOS-Imager-v2.1.6-20261011-x64.deb |
| Linux, Debian or Ubuntu (arm64) | HexOS-Imager-v2.1.6-20261011-arm64.deb |
| Linux, Fedora or RHEL (x64) | HexOS-Imager-v2.1.6-20261011-x64.rpm |
| Linux, Fedora or RHEL (arm64) | HexOS-Imager-v2.1.6-20261011-arm64.rpm |
All downloads, including a SHA256SUMS.txt file for checking them, are on the HexOS Imager release page. HexOS Imager does not update itself yet, so check that page for newer versions.
Info: On Windows, the installer is signed by Eshtek Inc. Because the signing certificate is new, Windows may still show a "Windows protected your PC" message. Click More info and check that the publisher reads Eshtek Inc., then click Run anyway. This message will stop appearing as the certificate builds a reputation.
Info: On a Mac, the app is signed and notarized by Apple, so it opens without a security prompt.
¶ Write HexOS to the USB drive
- Plug the USB drive into your computer.
- Open HexOS Imager.
- Click Download HexOS. The latest installer is downloaded to your Downloads folder and checked automatically. If you have already downloaded and verified it before, this step is skipped.
- Select your USB drive as the target.
- Click Flash!
HexOS Imager writes the installer and then reads it back to confirm the copy is exact. When it reports success, remove the USB drive. It is ready to use in the next section.
Tip: If you already have a HexOS ISO file, you can use Flash from file instead of Download HexOS. The rest of the steps are the same.
¶ Alternative: use your own imaging tool
If you would rather use a tool you already have, download the installer yourself and write it with Balena Etcher or another imaging tool that supports ISO files.
Current version: HexOS 25.10.7, released September 3, 2026.
- Download HexOS 25.10.7
- Backup download link, if the first link is slow or unavailable
- SHA256 checksum:
a7abaf7636a57e62ca65ad324c906b4059c0963da2a238f8bfb96ee7476ffbb2
Compare the checksum against the file you downloaded before writing it. A checksum that does not match means the download is incomplete or corrupted, and the resulting USB will not install correctly.
Warning: Do not use Rufus to create the installation USB. It has caused unbootable installers for HexOS users. Use HexOS Imager or Balena Etcher.
Verify your download (optional)
Two small files are published next to the installer:
- Checksum file, the SHA256 checksum shown above
- Signature file, a GPG signature from the iXsystems security team
Check the checksum
Run one of the following commands in the folder where you saved the installer, then compare the result to the SHA256 checksum shown above. The two must match exactly.
- Windows (PowerShell):
Get-FileHash TrueNAS-SCALE-25.10.7-HexOS.iso -Algorithm SHA256 - macOS:
shasum -a 256 TrueNAS-SCALE-25.10.7-HexOS.iso - Linux:
sha256sum TrueNAS-SCALE-25.10.7-HexOS.iso
Check the signature
Checking the signature confirms that the installer was built by iXsystems, the makers of TrueNAS. This needs GPG installed on your computer, for example Gpg4win on Windows or GPG Suite on macOS. Most Linux distributions include it.
- Download the signature file to the same folder as the installer.
- Import the iXsystems signing key:
gpg --keyserver hkps://keys.openpgp.org --recv-keys C8D62DEF767C1DB0DFF4E6EC358EAA9112CF7946 - Verify the installer:
gpg --verify TrueNAS-SCALE-25.10.7-HexOS.iso.gpg TrueNAS-SCALE-25.10.7-HexOS.iso
The output should include Good signature from "IX SecTeam <[email protected]>" and the key fingerprint C8D6 2DEF 767C 1DB0 DFF4 E6EC 358E AA91 12CF 7946.
Info: GPG will also print a warning that the key is not certified with a trusted signature. This is expected. It only means you have not personally marked the iXsystems key as trusted on your computer.
¶ Installation process
- Insert the USB into your server and power it on
¶ Getting to the boot screen
If you do not see the boot screen (shown in the next section) right away, the following are common issues:
¶ Boot device order
Your server might be trying to boot from a different drive, for example an old Windows install on one of the hard drives.
To fix this, first enter the BIOS. Usually this is done by pressing F1, F2, F10, F12 or Del while the machine is turning on.
Then in the BIOS, change the order of boot drives so your USB drive is at the top. Then save and restart.
¶ UGREEN NAS: turn off the watchdog
UGREEN NAS models restart about 3 minutes after they turn on unless the watchdog in the BIOS is turned off, and that can interrupt the installation. While you are in the BIOS, follow UGREEN NAS keeps restarting to turn it off.
¶ Disabling Secure Boot
If you see an error message about a "security policy violation" after booting, this is caused by Secure Boot.
For instructions on how to disable Secure Boot, search for "[your motherboard model here] disable secure boot". You can also search for the motherboard user manual, and search within that for "secure boot".
¶ Start the USB drive in UEFI mode
Some HexOS features, such as the memory test, need your server to start in UEFI mode. The mode you start the USB drive in is the mode HexOS is installed in.
If you use your motherboard's boot menu, it often shows the USB drive twice. Choose the entry whose name starts with UEFI, for example UEFI: USB Flash Disk 1.00, Partition 1. See UEFI boot mode for pictures and the boot menu key for your motherboard.
¶ Boot screen
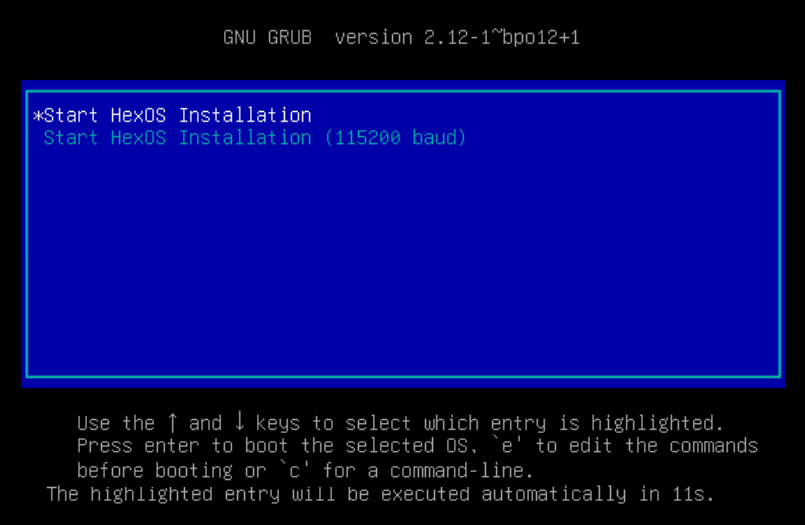
Once you see this screen, you are ready to boot into HexOS and install it:
- Select Start HexOS Installation (default)
- This screen will pass automatically after a moment
HexOS installer boot screen
¶ Installation menu
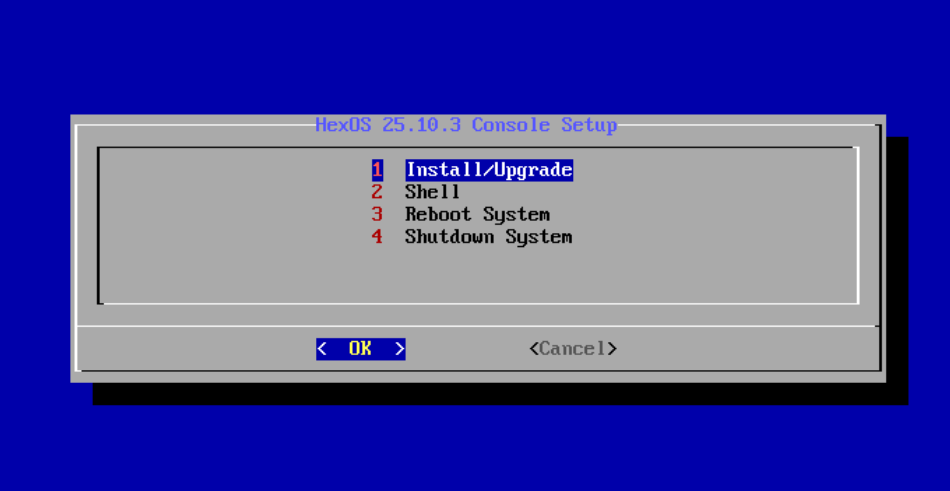
- Once the system loads, select option 1: Install/Upgrade
Install/Upgrade menu option
¶ Select installation drive
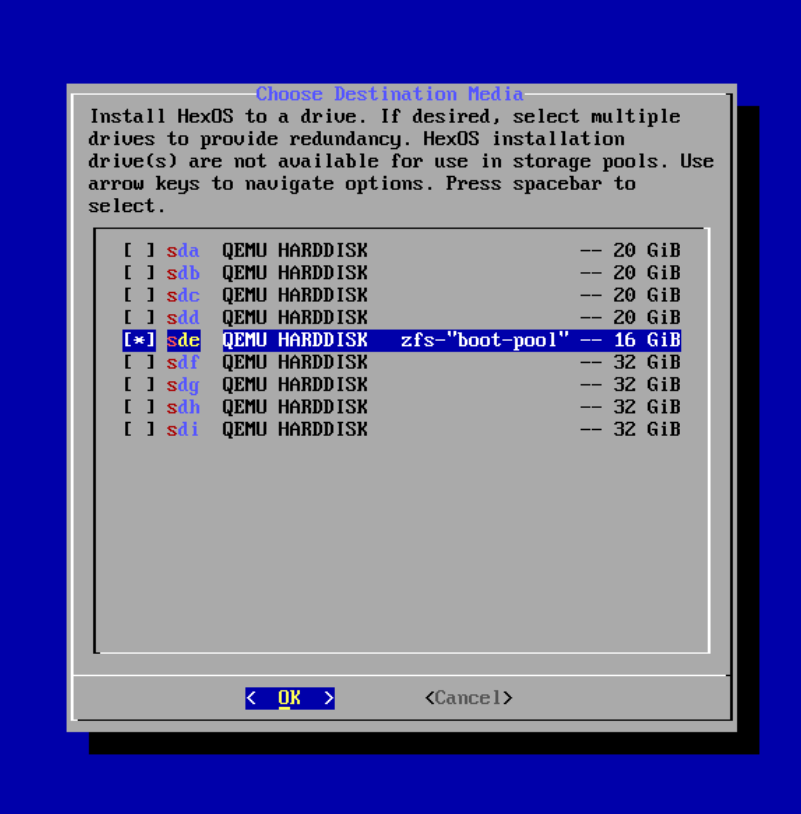
What you see now will depend on how many drives you have in your server. The drive or drives you choose to install HexOS on will not be available to store data on.
- Use the arrow keys to navigate and the space bar to select your installation drive or drives
- [*] in the first column indicates the device is selected
Installation drive selection
¶ Confirm drive erasure
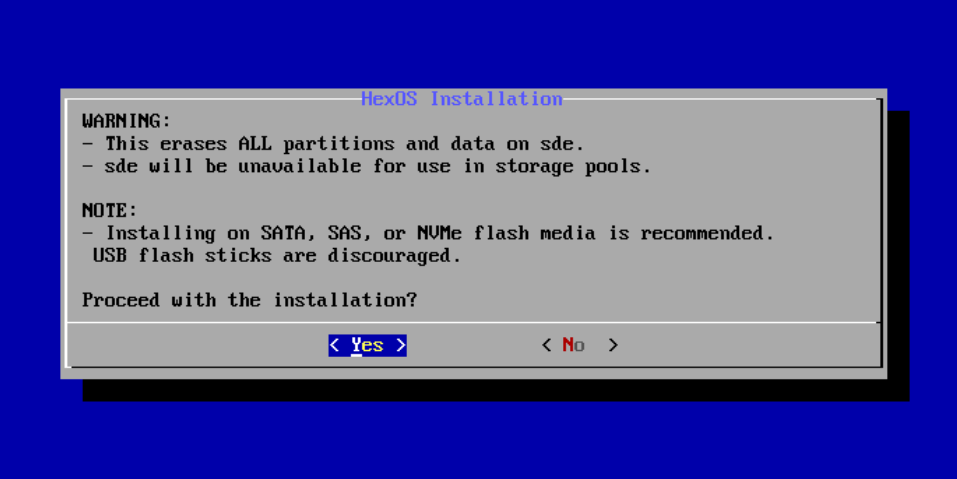
- Confirm you understand the selected drive or drives will be FULLY ERASED
Drive erasure confirmation
¶ User account setup
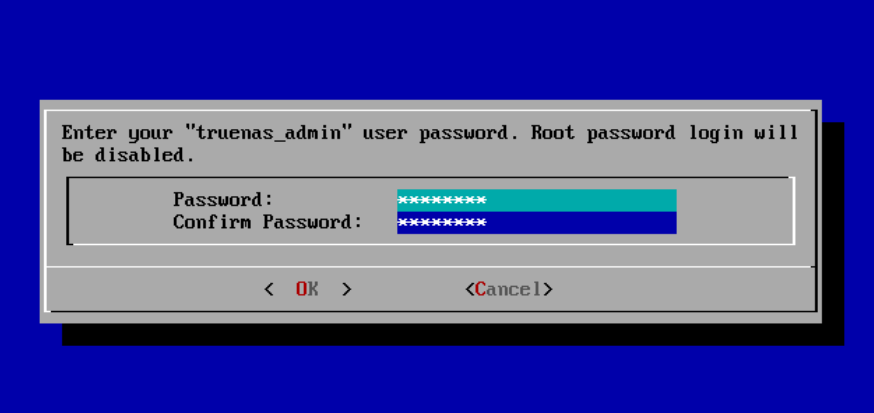
- Set the password for the administrative user
truenas_admin
Danger: Save this password. You will need it later to reach the TrueNAS interface and to recover the server.
Info: If you use a non-US keyboard, be careful with special characters in the password. The installer uses a US keyboard layout, so some symbols may not be the ones printed on your keys. See details here.

Root password entry
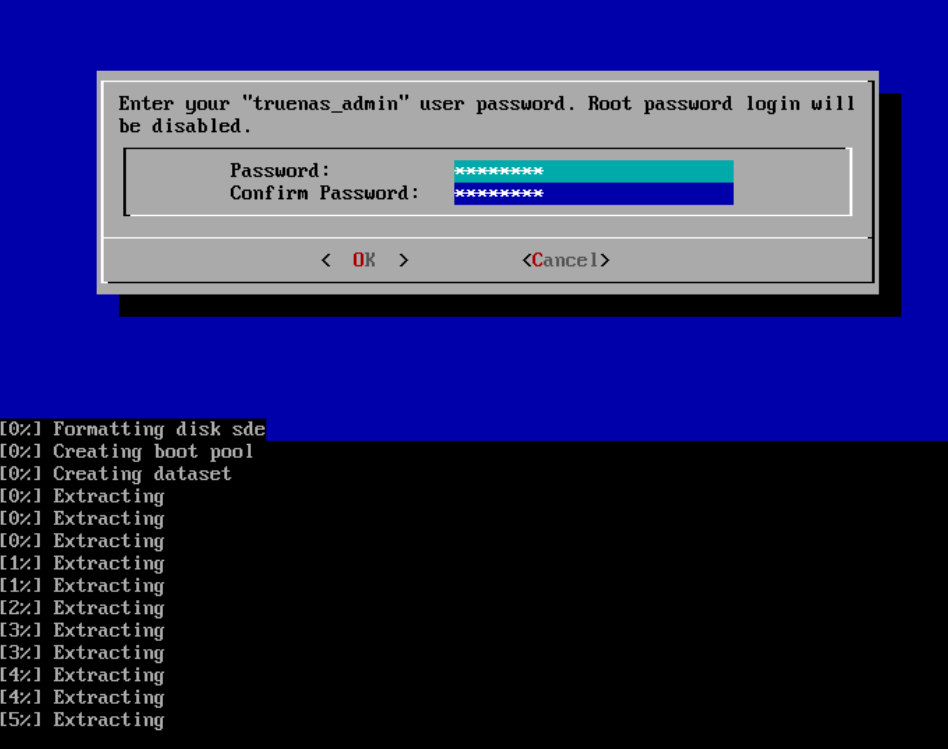
¶ Installation progress
- The installer will run for a few minutes
Installation progress screen
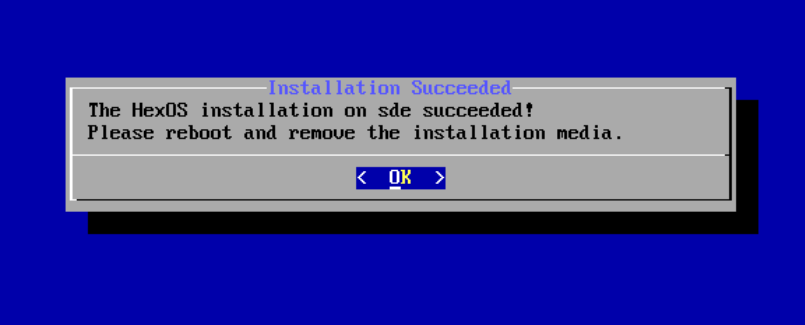
¶ Installation complete
- Remove the install USB
Installation complete prompt
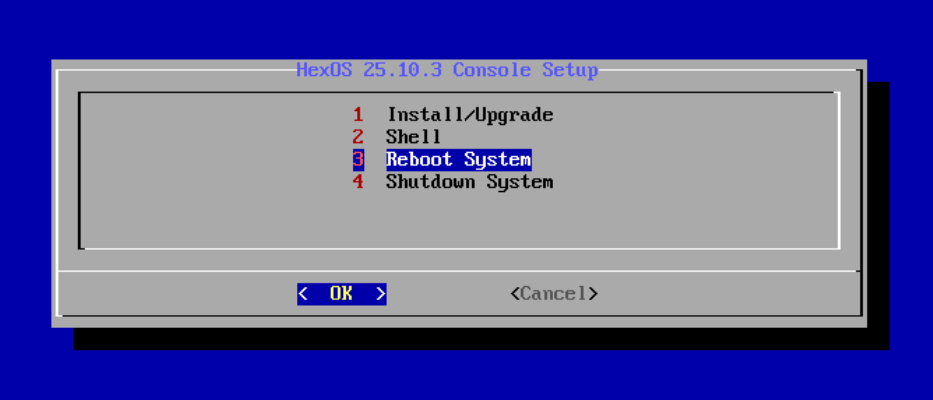
- Restart your machine
Reboot menu option
¶ First boot
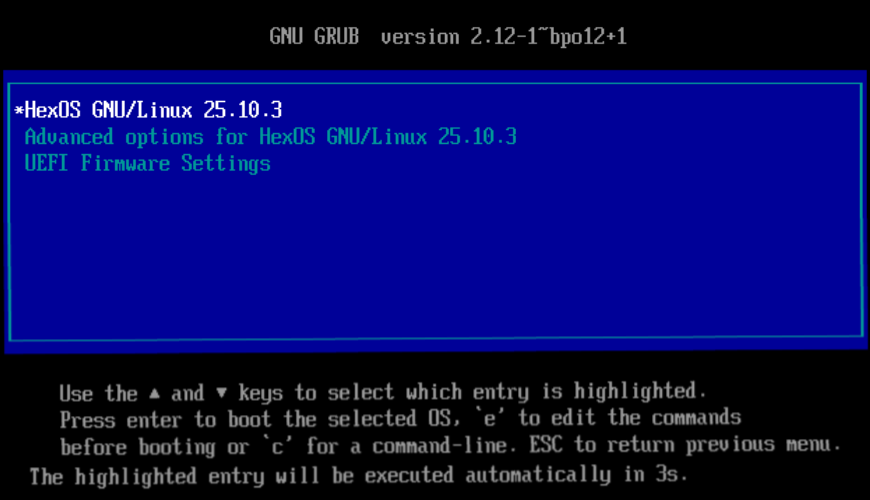
¶ Boot screen
- The boot select screen will appear again. Ignore it
- The default option is correct and will auto-select
Boot selection screen
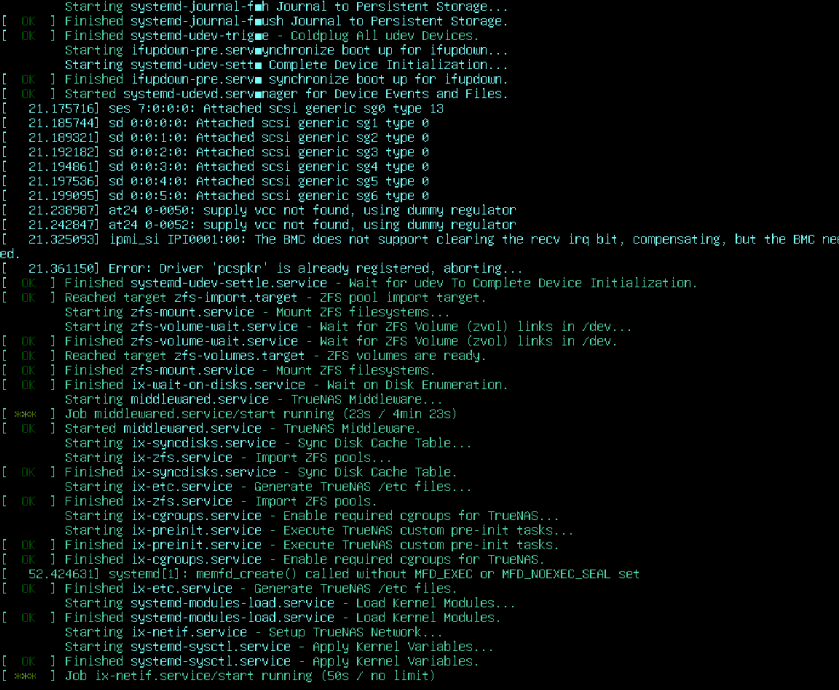
¶ System startup
- The console will display startup information
Tip: If boot fails, check that HexOS is at the top in your BIOS boot device order. The instructions are at the top of this guide.
Console startup output
¶ Success
- The Console Setup screen shows when your server has fully booted
Console setup screen
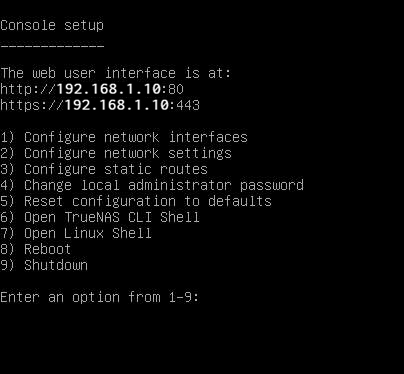
Installation complete!
¶ Next step
- Open a browser window on your laptop and go to https://deck.hexos.com/ to configure your server
Help: Installer will not boot, or stuck partway? See Installation issues or ask in the HexOS Discord Community.
Thank you: @Mawson for the original guide, with edits by @gingerling
Contribute: to help to improve HexOS documentation join the #Docs channel on Discord today! Send feedback, suggestions or contribute a guide.