¶ Import pools to HexOS
Thank you: lnkd and ShinobiRen for the original guide
Info: This guide was contributed by a member of the HexOS community. Your setup may differ slightly — if a step doesn't match what you see, ask in the #Docs channel on Discord.
¶ Who this guide is for
This guide will help you
- Migrate from TrueNAS to HexOS
- Move HexOS to new hardware when a reinstall is required
- Reinstall HexOS on the same hardware
specifically if you do not want to wipe your storage pools as part of the process.
Best practice would be a fresh install of HexOS with new storage pools and adding the data to these new pools from backup. However, if you have:
- a large amount of data in your storage pools
- a large number of drives in the storage pools
- complex app configurations
- not much time
this guide will show you how to keep your existing storage pools and import them to a new HexOS install.
The guide does not assume significant prior knowledge of the software involved, and all steps are described thoroughly. If at any point you do not feel confident, please pause and ask for help - this is a high risk process and a mistake could make your data unrecoverable.
By exporting the TrueNAS configuration you are backing up things like:
- Settings of your apps
- Folders and permissions
- Users and permissions
¶ Warning: data is at risk
Danger: You must have backups of your data. Without adequate backups you could permanently lose data at several points during this process.
Best practice is to:
- Have backups of everything
- Verify they still work
- Try to copy a small set of files to be sure the data is accessible.
¶ Process
- Export TrueNAS configuration
- Prepare hardware for install
- Install HexOS
- Import configuration
- Claim server
¶ Exporting TrueNAS configuration and keys
In this section we will complete the following tasks:
- Log in to TrueNAS and note password
- Turn off 2FA (if applicable)
- Download TrueNAS config file
- Download encryption keys (if applicable)
- Find the serial numbers of our drives
- Check we are ready to install HexOS
You will need
- Note pad and pen
- USB drive to back up config and encryption
¶ Log into TrueNAS web interface
¶ From HexOS
If you are starting in HexOS, go to https://deck.hexos.com/ > Settings > TrueNAS
Open TrueNAS button
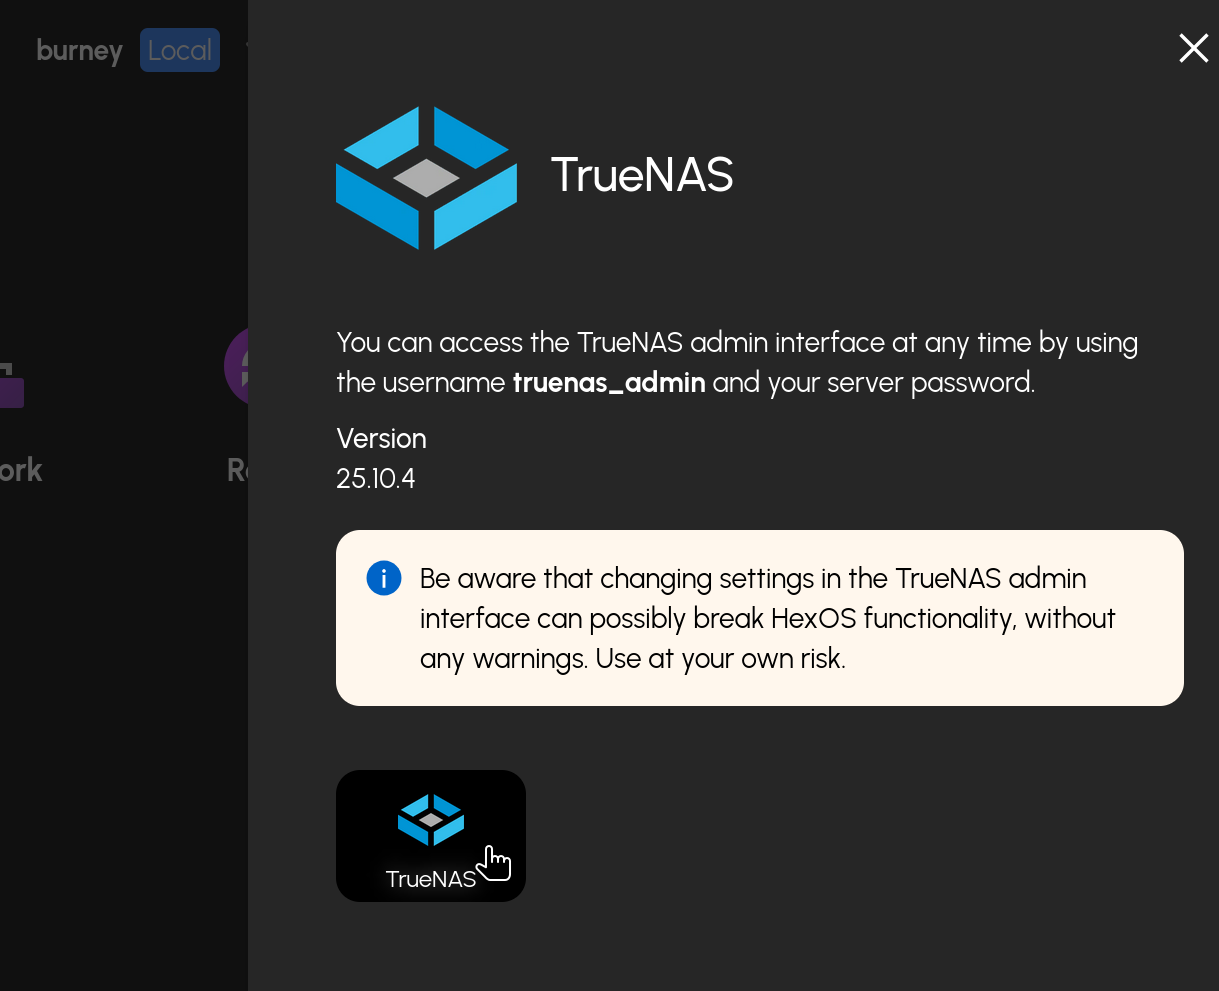
This will open a new window in your browser.
You may need to click through a security warning about a self-signed SSL certificate. For example, in Firefox I clicked Advanced, and Accept the risk and continue.
Next you will see the TrueNAS login.
TrueNAS login
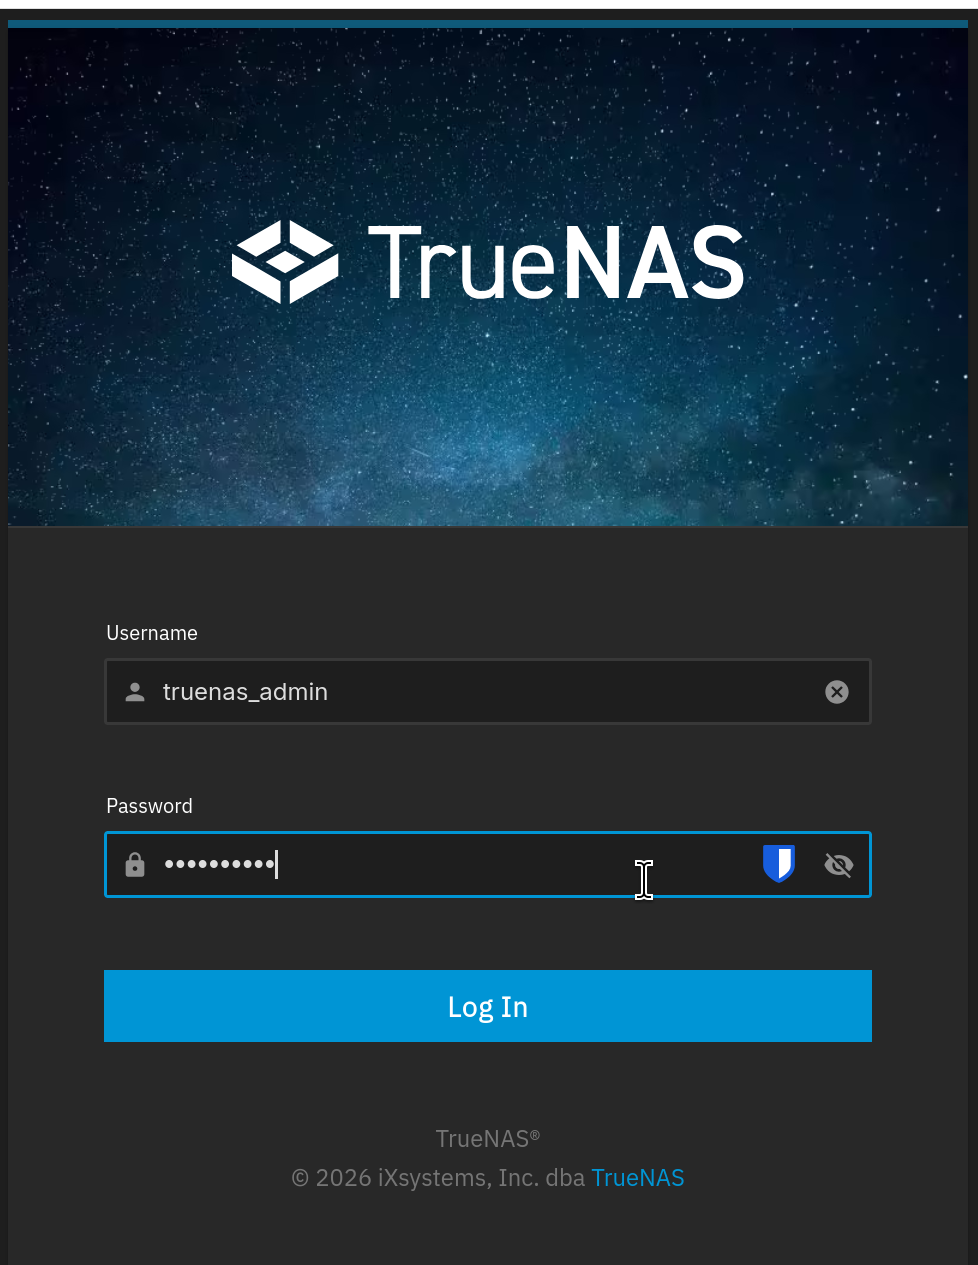
The username is truenas_admin and the password is the one chosen when you installed HexOS.
Note down your password
The TrueNAS password for this server will be needed again in the future, when the new machine is set up. Make sure to note it down.
¶ From TrueNAS
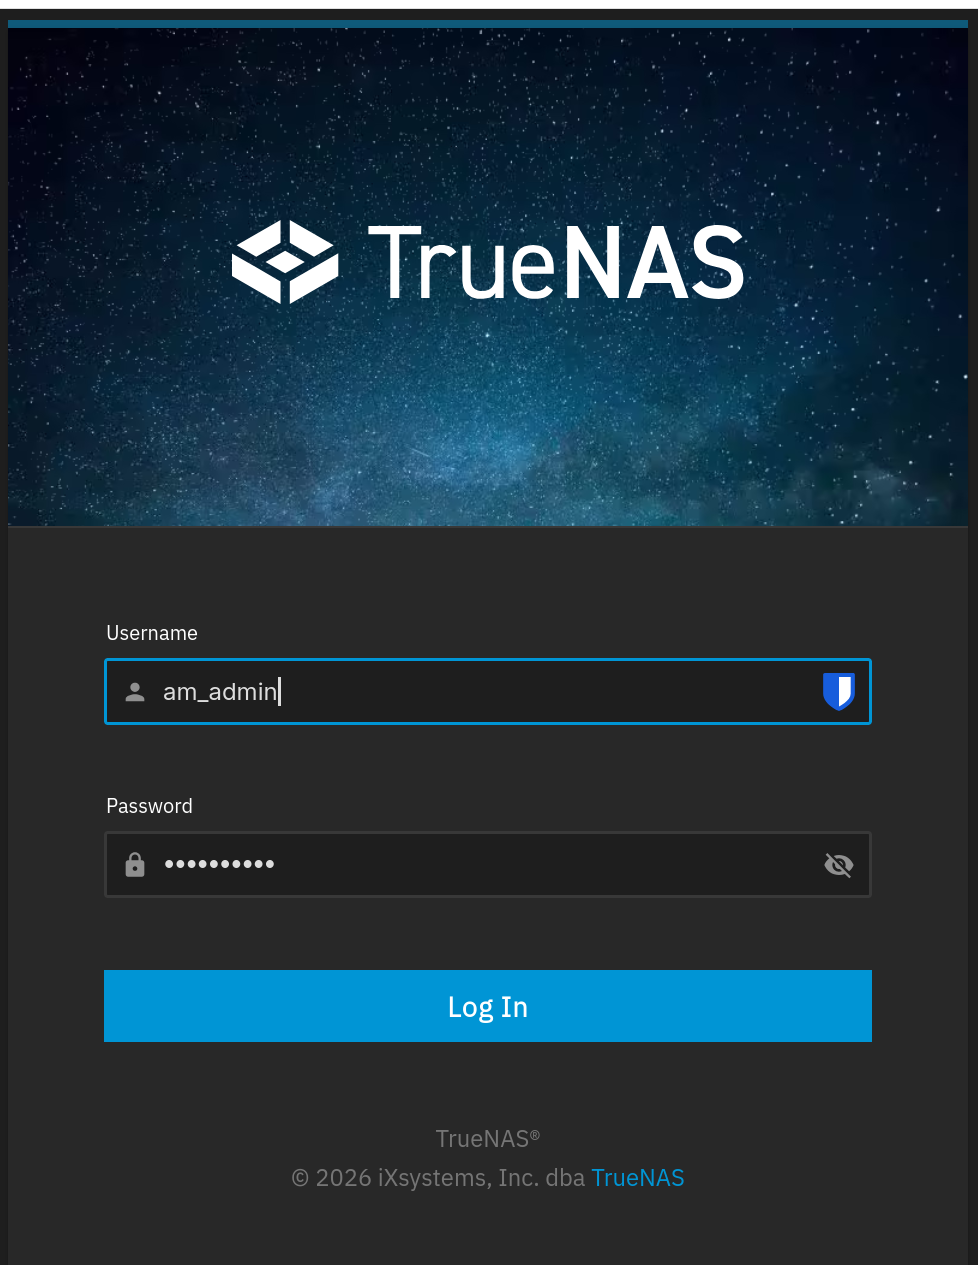
If you are not yet using HexOS, enter TrueNAS by going to the login screen at your server IP address. For example https://192.168.1.142/ui/signin.
Your username and password were set during TrueNAS installation.
TrueNAS login screen
Note down your password
The TrueNAS password for this server will be needed again in the future, when the new machine is set up. Make sure to note it down.
¶ Turn off 2FA
If 2FA is enabled you will not be able to claim your server when installing HexOS. Check that 2FA is disabled.
Go to System > Advanced Settings then scroll down to Global Two Factor Authentication and check that 2FA is showing as disabled.
You may need to scroll down to see the System menu item
Two-factor authentication setting
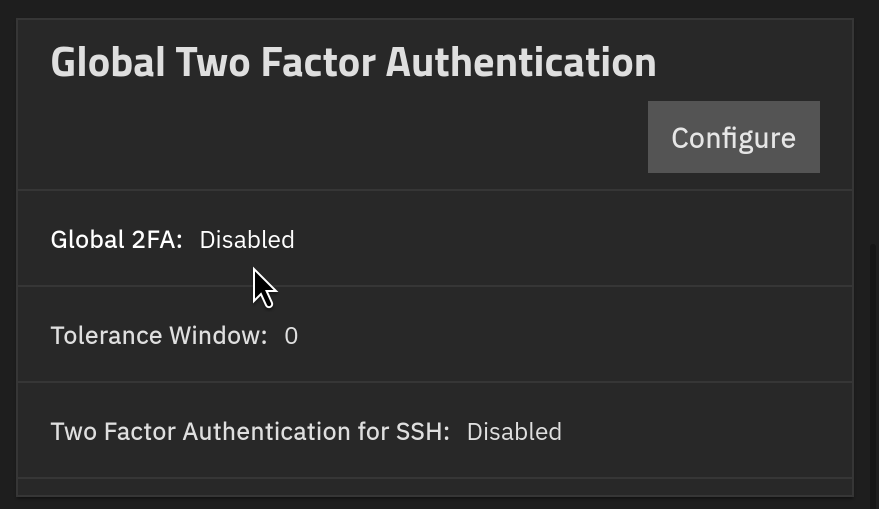
If it is showing as enabled, click Configure, uncheck the Enable Two Factor Authentication Globally box and click Save
¶ Download TrueNAS configuration
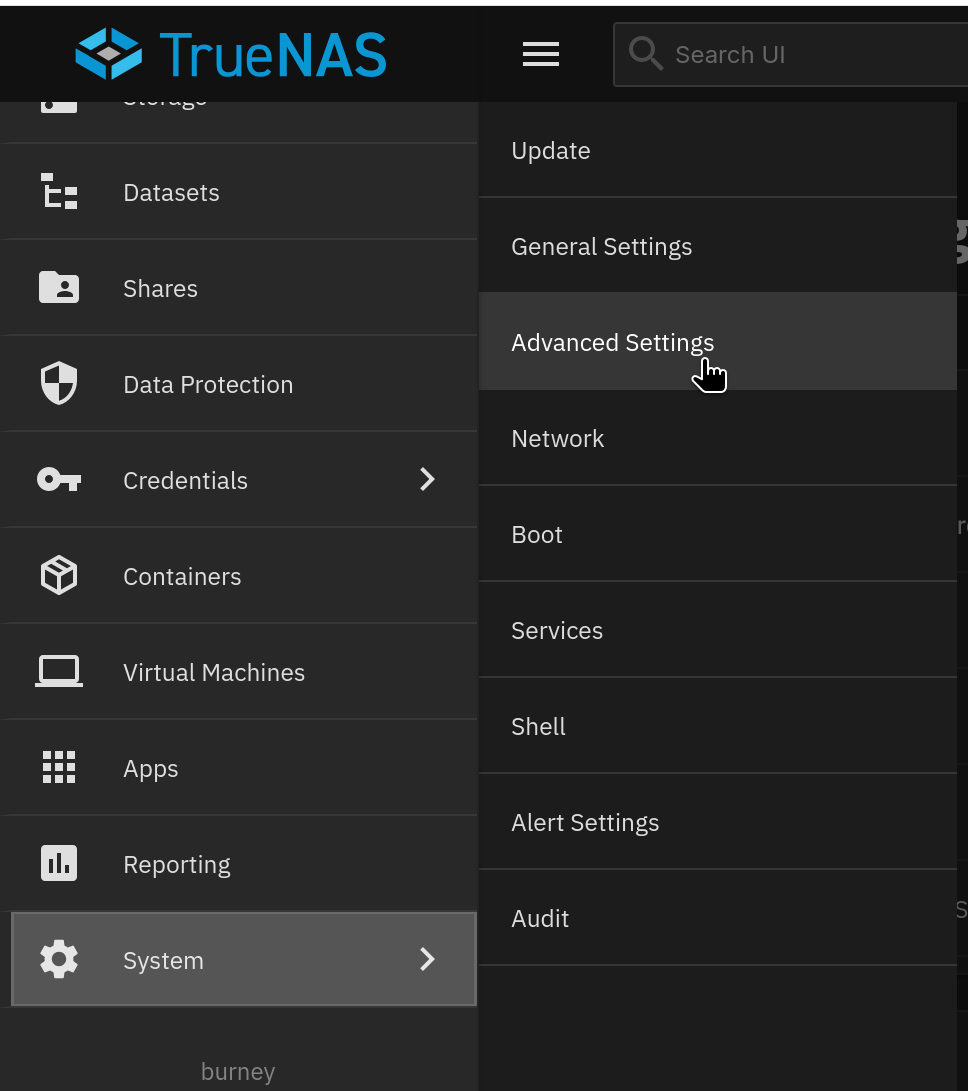
Go to System > Advanced Settings
You may need to scroll down to see the System menu item
System menu in sidebar
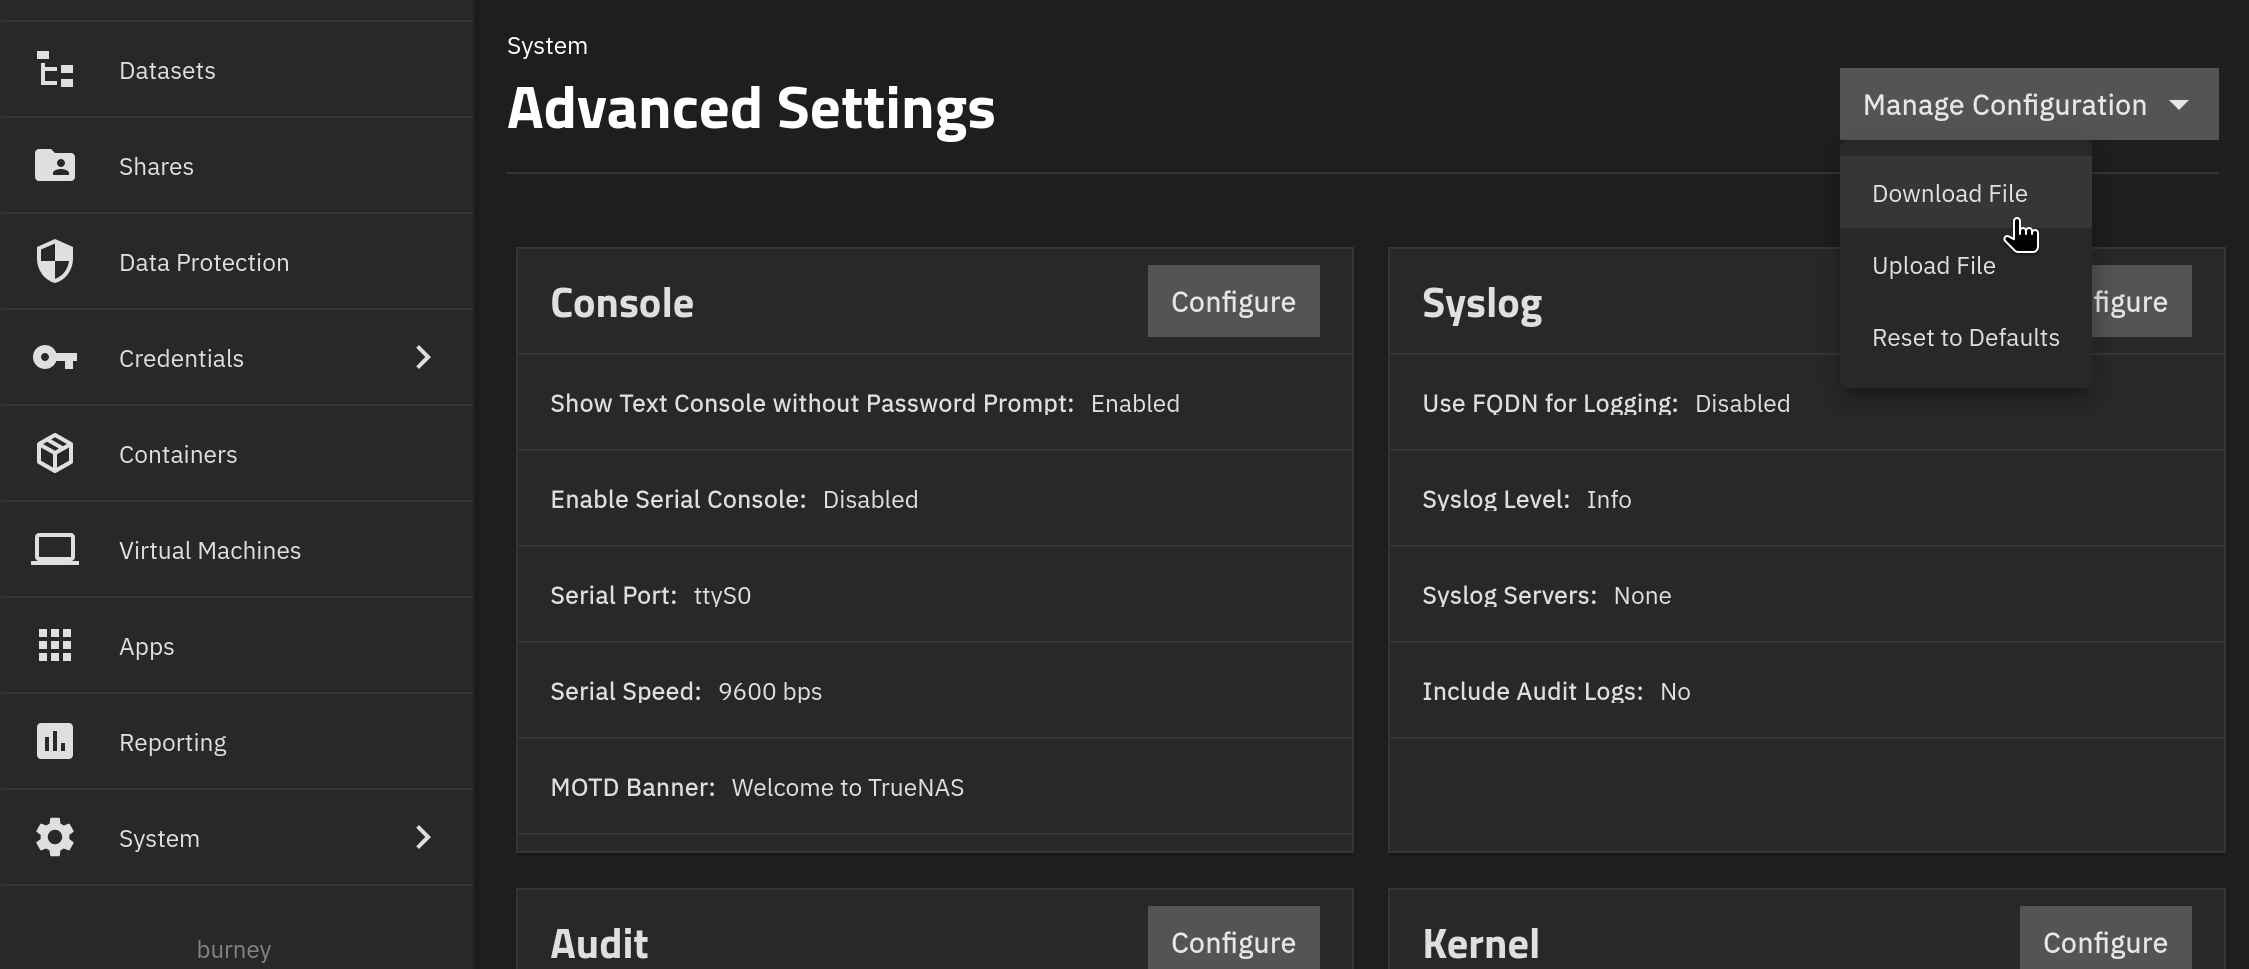
Then go to Manage configuration > Download File. This dropdown is on the top right of the screen.
Manage Configuration dropdown
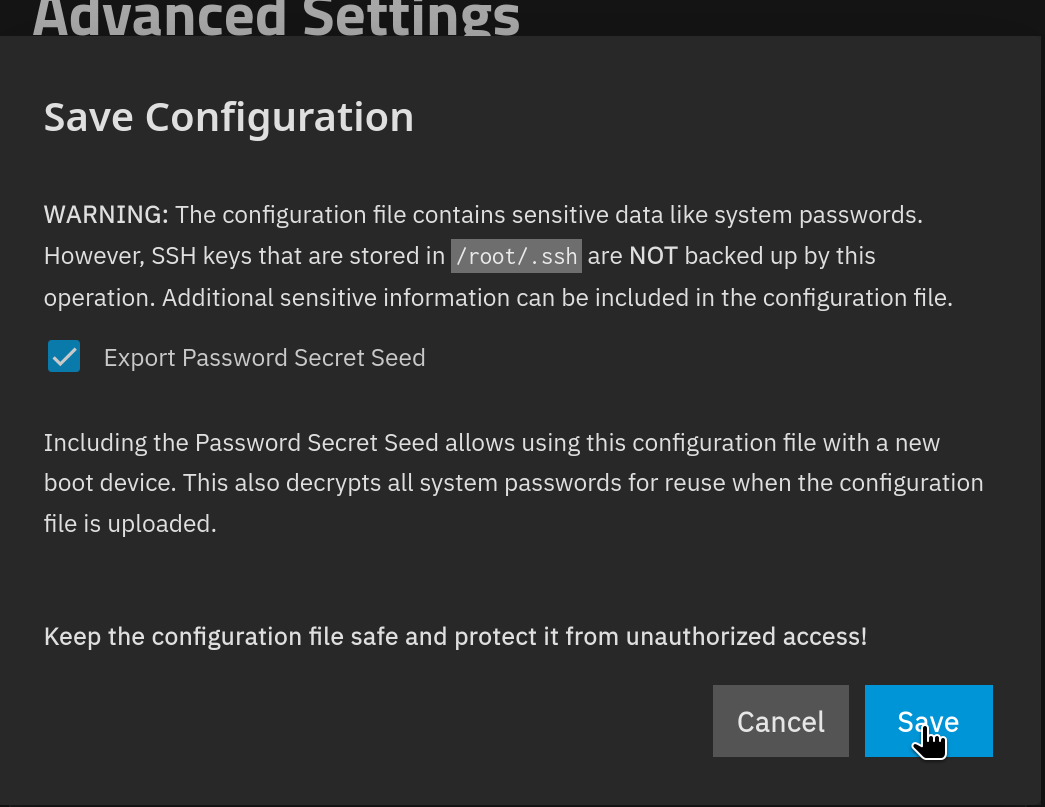
Leave the Password Secret Seed box checked. Click Save.
Config download dialog
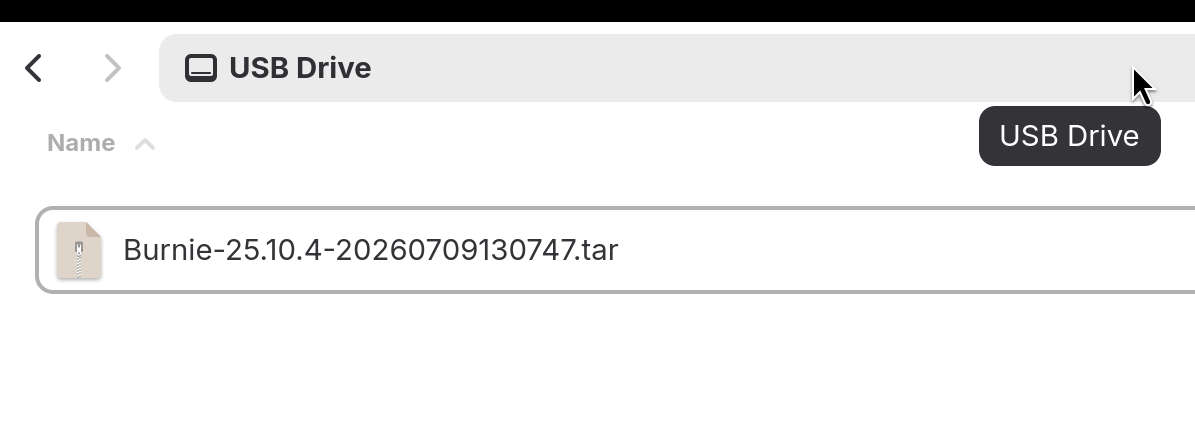
Check that the file has downloaded. Make a note of the TrueNAS version number included in the file name (in this case 25.10.4) - you will need this later.
Back up this file to a secure local place, such as a USB drive.
Config file backup on USB
¶ Download Keys for Encrypted Datasets
If you have data encrypted with a key in your storage pool, the keys must be downloaded. If this step is skipped you will lose your data.
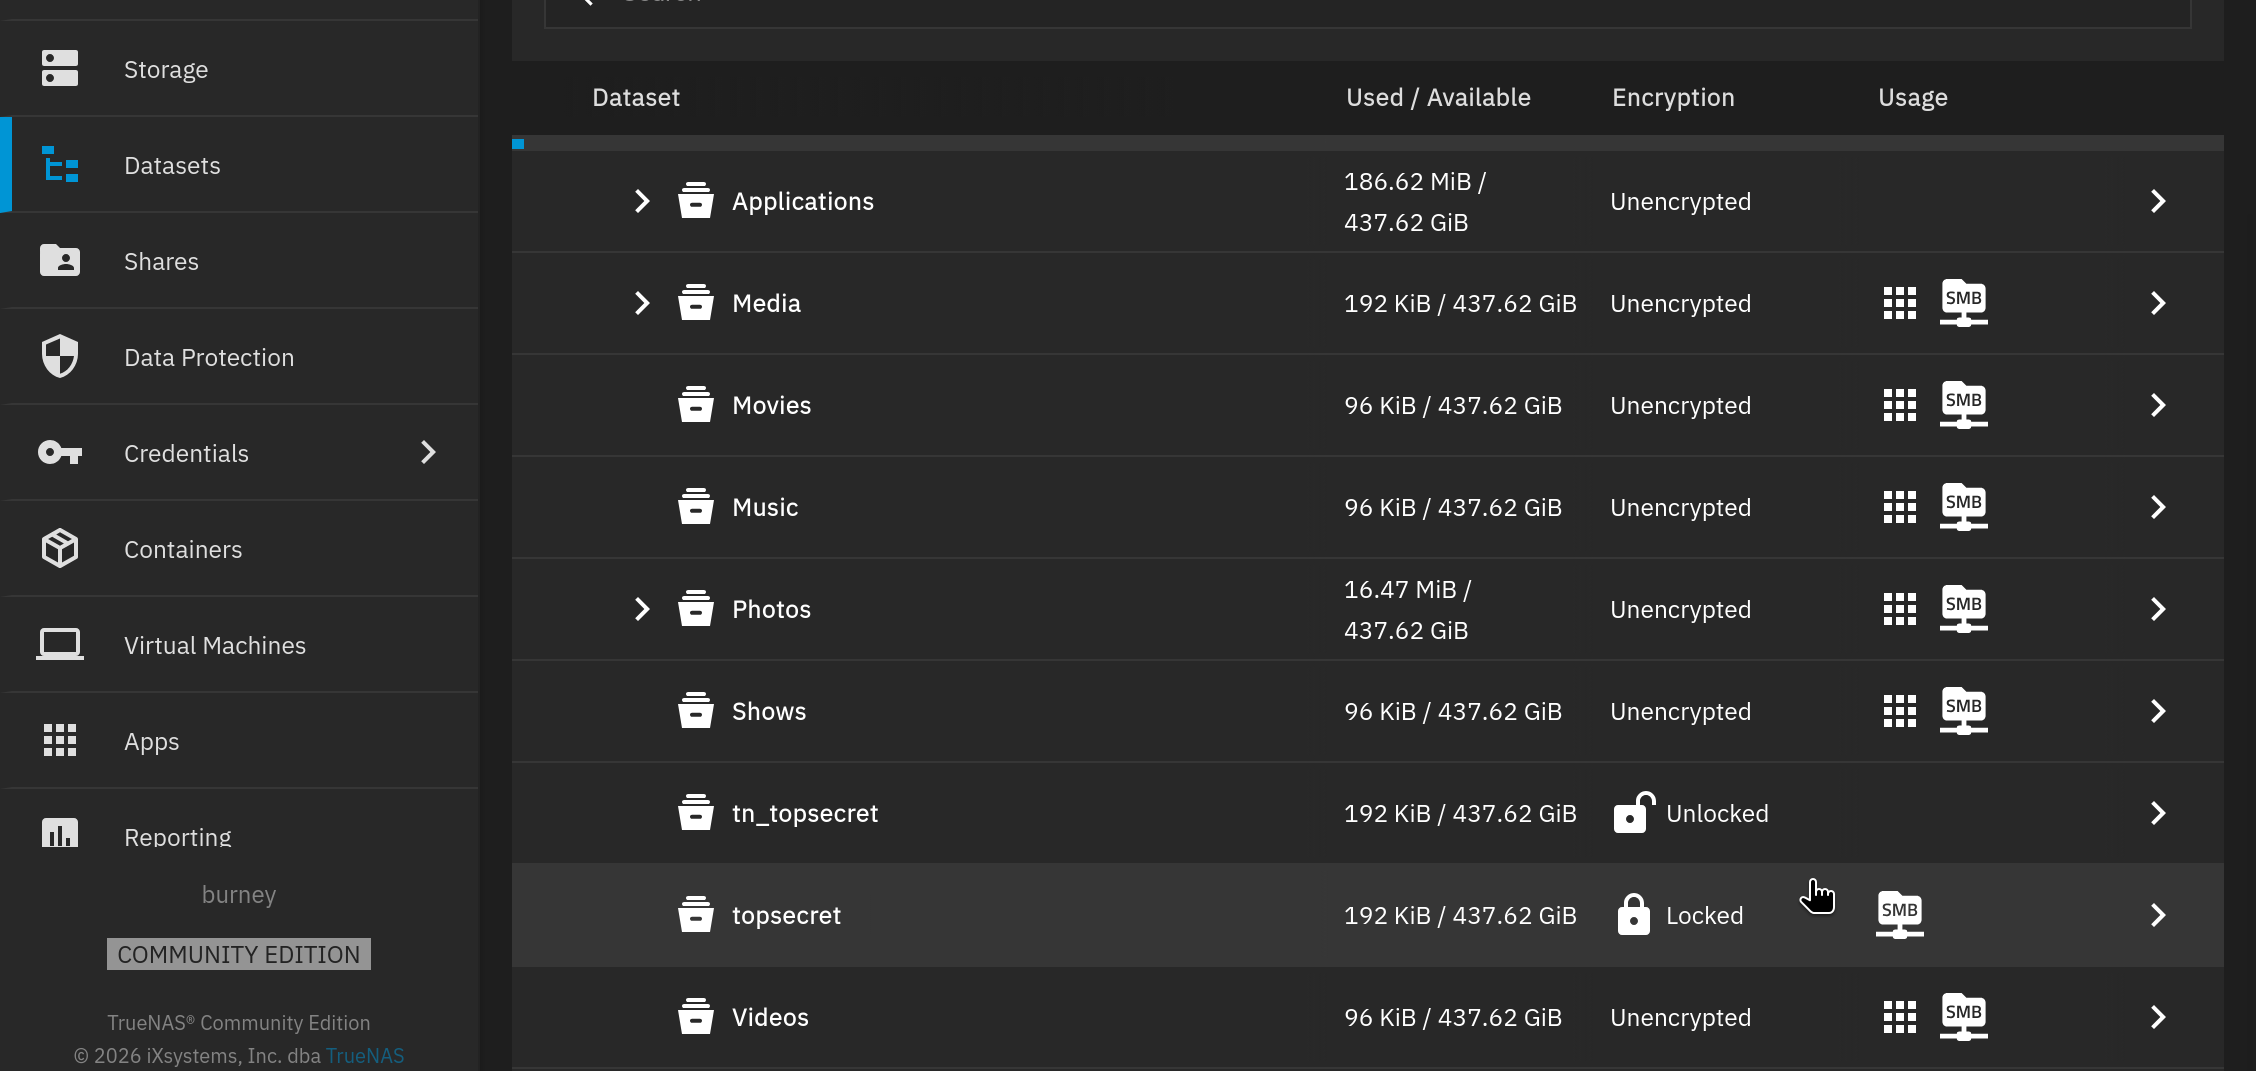
To see if you have encrypted data go to Datasets from the main menu in TrueNAS.
In the Encryption column, datasets that are encrypted are marked as Locked or Unlocked. The rest are marked Unencrypted.
Dataset encryption status column
If you have no encrypted data you can skip ahead.
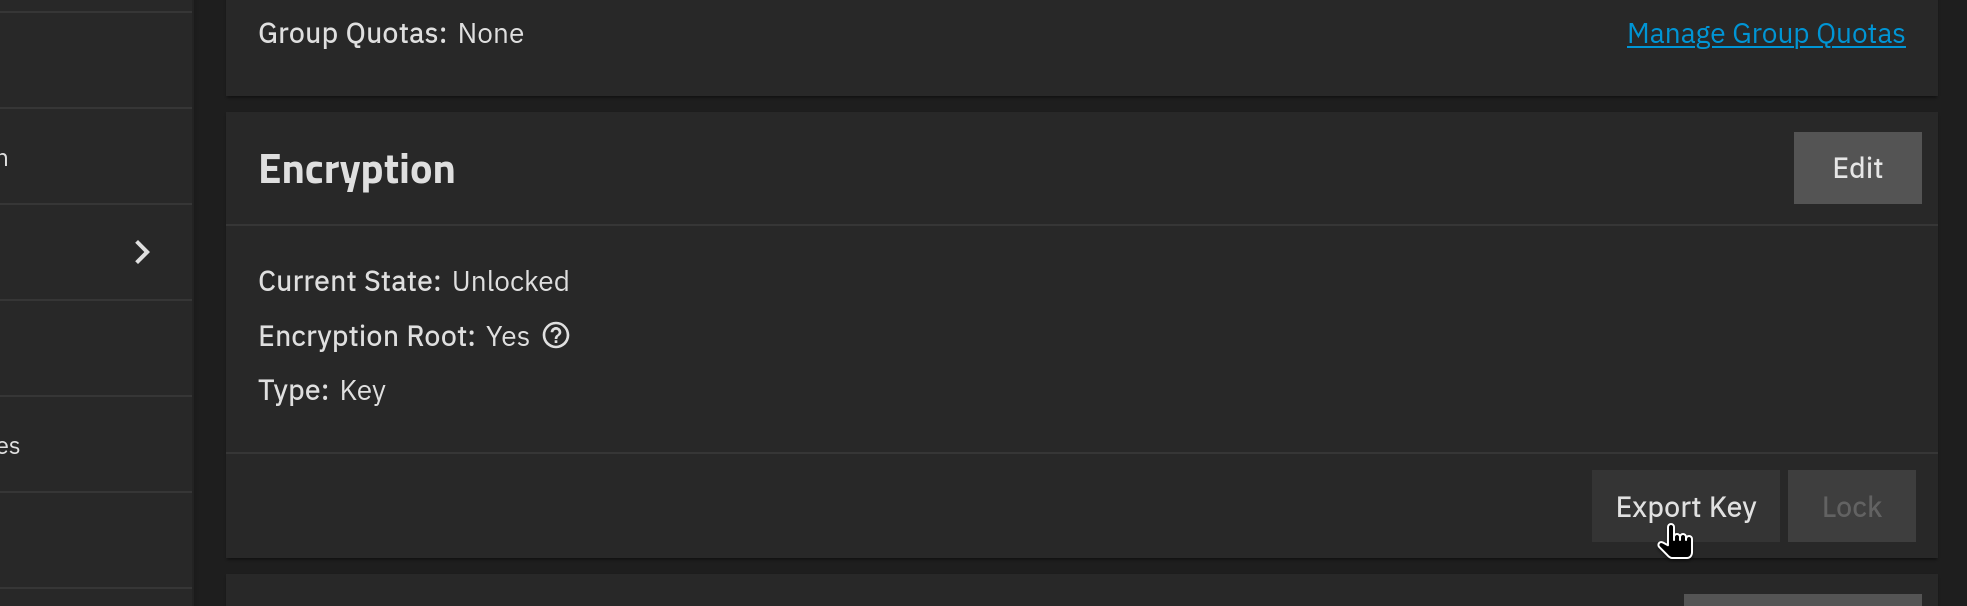
If you have encrypted data, next find out if it is key encrypted. Click on the entry then scroll down to Encryption.
If there is an Export Key button, then the data is encrypted with a key.
You need this key to be able to access the data again later: without the key the data is unreadable.
To export your key, click the Export Key button. You will be reminded that each encrypted dataset has its own key, and you must download each key separately.
Export Key button
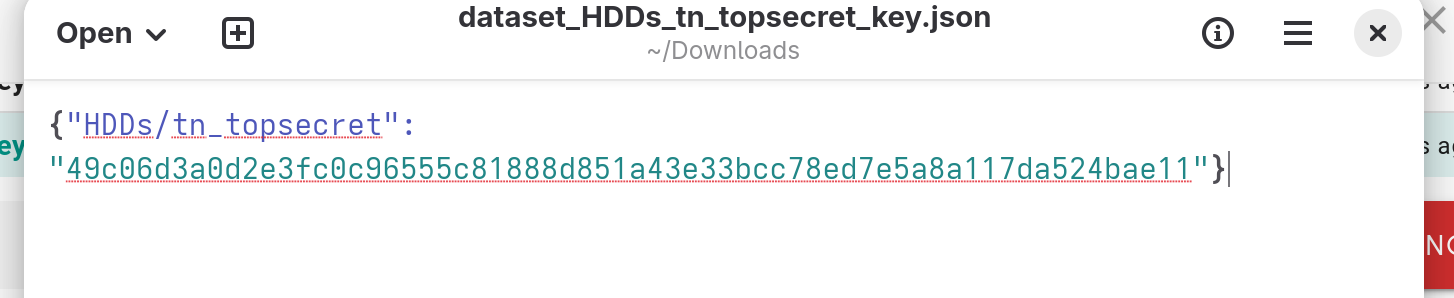
When you have downloaded the key, check that it looks similar to the example key below:
Example encryption key file
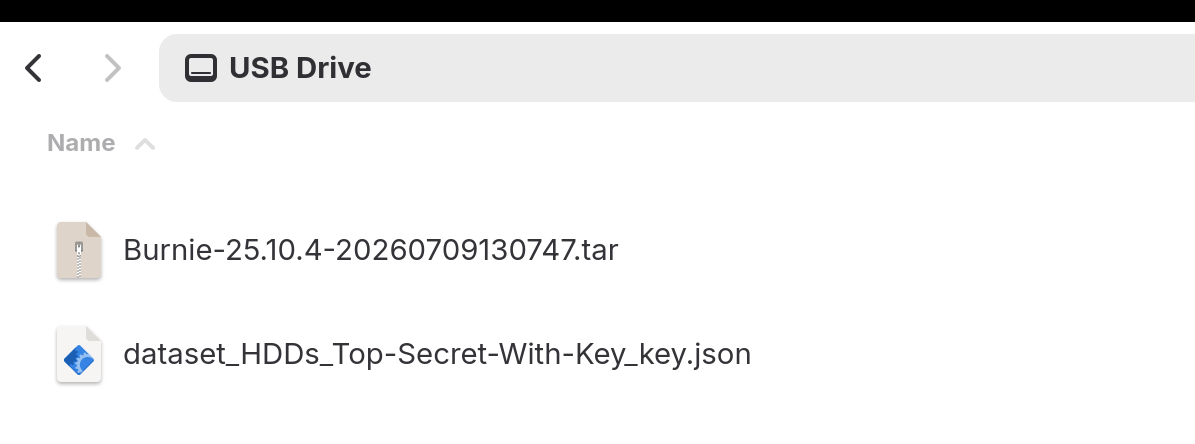
Then back up the key to a safe local place, such as a USB drive.
Key file backup on USB
¶ Passphrase encryption
If there is no button to export the key, then the data is encrypted with passphrase only. In this case you don't need to download anything, as long as you know the passphrase you can access the data.
To confirm this click Edit (you may need to unlock first) and check that the Encryption Type* dropdown is showing Passphrase.
Warning: Encrypted folders made in HexOS do not always use a passphrase. A folder with an Autogenerated key (the default for new folders) is encrypted with a key, and TrueNAS shows an Export Key button for it. Export its key as described above. Only a folder with a Manual passphrase has no key to download. See Encrypted folders.
Help: If you have any doubts or questions, please contact HexOS support: this step is critical to get right.
¶ Find the serial numbers of your drives
To prevent data loss, we want to make sure we know which drives are pool drives and which drives are boot drives in the machine. Then we will unplug the pool drives to make sure they don't get overwritten.
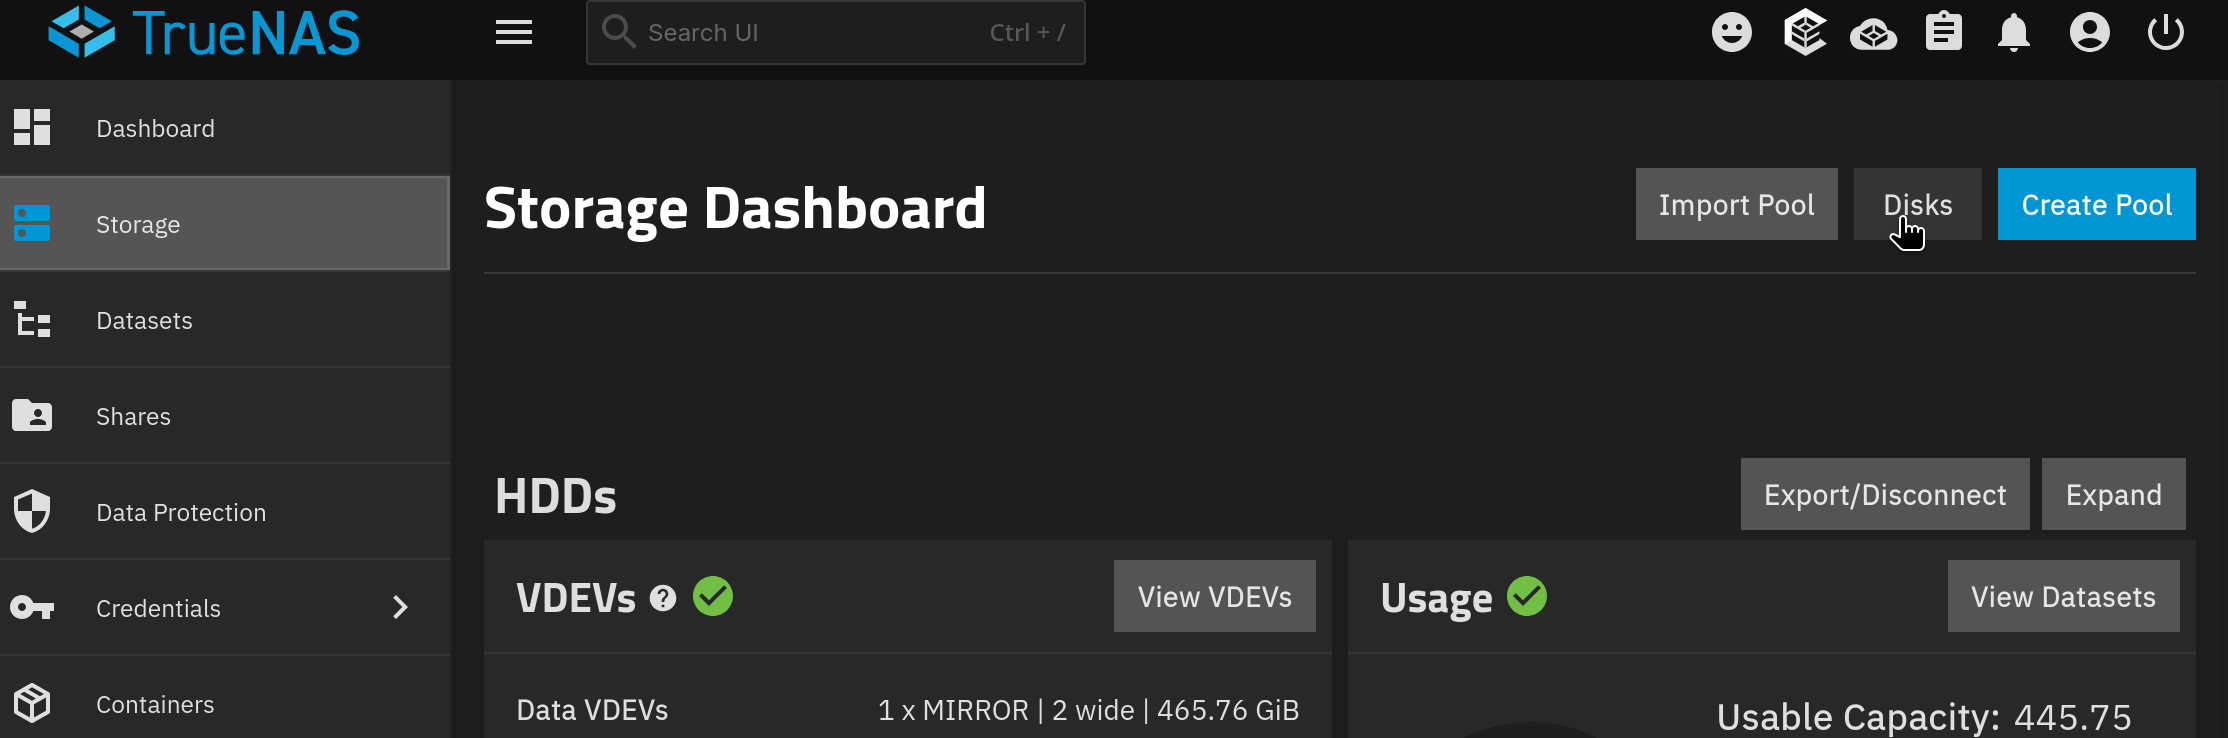
First, in TrueNAS go to Storage > Disks. The disks button is top right.
Disks button on Storage screen
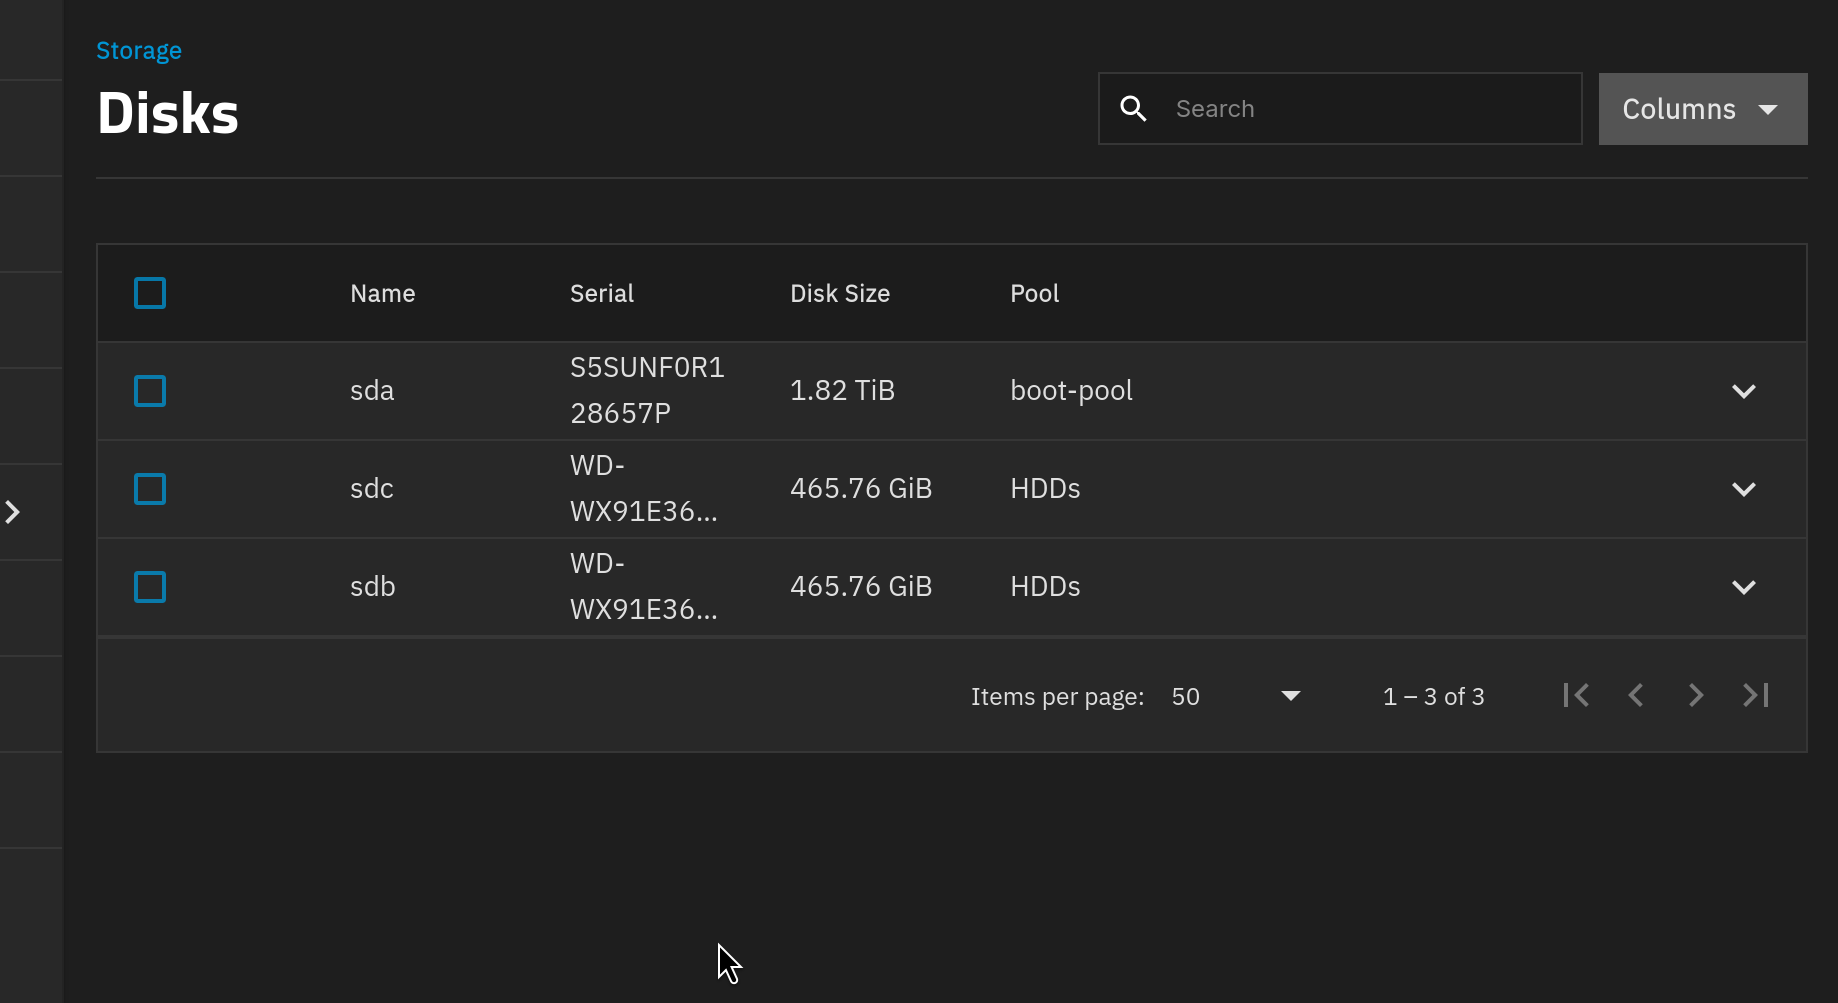
You will see a list of all the drives in the machine.
The name of the boot drive is boot-pool. The storage pool drives, which have our data on, will have the name given when the storage pool was created, in this case “HDDs".
List of drives
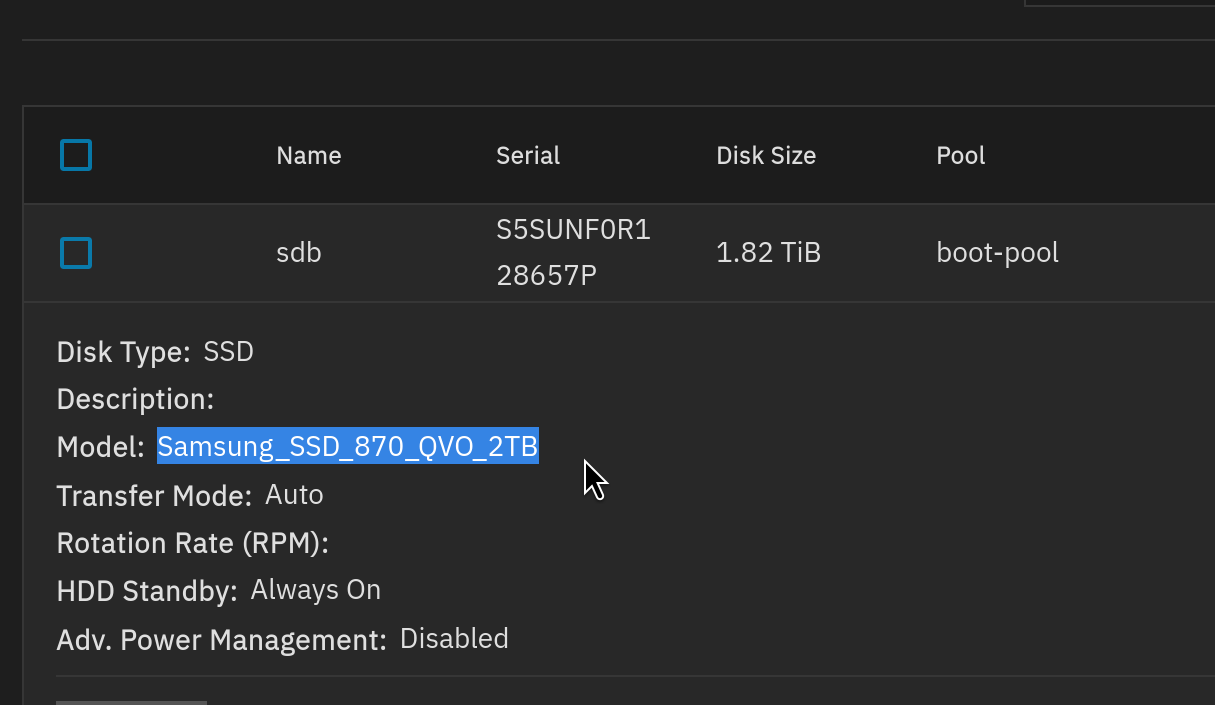
Click on each entry and note down the drive Model Number, Disk Size and Pool.
Drive details panel
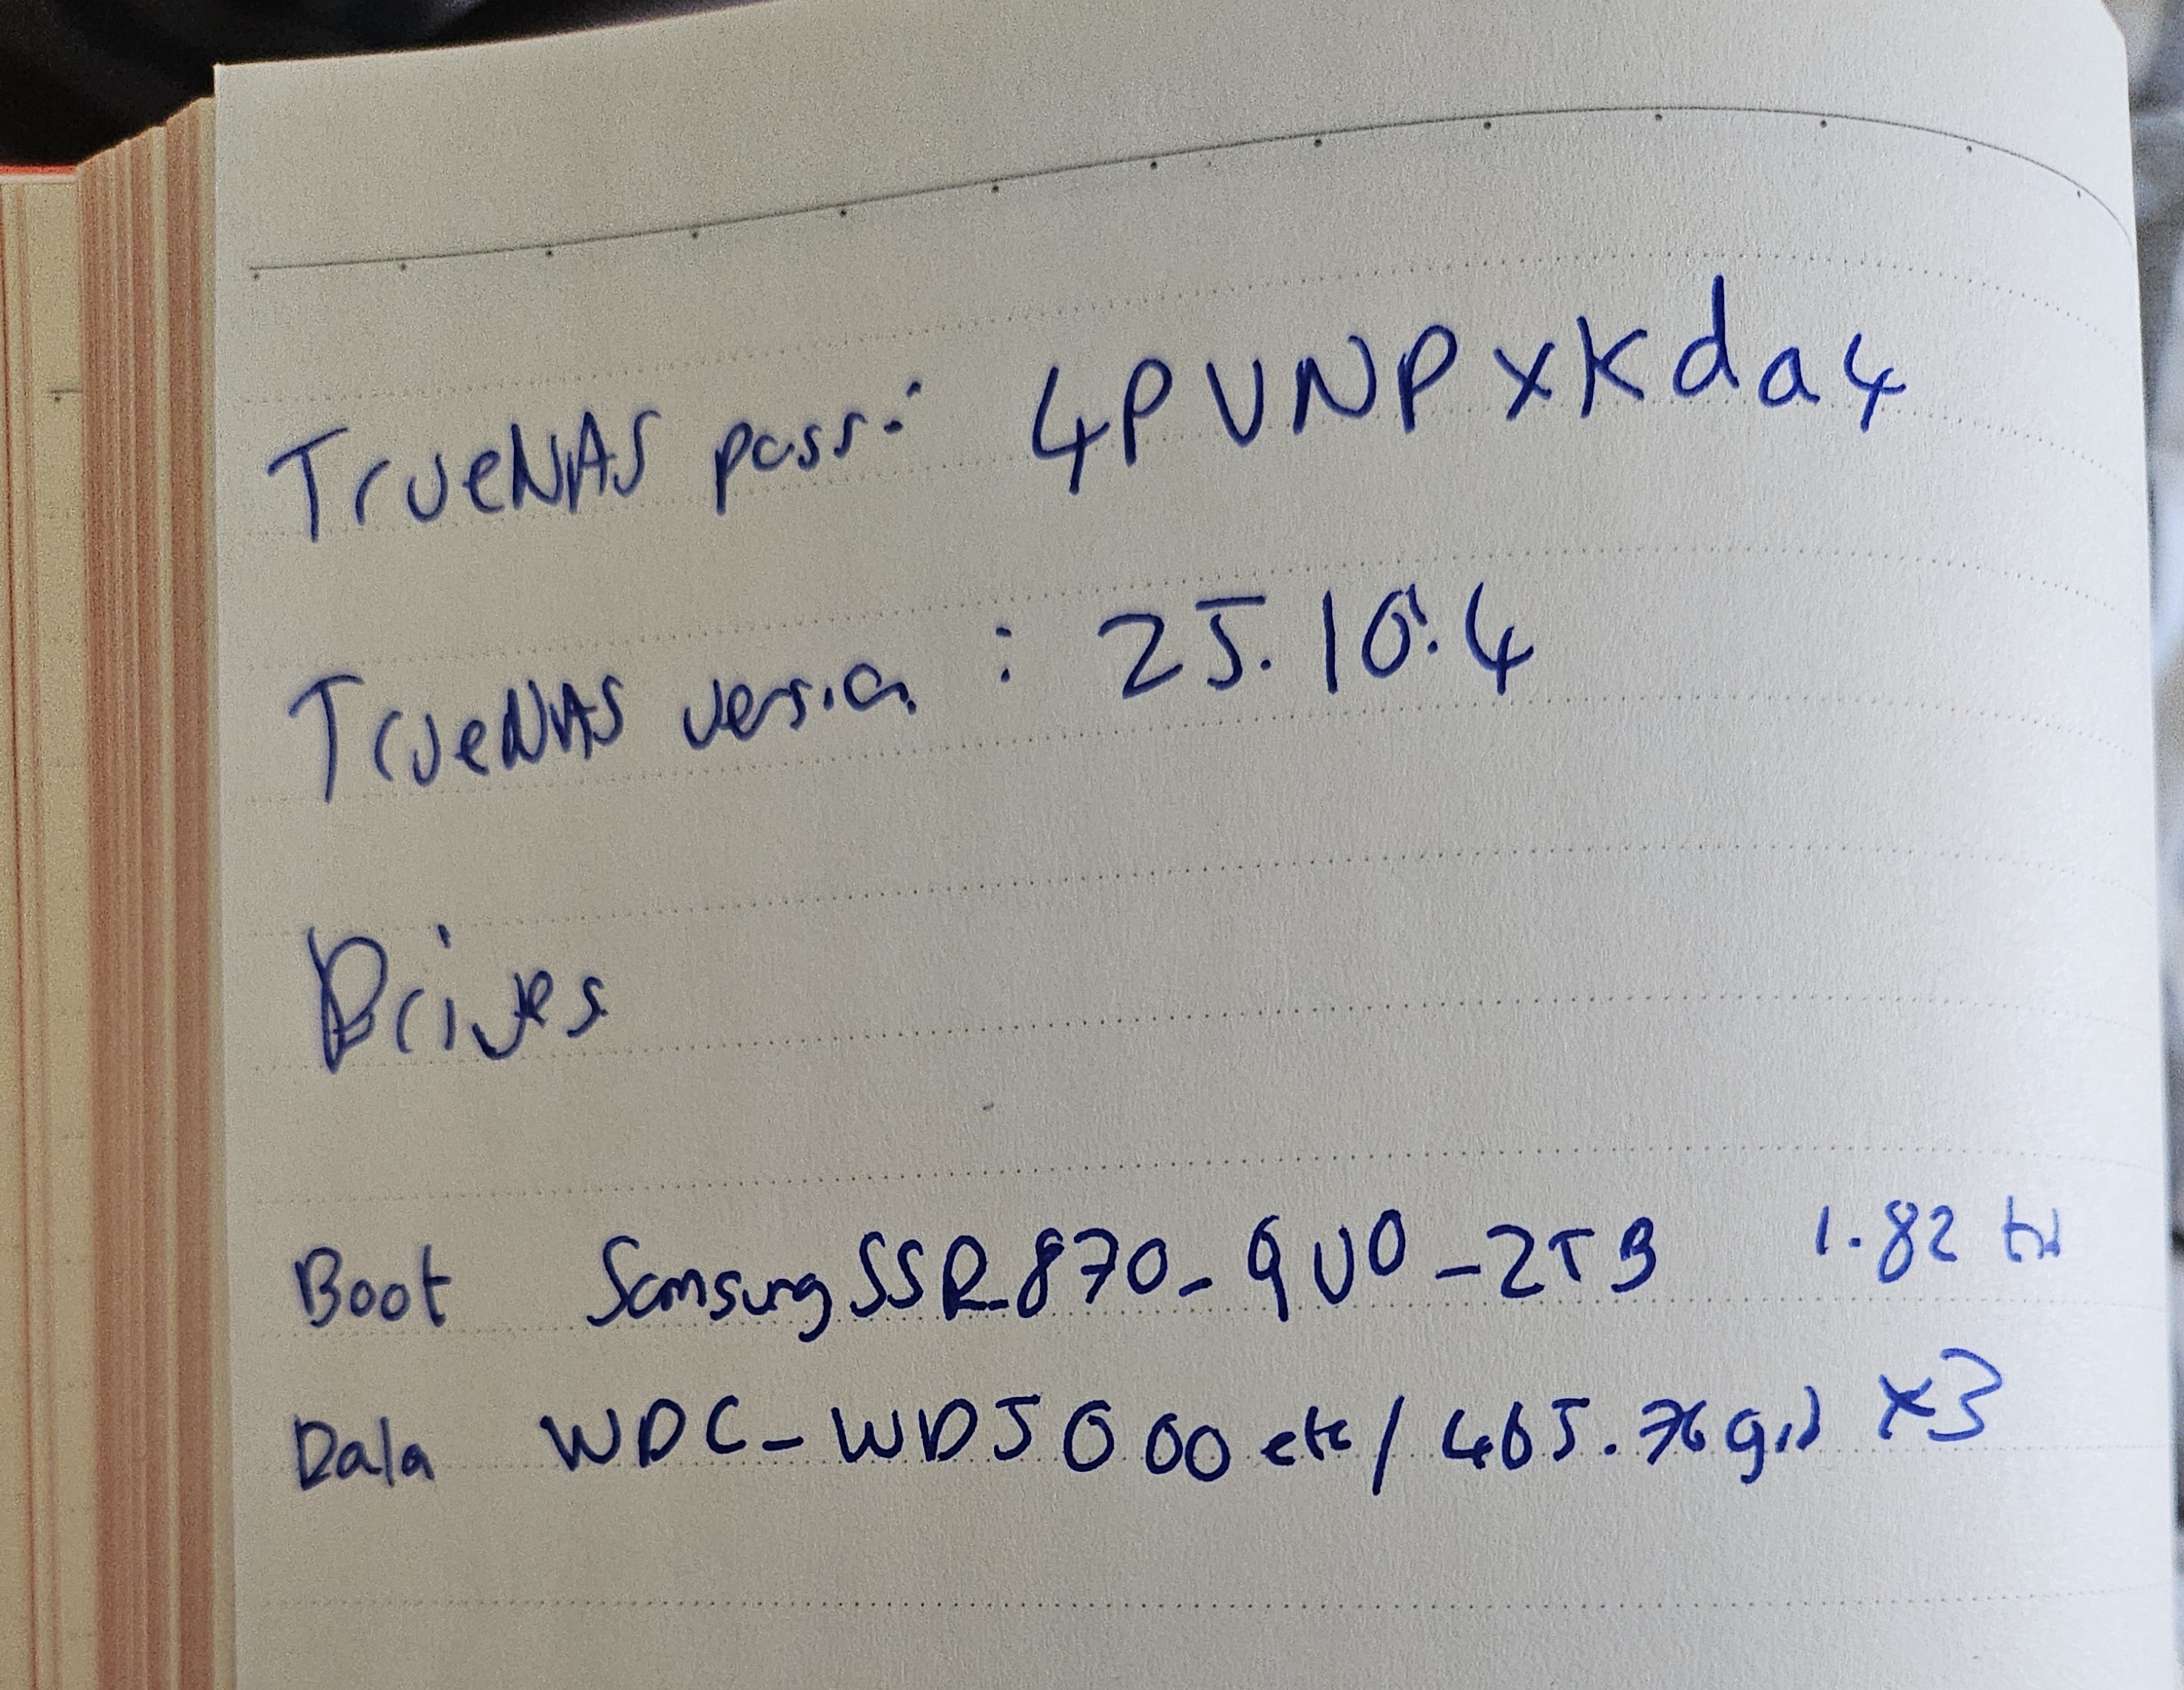
I have used model number because this is shown during the HexOS install process. However, if your drives all have the same Model Number then note down the Serial Numbers too.
Note of drive model numbers
Final Checks
You should now have a:
- Note with your password, TrueNAS version and drive model/serial numbers, pool and size
- Copy of the config file and any encryption keys
- Backup of the config and encryption keys
- Full backup of the data on your pools which you have verified is working
¶ Preparing to install HexOS
In this section we will:
- Shut down the server
- Unplug the storage pool drives
- Make any other hardware updates
You will need
- Physical access to your server
- Any new hardware you're installing
¶ Shut down the server
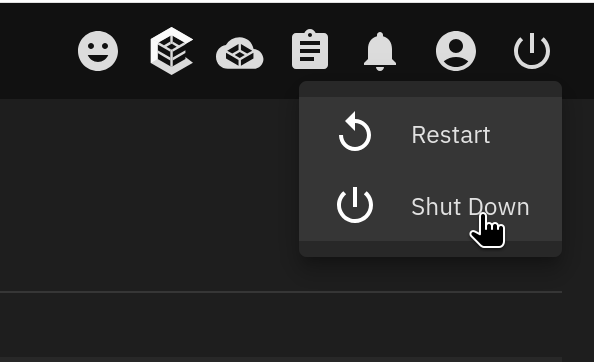
First, shut down the server. From TrueNAS this can be done by clicking the power button icon and Shut Down
Shut Down menu option
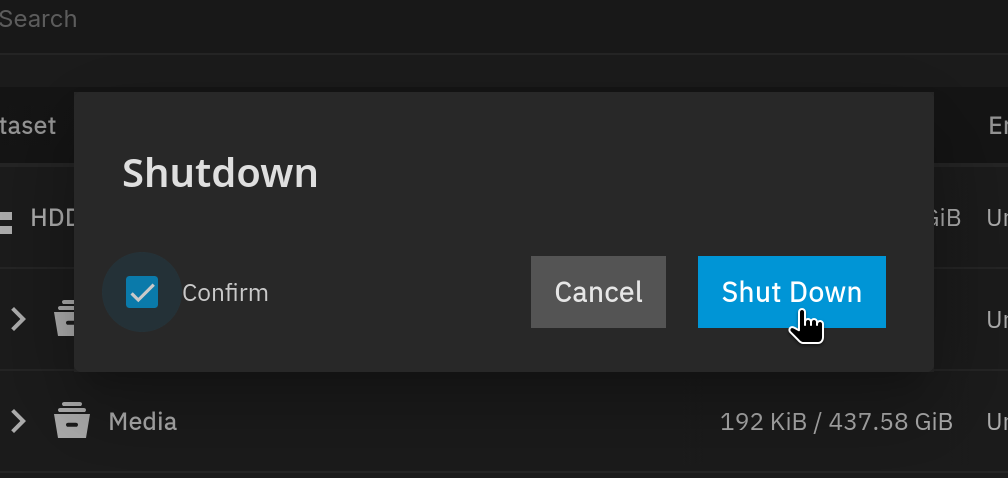
then check Confirm and click Shut Down
Shutdown confirmation dialog
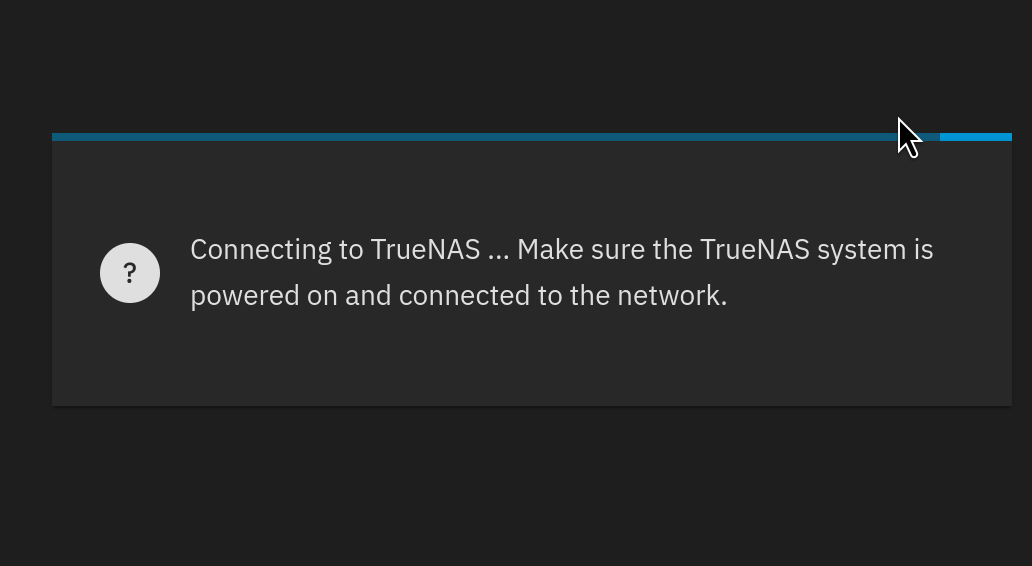
When the browser starts to show a connection error, the server has shut down.
Browser connection error
¶ Unplug your storage pool drives
At this stage we will unplug all the drives that make up the storage pools. It is essential to do this, to prevent accidental data loss during HexOS install.
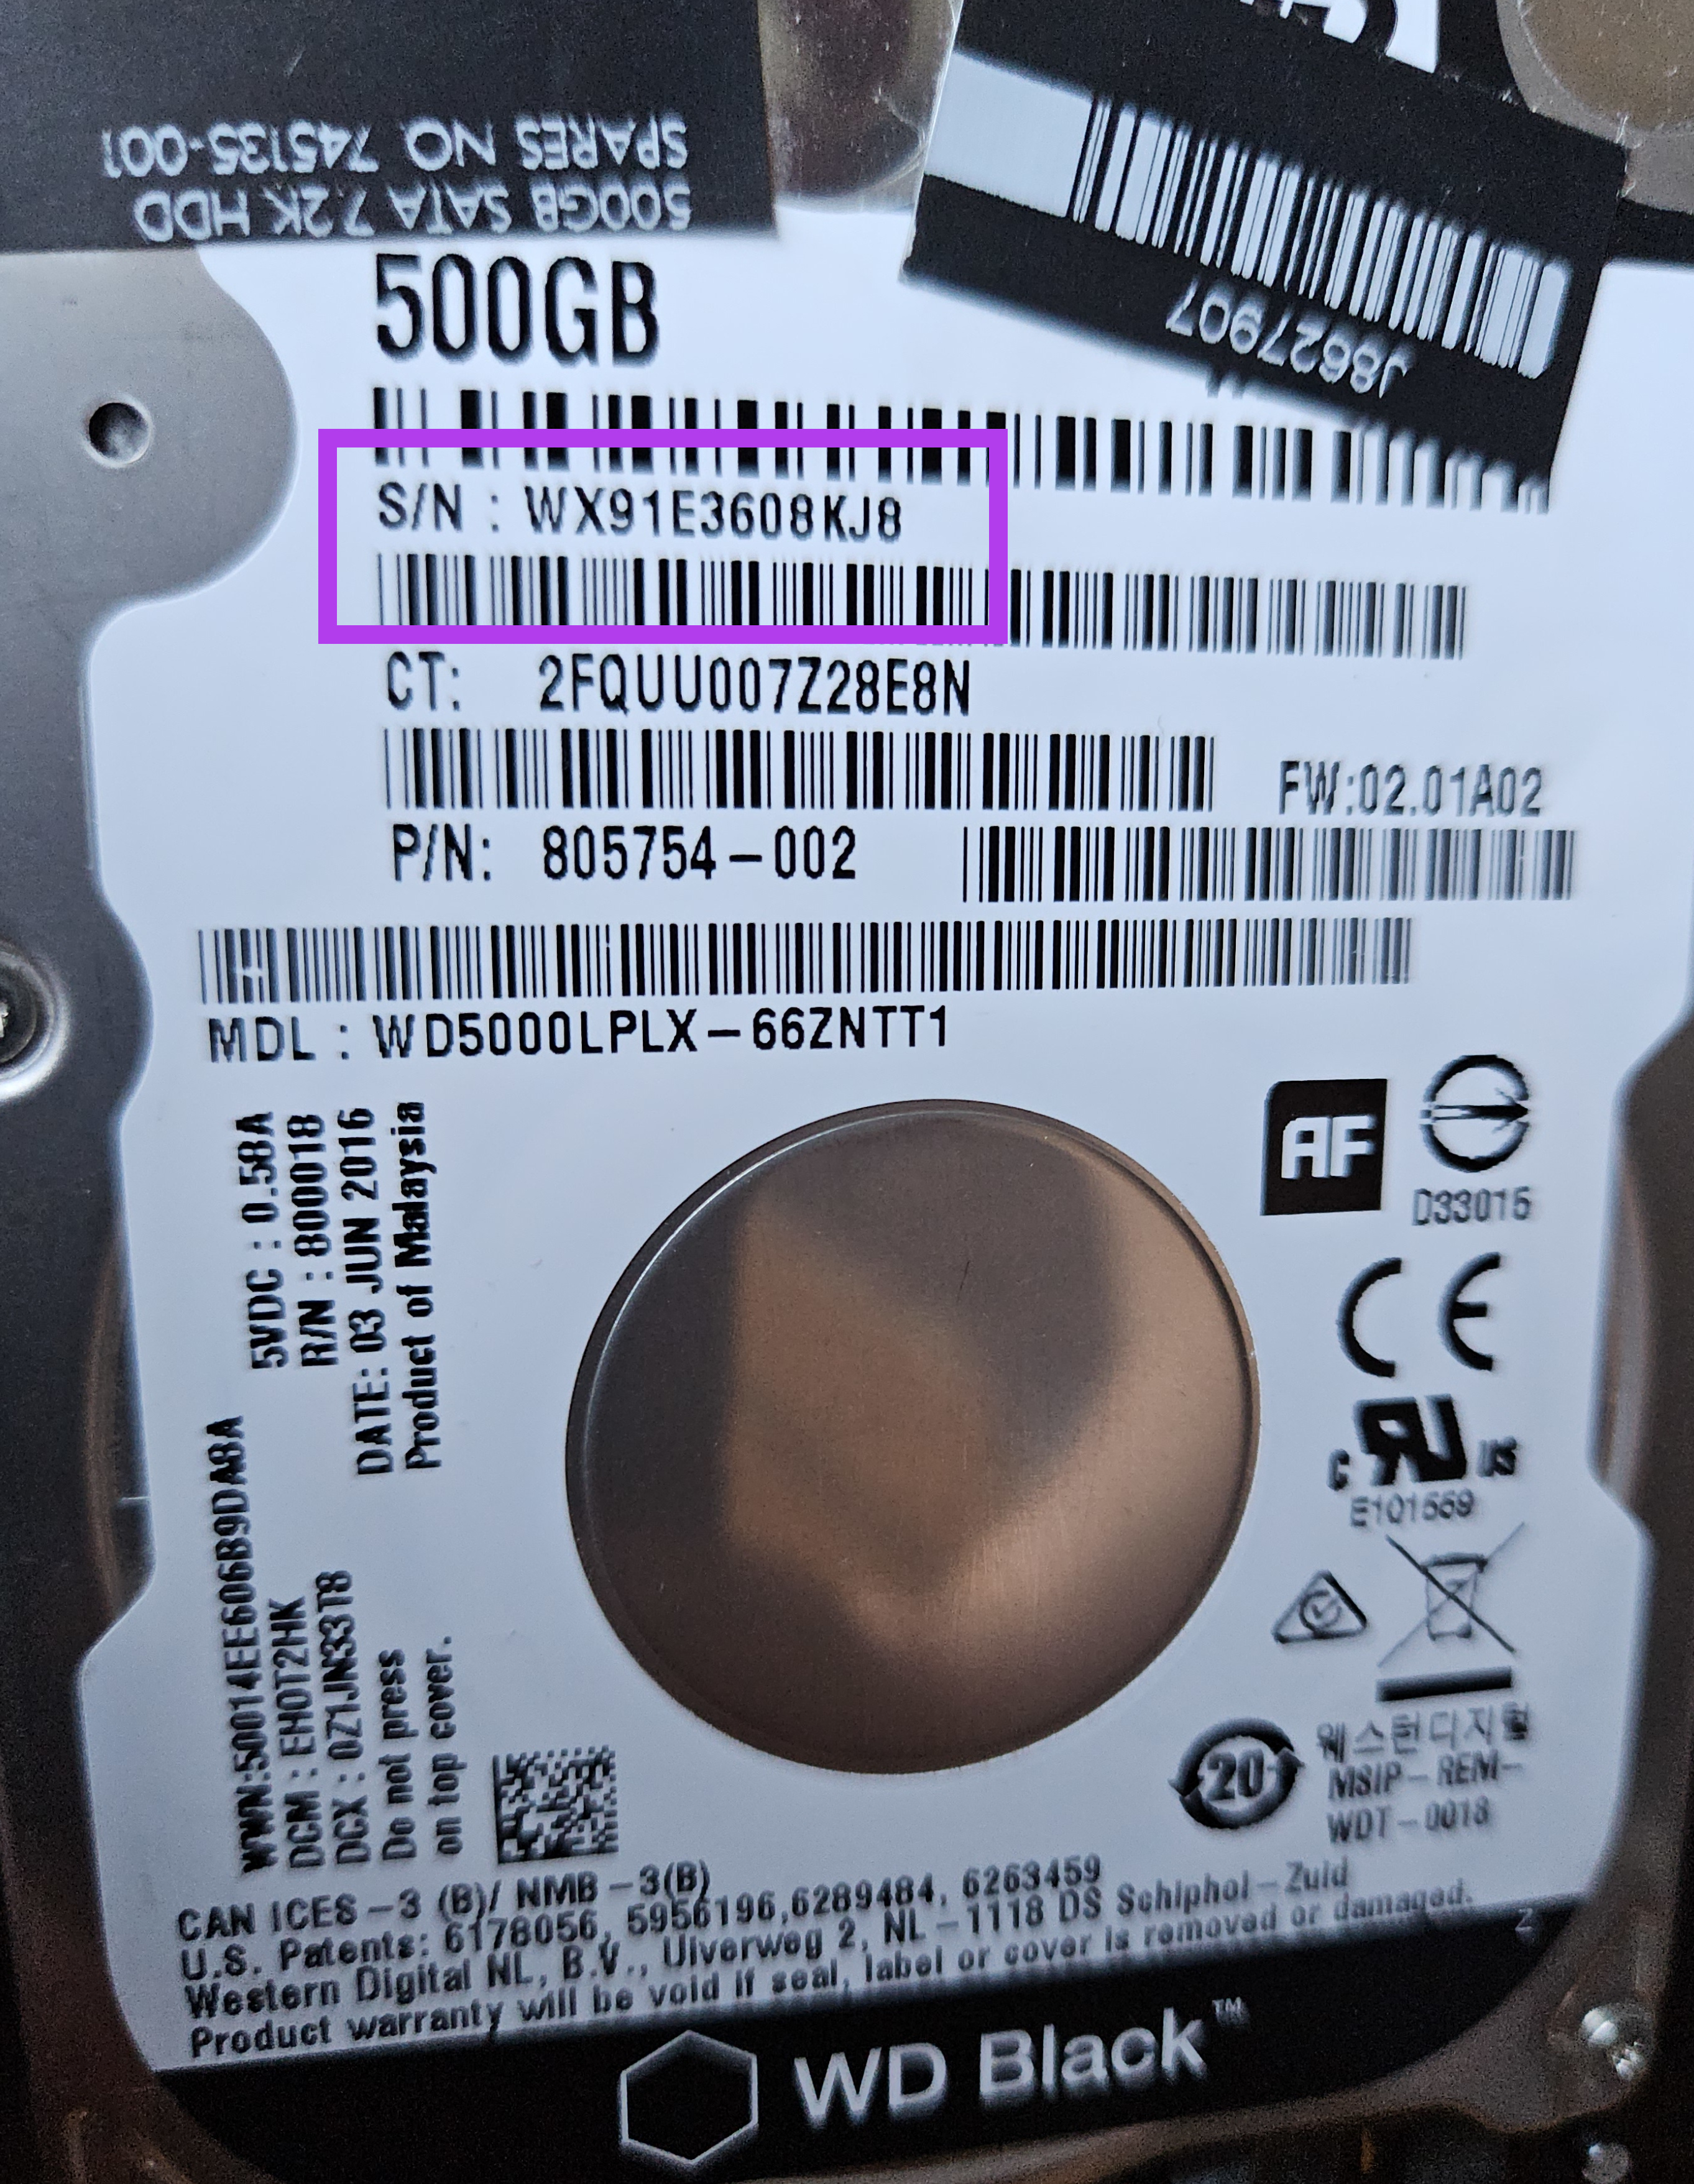
These drives can be identified using the model numbers or serial numbers noted down earlier. Remove the data and power cables from all the storage pool drives.
Unplugged pool drives
¶ Make any hardware changes
Make any other planned hardware changes to your system now also.
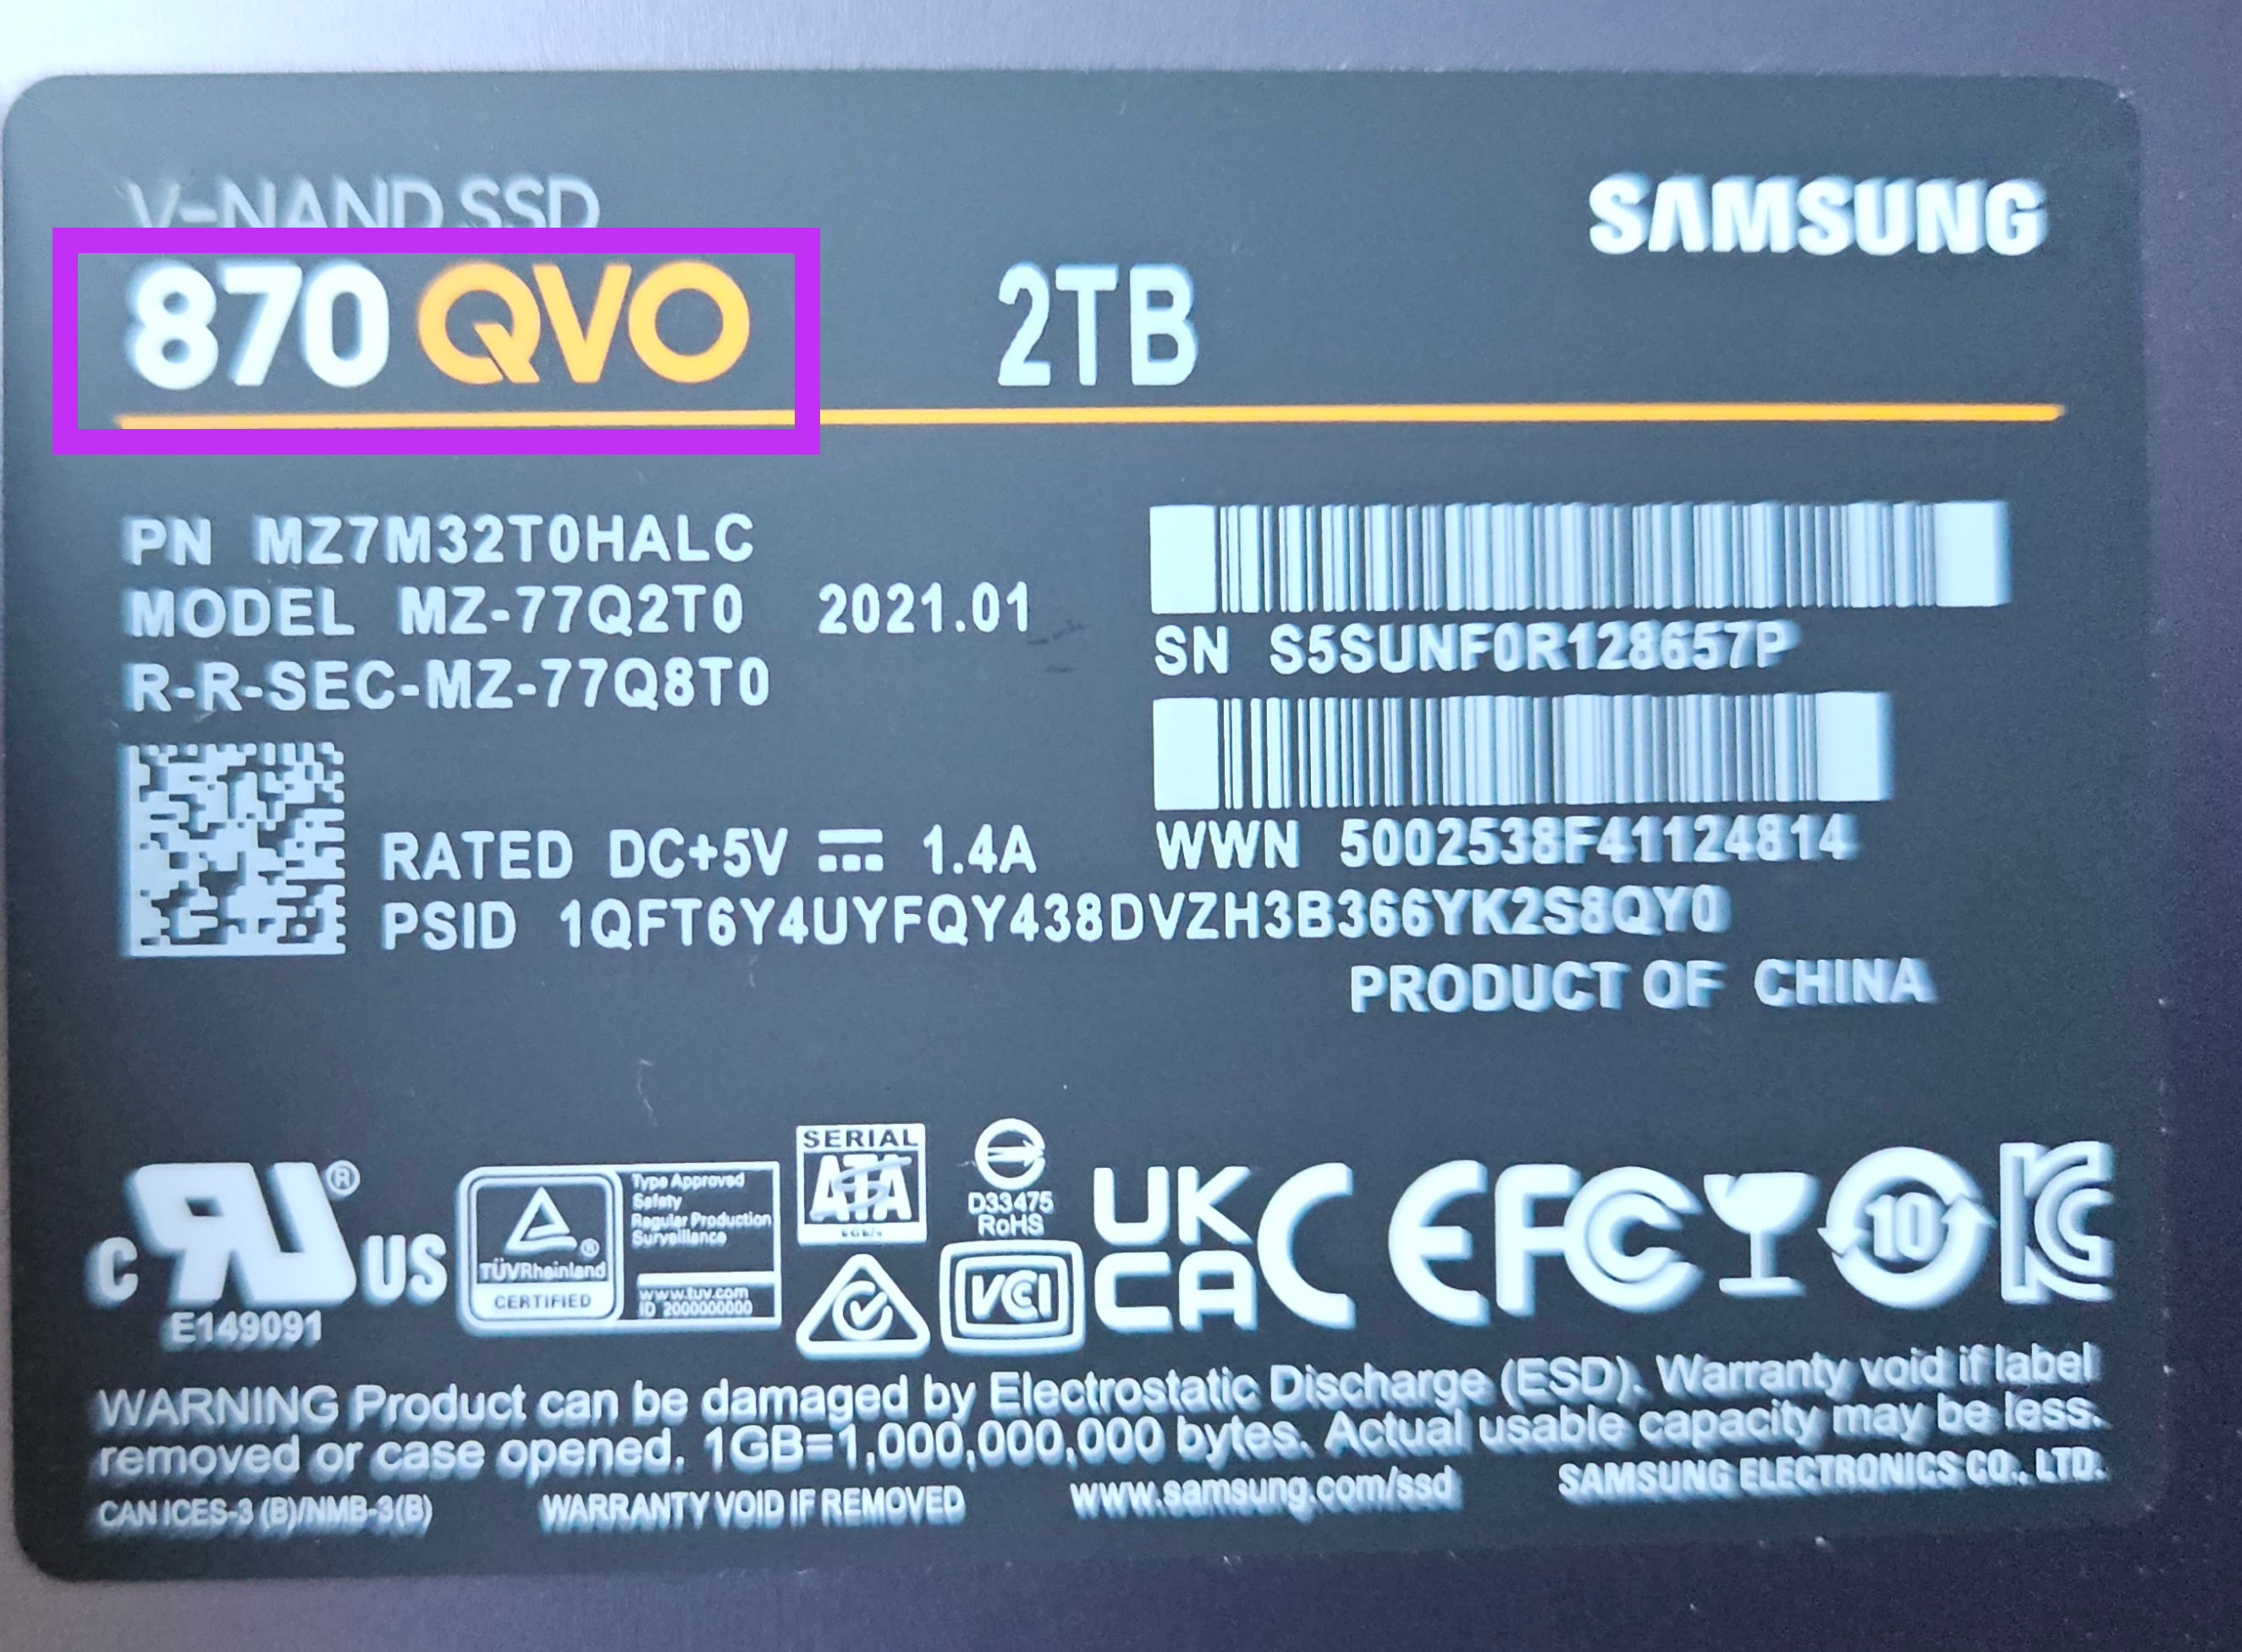
In this case, I will be using the same boot drive, so this remains plugged in ready for HexOS to be installed. The serial number matches what I noted down as the boot-pool drive in TrueNAS.
Boot drive left plugged in
Final Checks
- The machine is off
- The drives for storage pools are unplugged
- The boot drive that will have HexOS on is plugged in
¶ Install HexOS and update TrueNAS
In this section we will:
- Install HexOS, following the install guide up until we see the console setup screen
- Update TrueNAS
You will need
- The items listed on the install guide
¶ Install HexOS
Follow the HexOS installation guide here.
At the end of the installation process, come back to this guide.
Do not continue on to complete the HexOS setup.
Two important notes
- The password you use during install is temporary, it will later be replaced by the password you noted down.
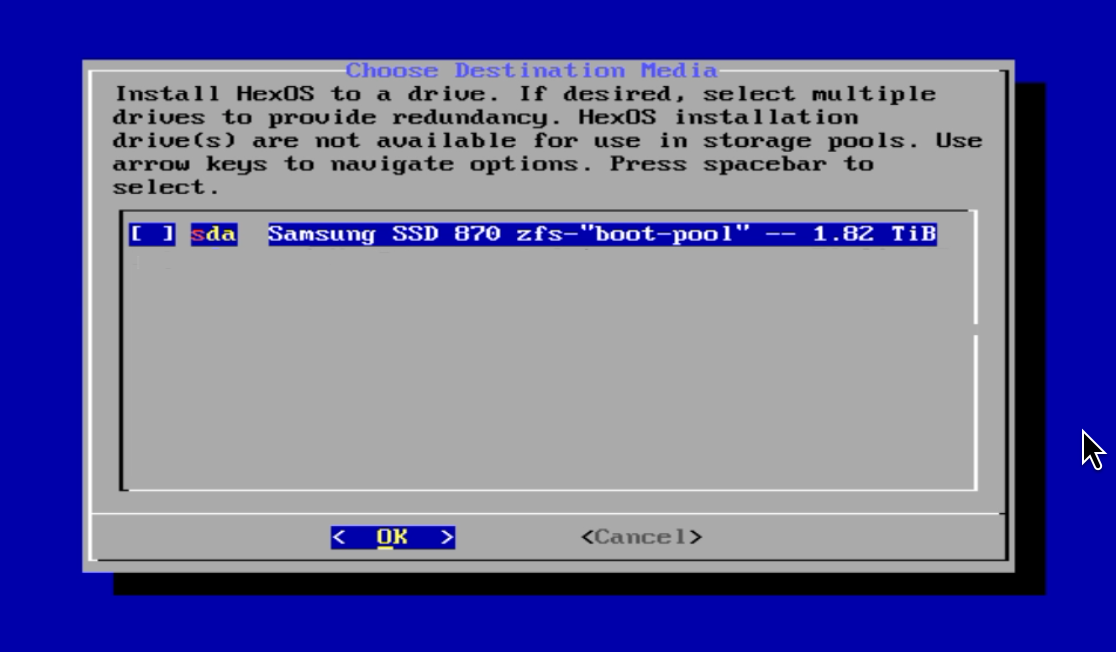
- When you get to the step Select Installation Drive there should only be one drive listed. Double-check this drive matches the description of the place you want to install HexOS. Be sure, any data on the drive will be overwritten.
Installation drive selection screen
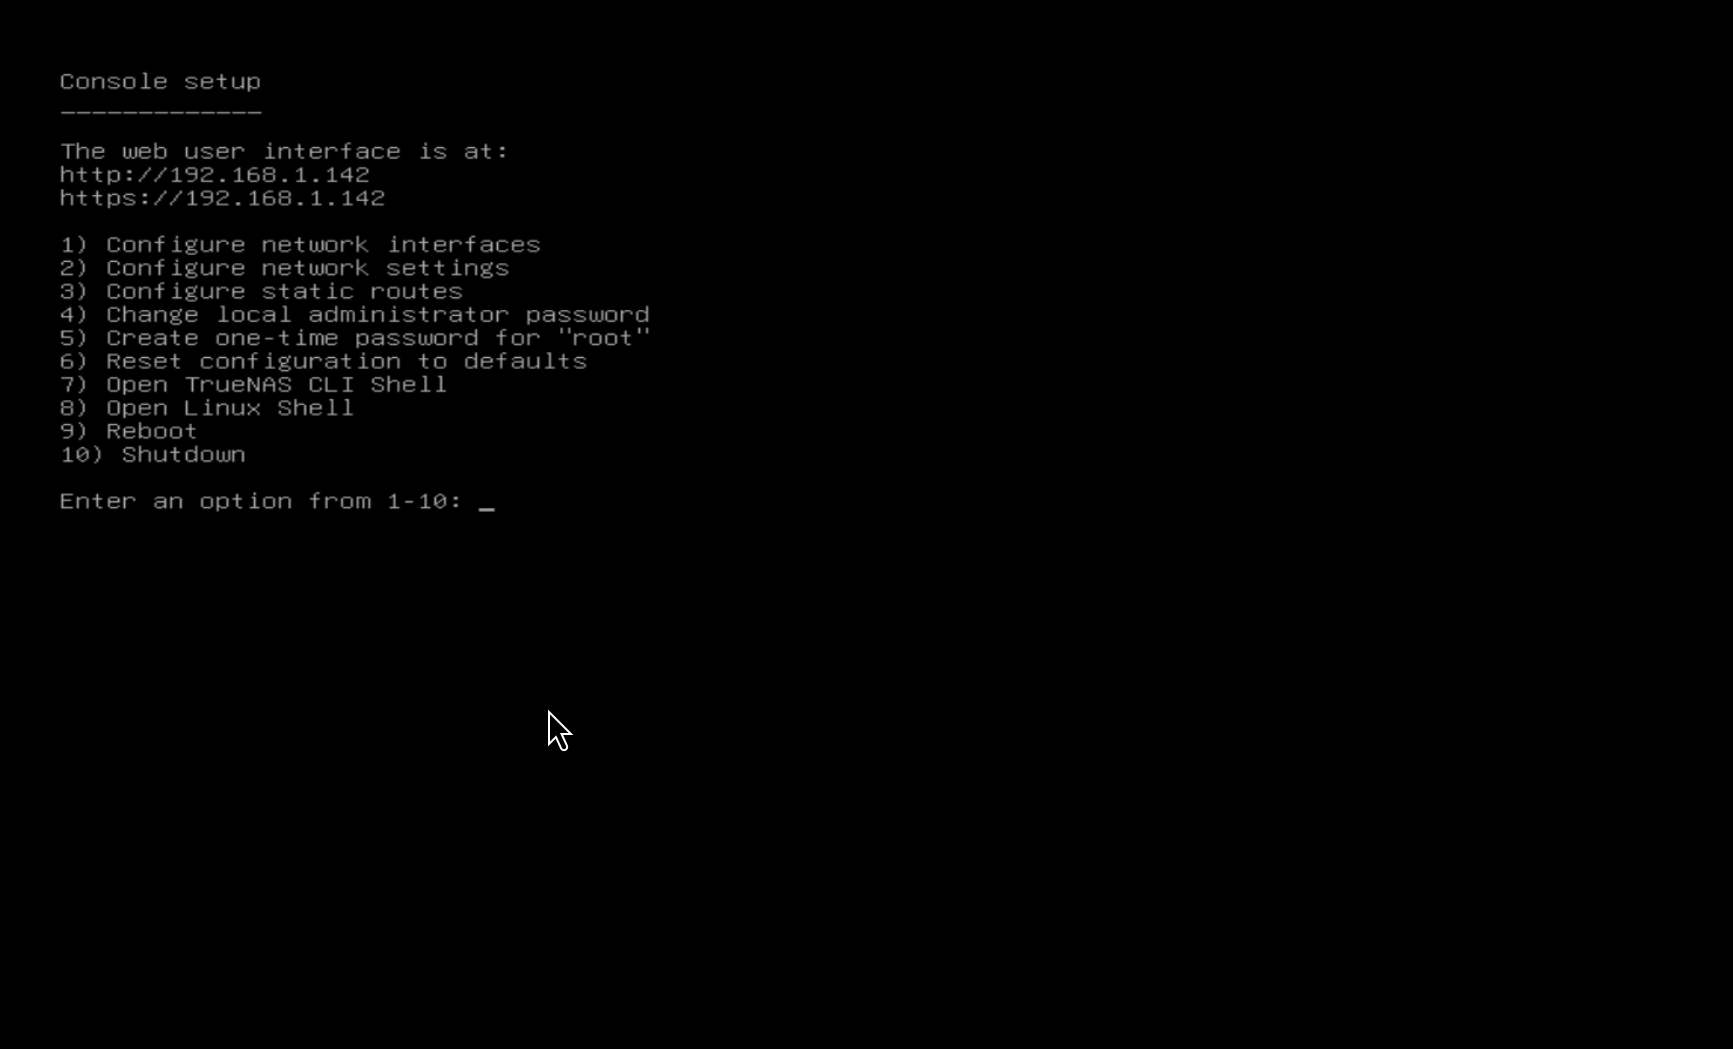
At the end of the install process, you will see the following Console setup screen. Do not continue following the docs to complete HexOS setup.
This screen shows the IP address we will use in the next step.
Console setup screen
¶ Log in to TrueNAS
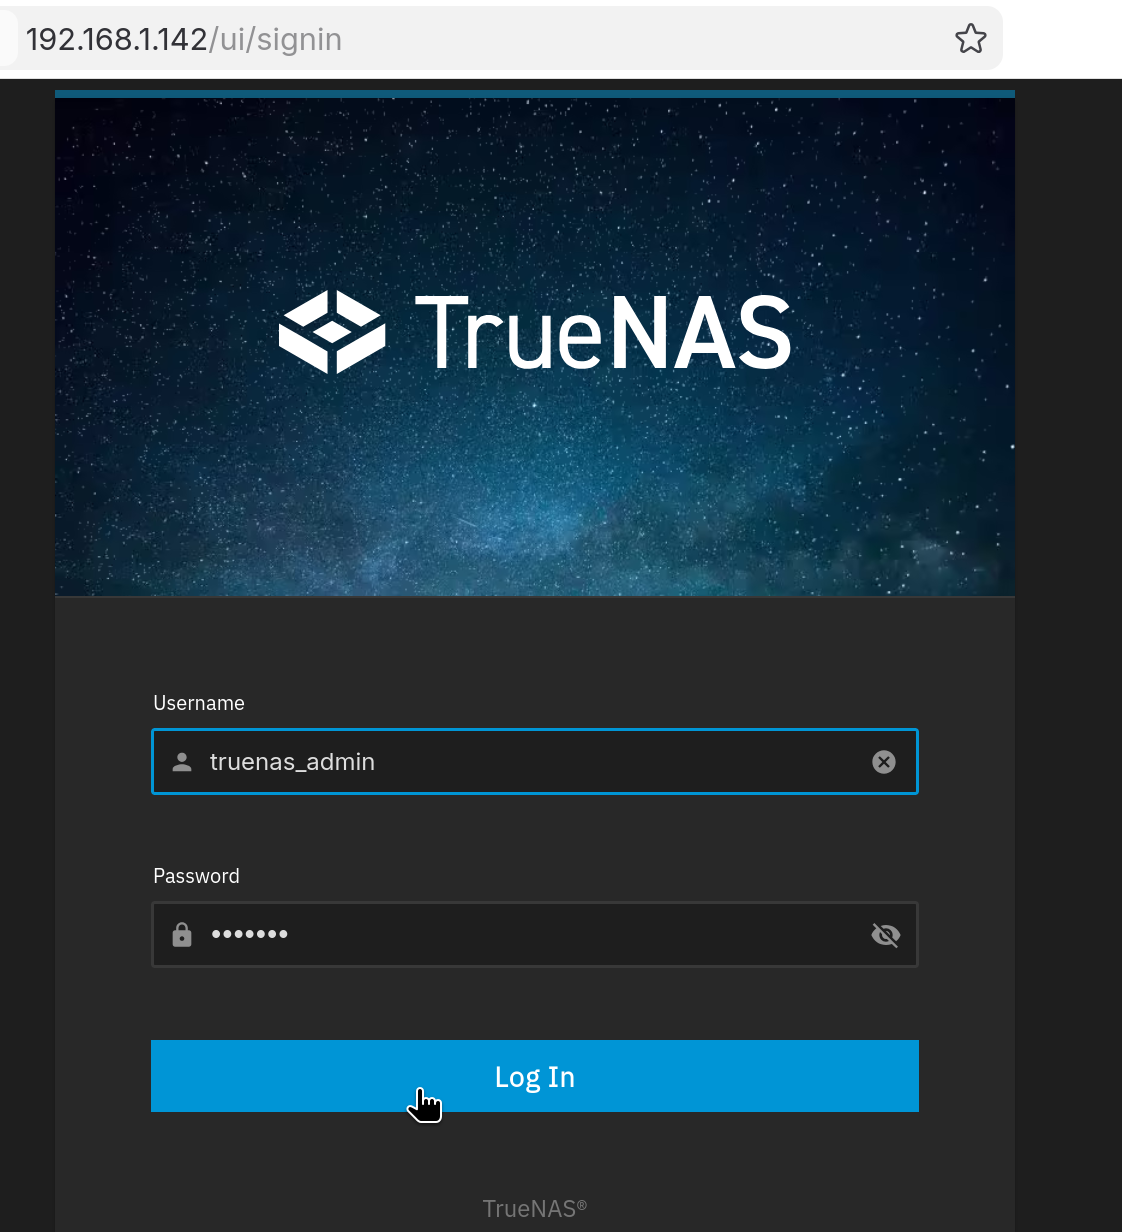
First, log into TrueNAS by going to the IP address shown on the Console setup screen.
Enter the username truenas_admin and the temporary password you chose. Click Log in.
TrueNAS login screen
¶ Upgrade TrueNAS
The next step is to update TrueNAS to the same version as our previous instance.
Note: Usually, you should not manually update TrueNAS this way: TrueNAS updates should be handled by HexOS. In this specific situation, TrueNAS needs to be updated in order to ensure the config file uploads correctly.
You should have the version number in the notes from earlier steps, it can also be found in the config file name. In this case the version number is 25.10.4
Version number in config file name

After logging in, TrueNAS should open on the dashboard.
Click the Updates Available button.
Updates Available button
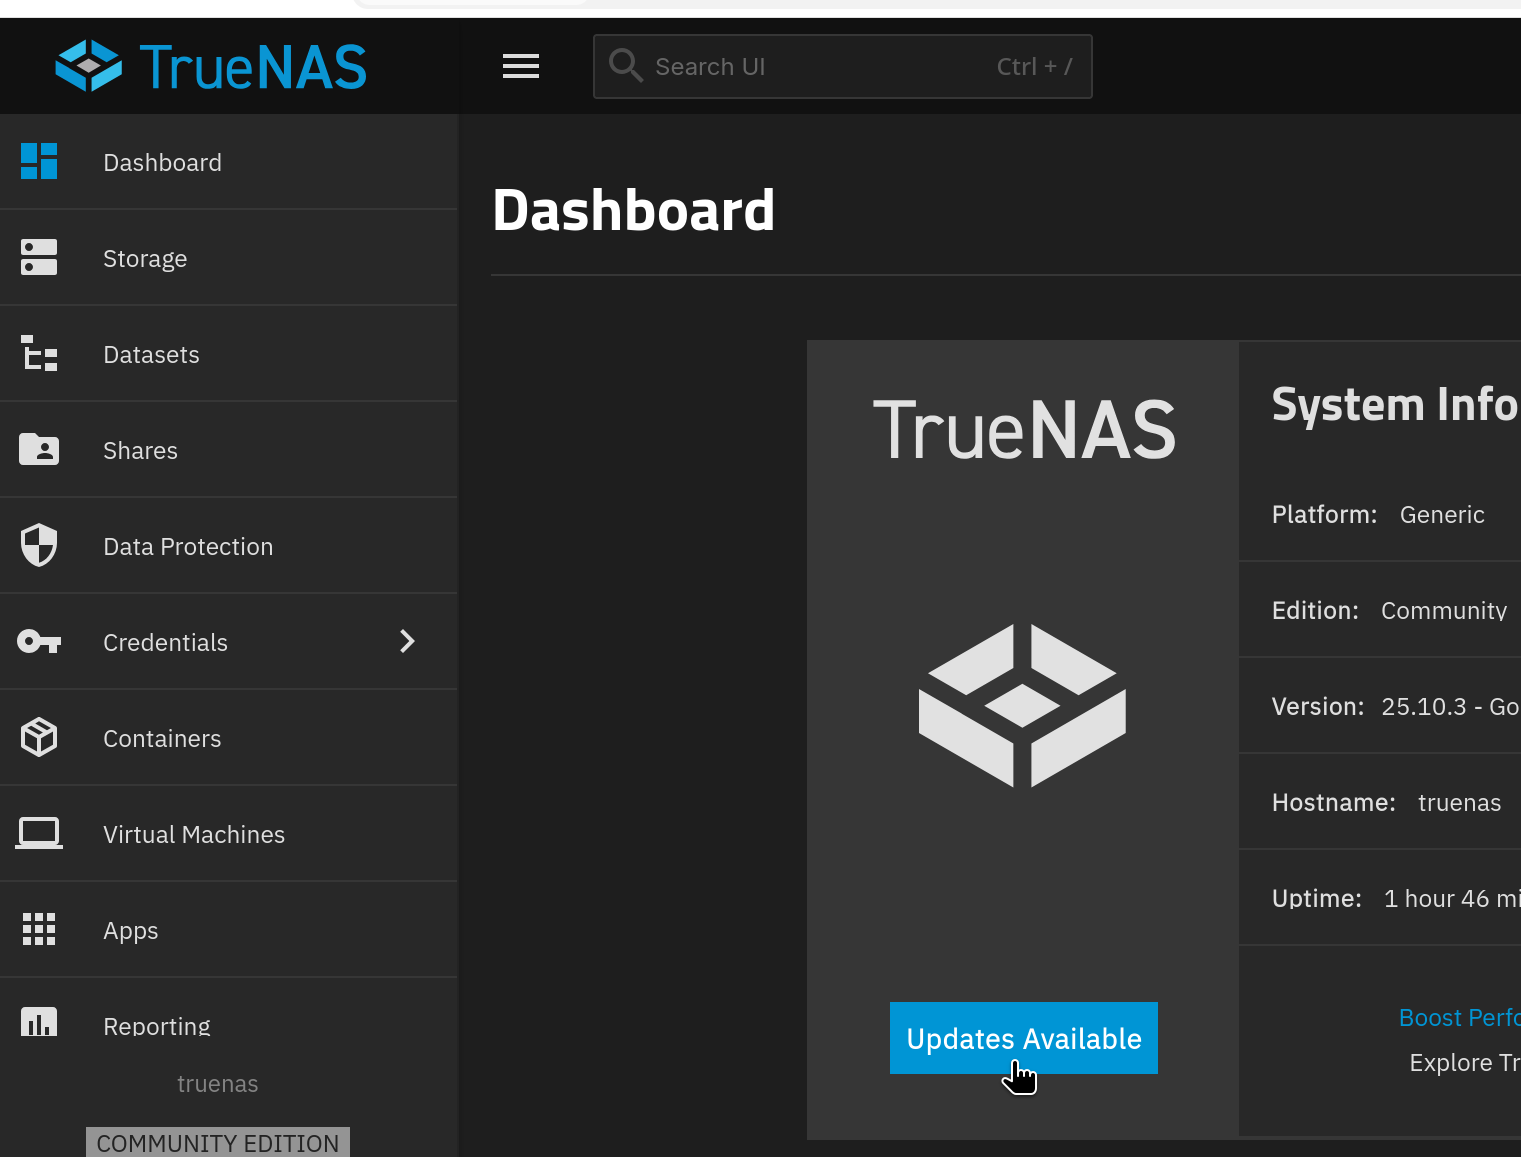
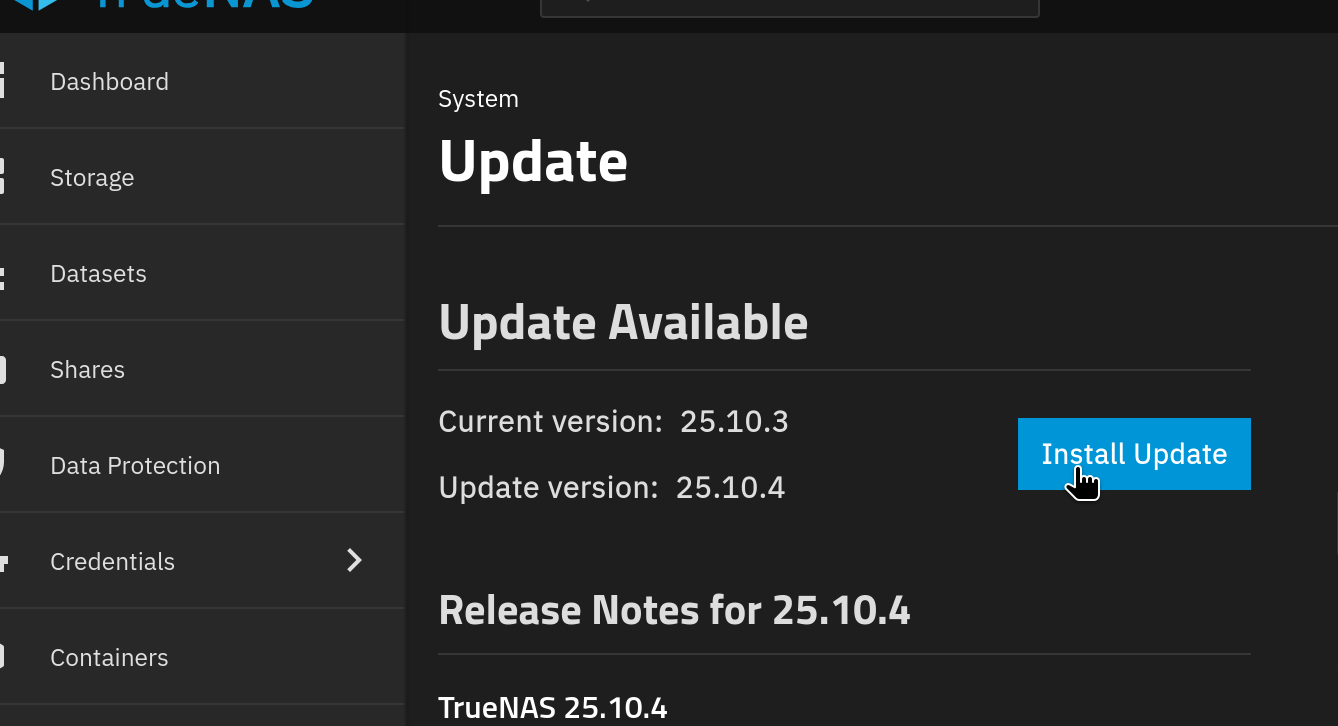
In this case there is only one update to make our TrueNAS version numbers match. If the options available do not allow you to update to the correct version, please contact support.
Click Install Update.
Install Update button
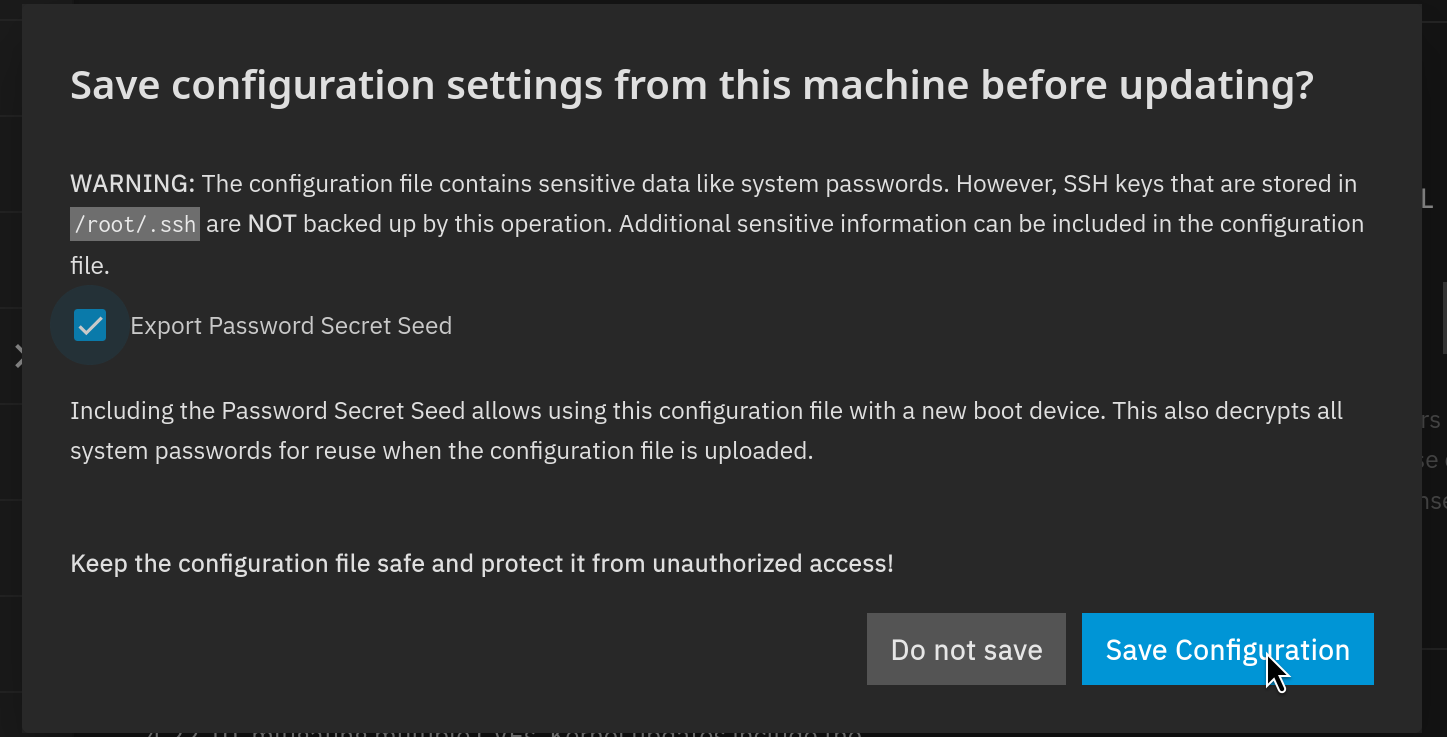
Download the config and settings and password as suggested by clicking Save Configuration.
Save Configuration prompt
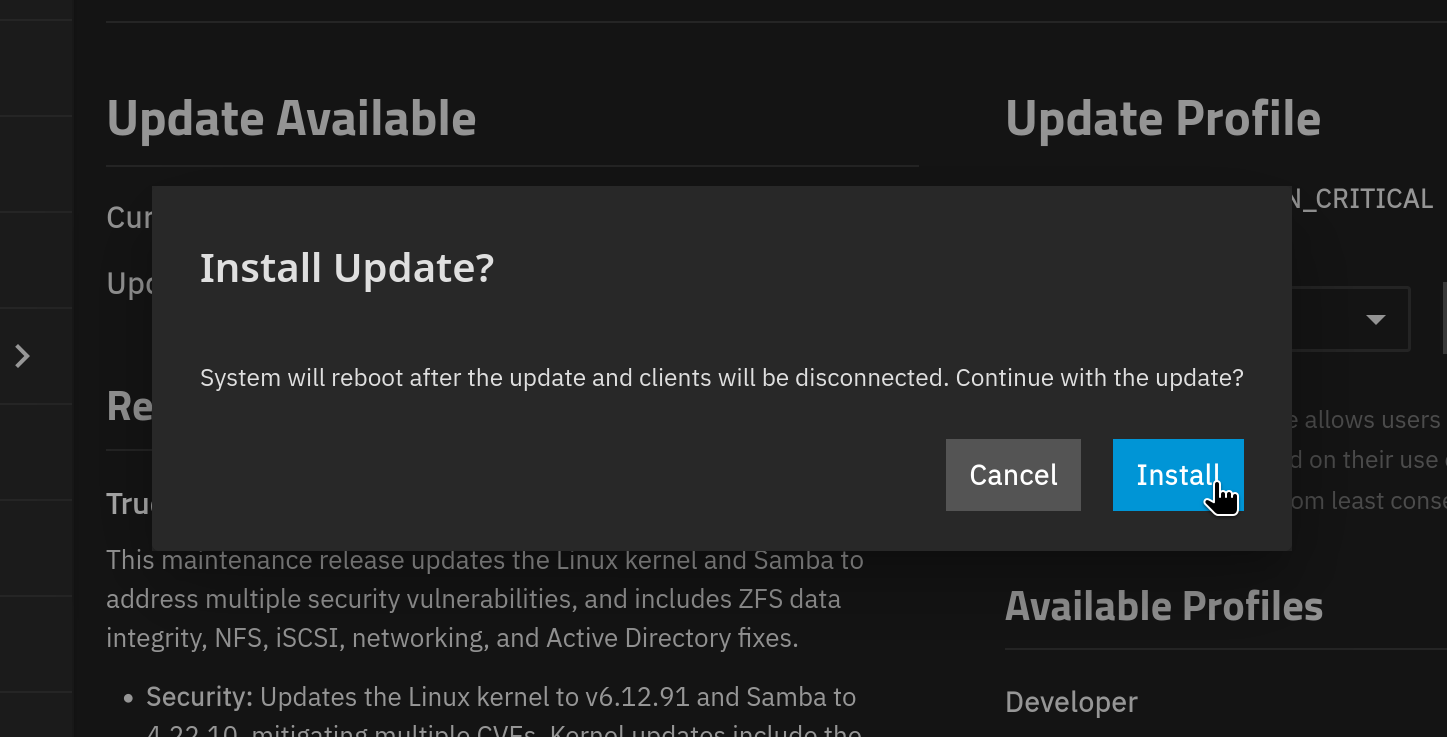
Then click Install.
Install button
The system will run the update and reboot.
Update progress screen
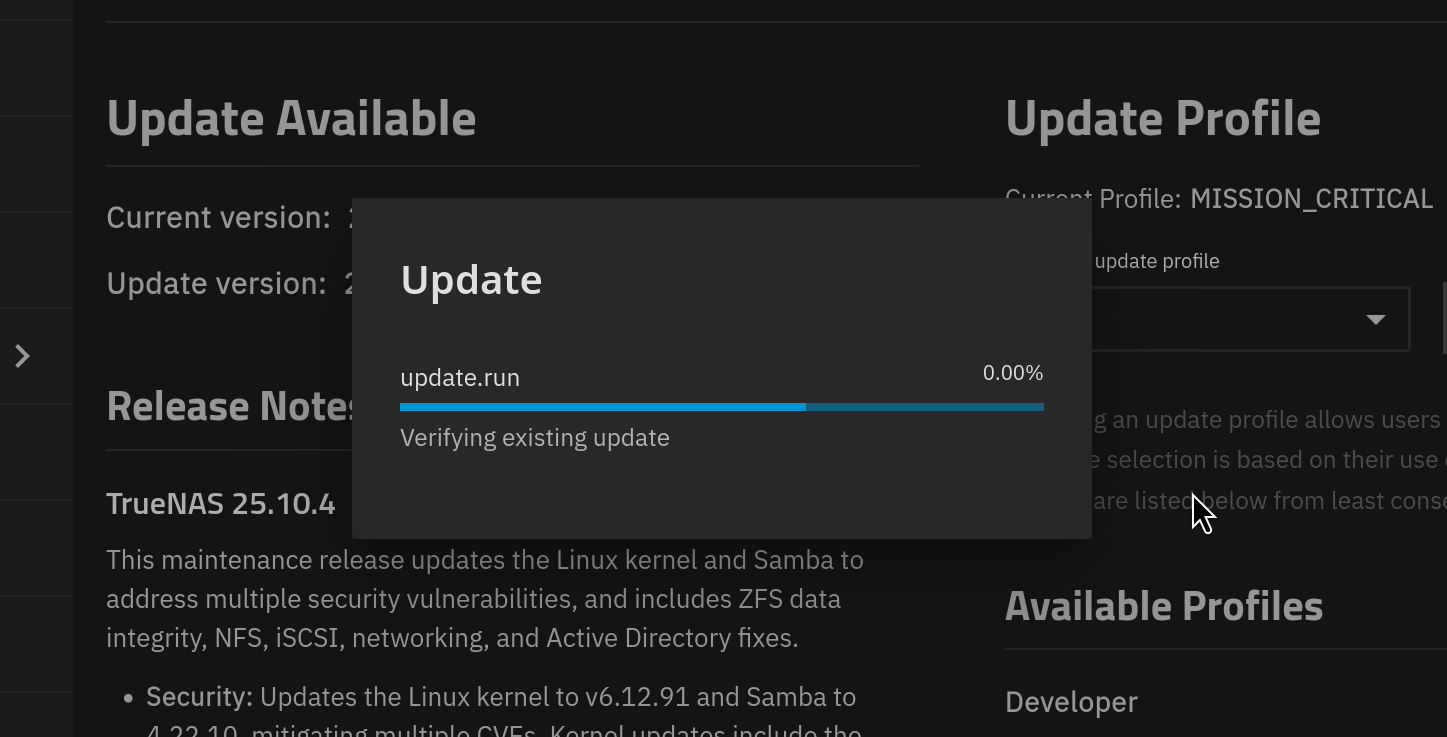
When the reboot has finished and the Console Setup screen is showing again, shut down the machine.
Plug all the remaining drives back in and boot up.
Final Checks
- TrueNAS is installed with a temporary password
- The version number of TrueNAS matches your previous instance
¶ Import configs
In this section we will:
- Import storage pool
- Upload config file
- Import encryption keys and set up SMB share (if necessary)
- Reset the apps pool (if necessary)
You will need
- The backed up config file and keys
- Your temporary password
- The original password
Requirement: Make sure you have updated TrueNAS to the correct version before proceeding.
¶ Import your storage pool
Go to Storage > Import Pool. Import pool is on the top right of the screen.
Import Pool button
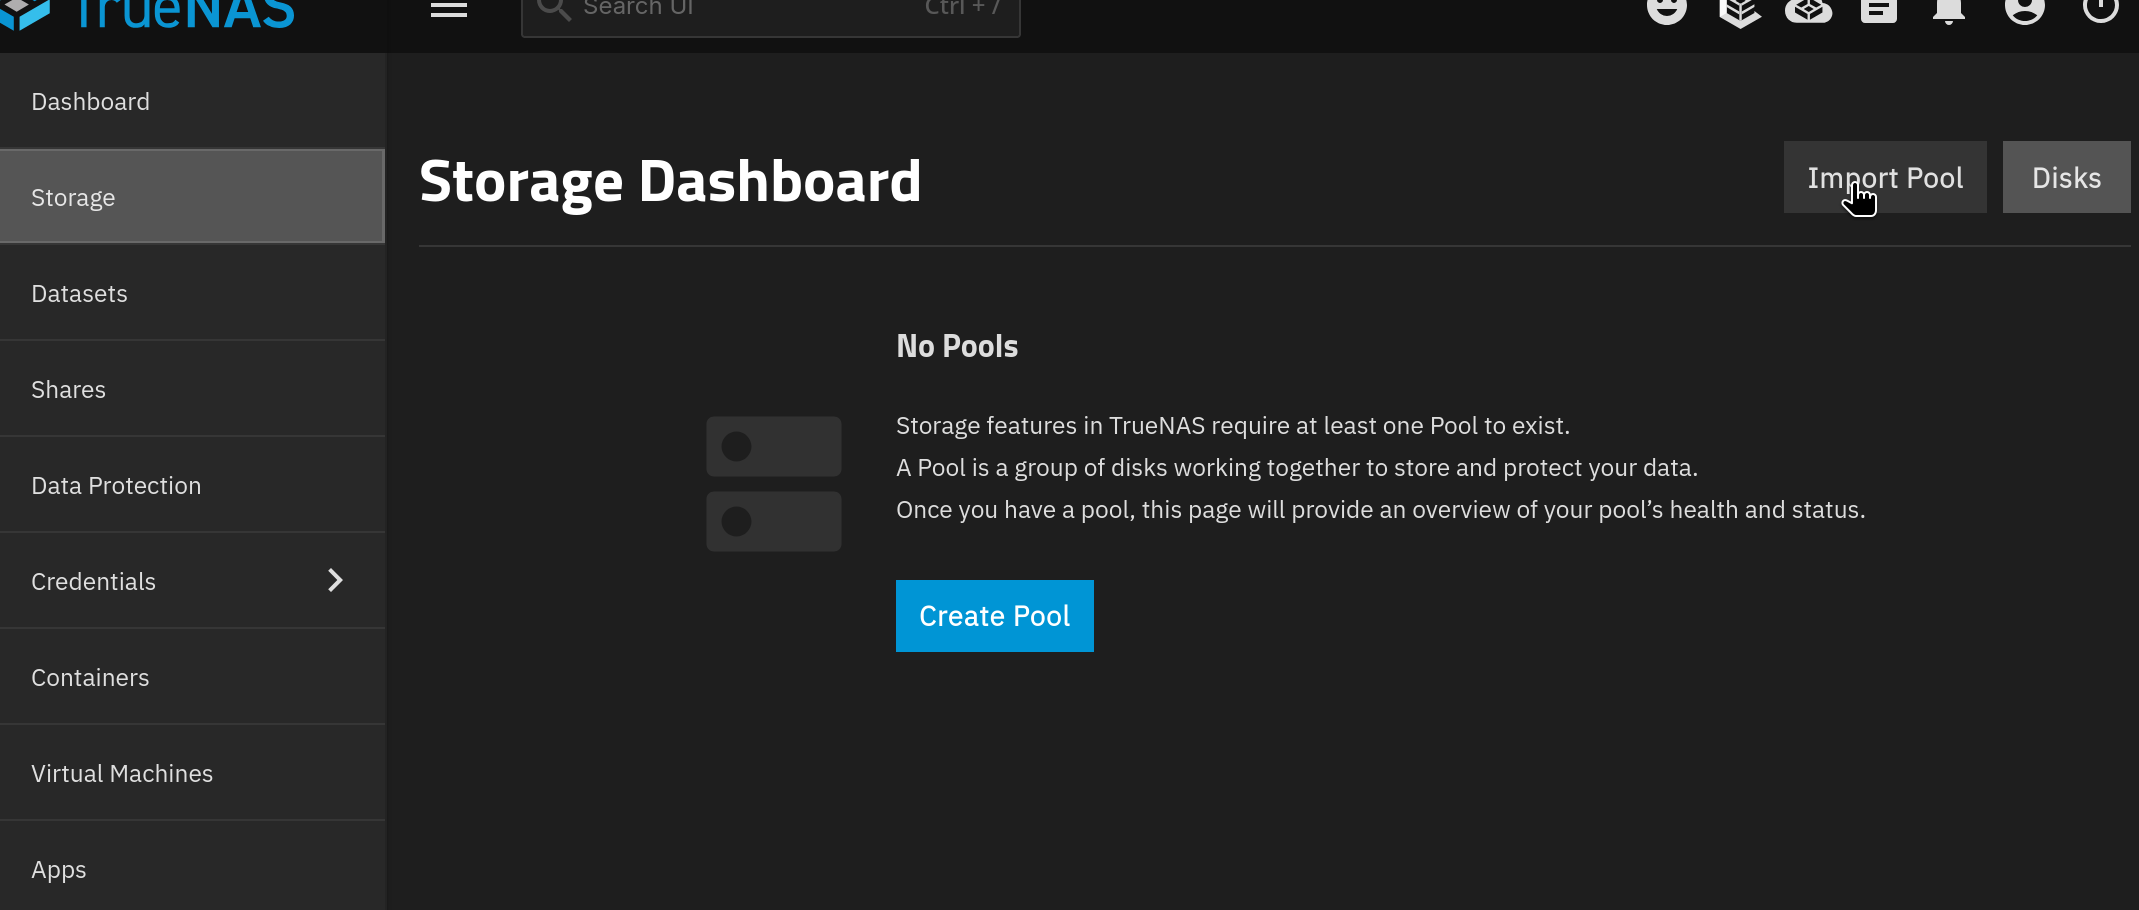
Find your pool in the list, in this instance there is only one pool. Click Import.
Pool import dialog
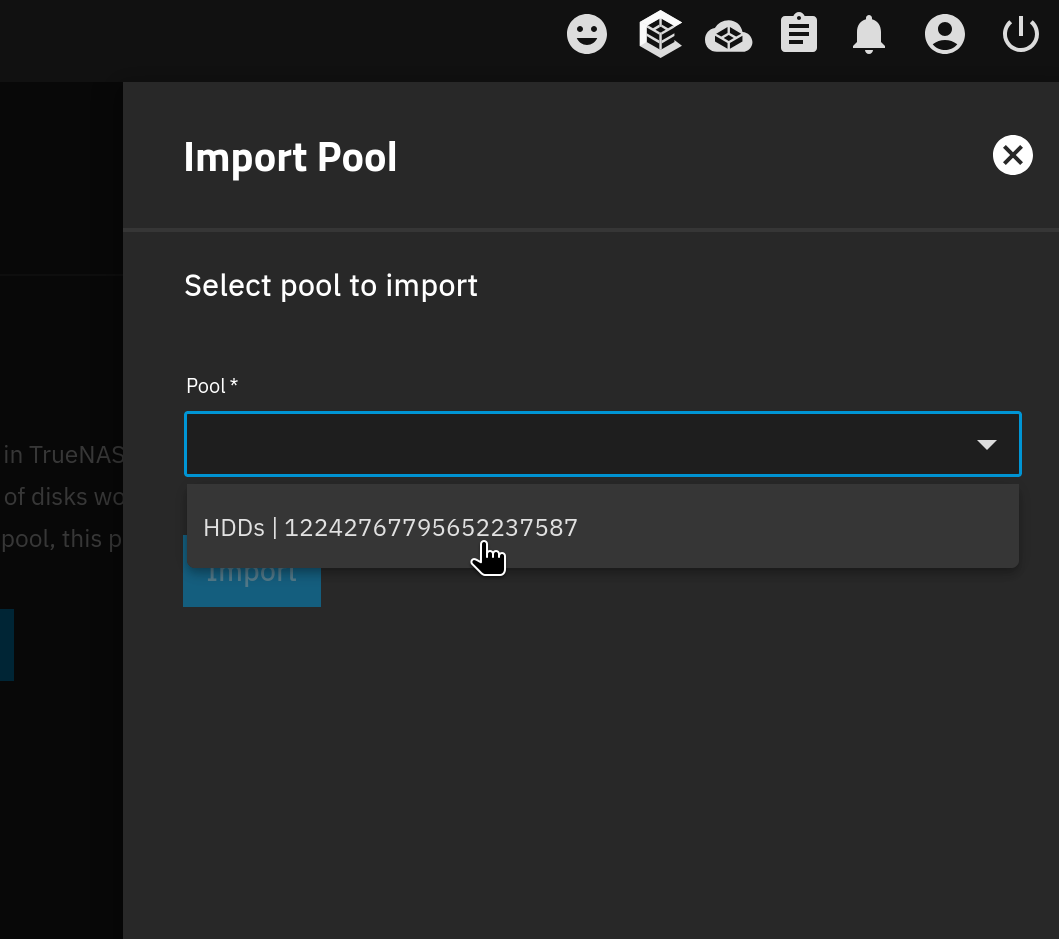
The pool will then import, this may take some time.
Pool import progress
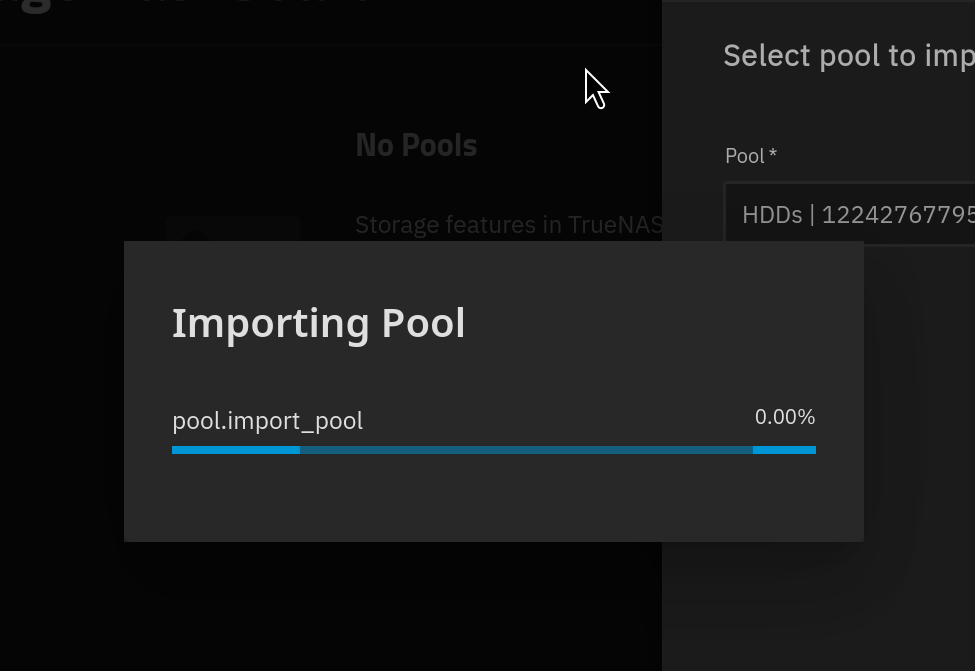
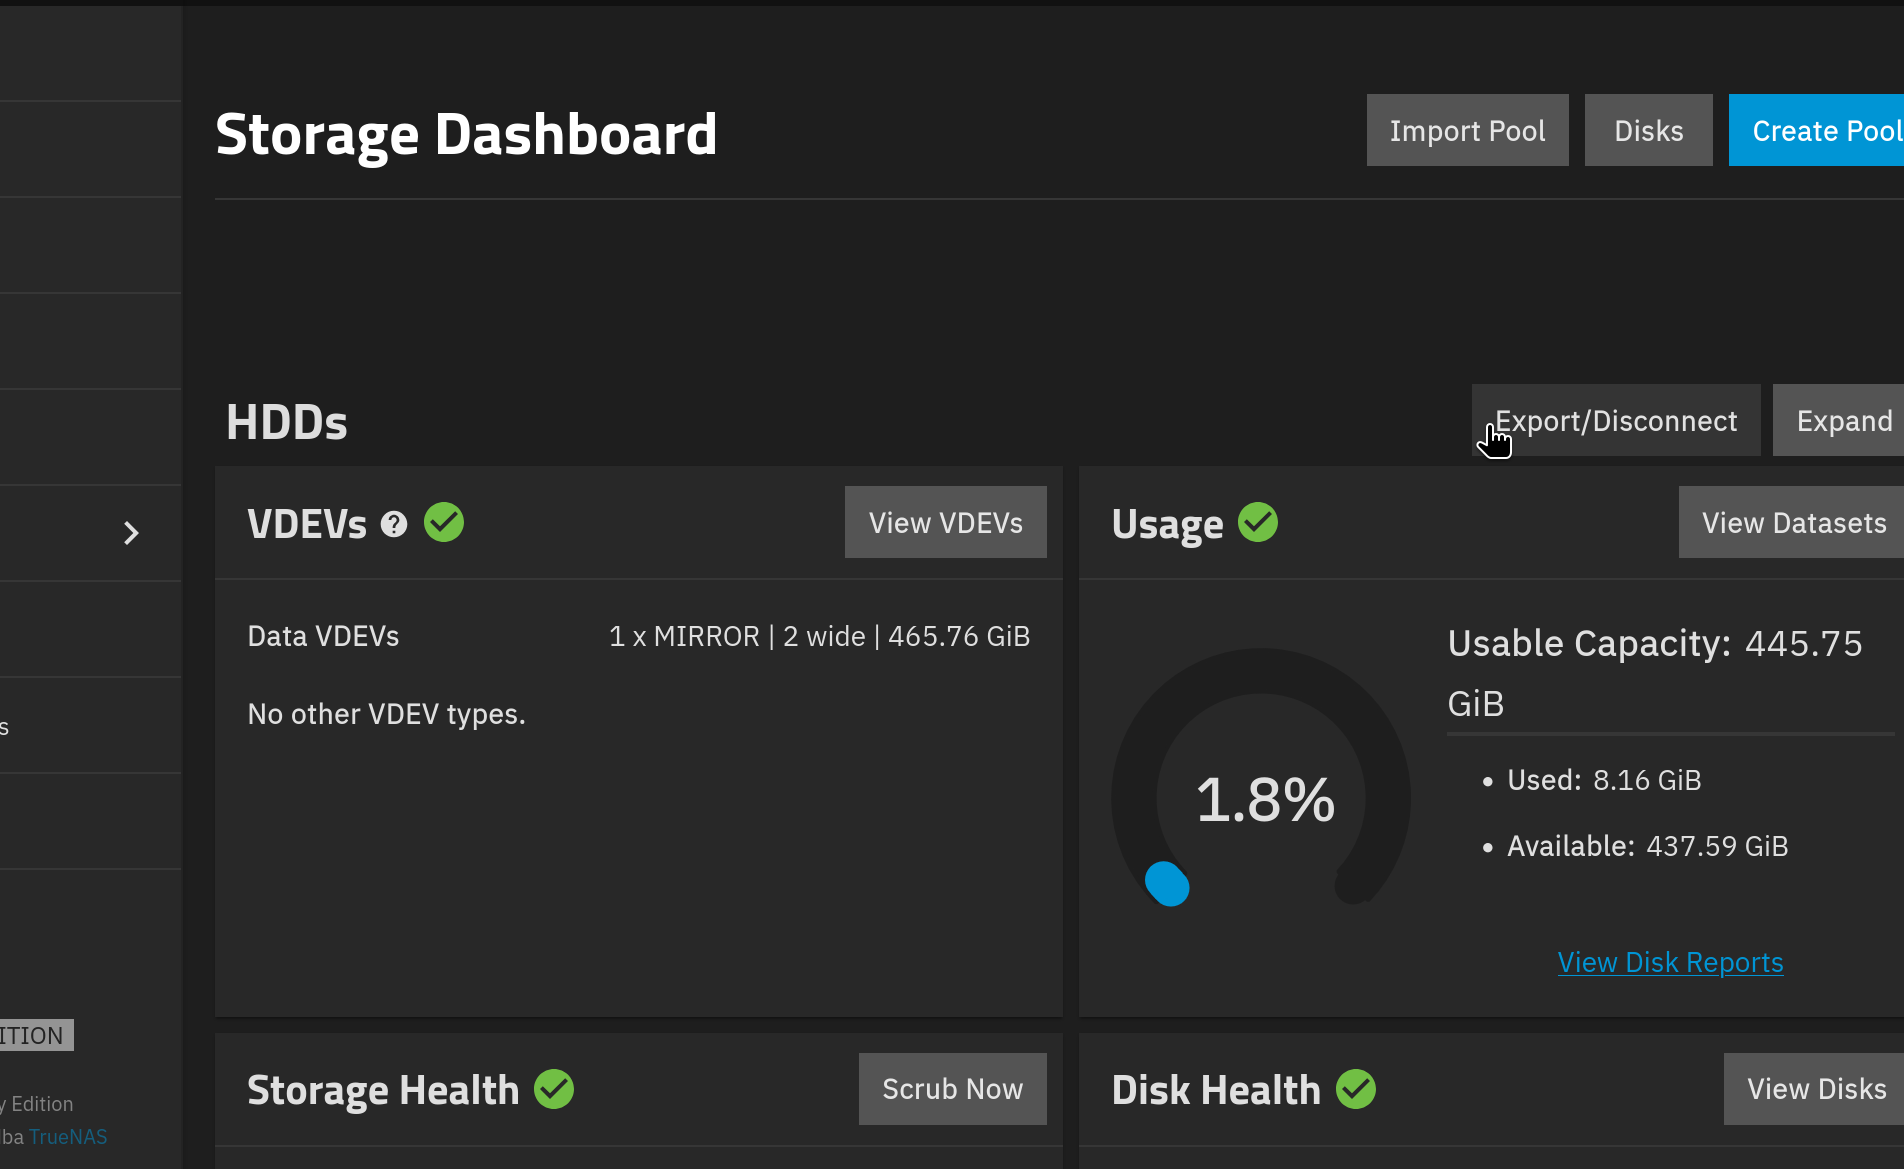
Once the pool is imported the Storage Dashboard will be populated.
Storage Dashboard after import
¶ Upload your config
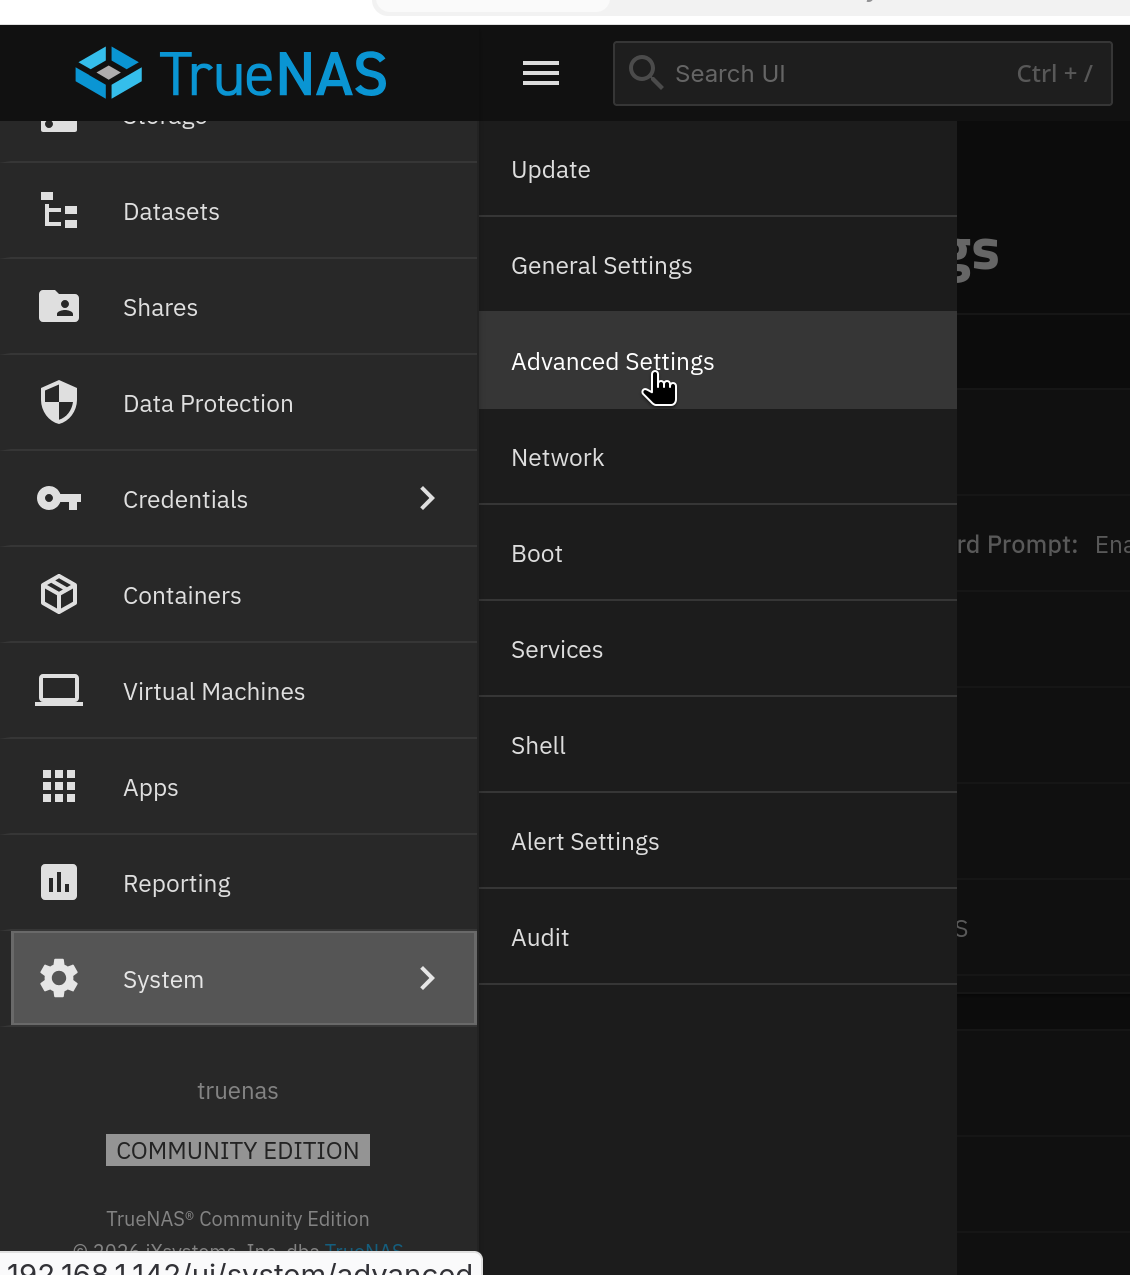
Go into System > Advanced Settings
Advanced Settings menu
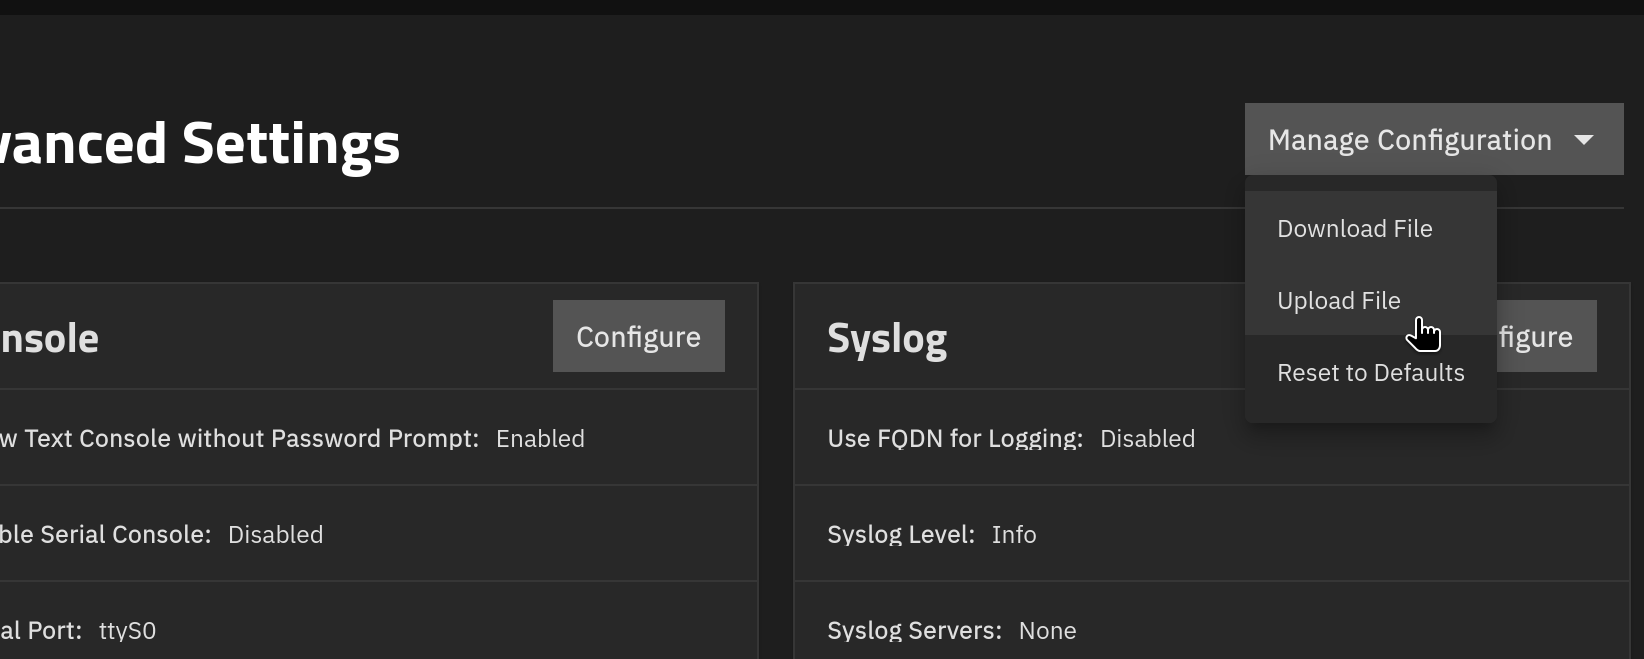
Then click Manage Configuration > Upload File. Manage configuration is found top right of the screen.
Upload File menu option
You will be reminded that your temporary password will now be replaced by the original password.
Password replacement warning
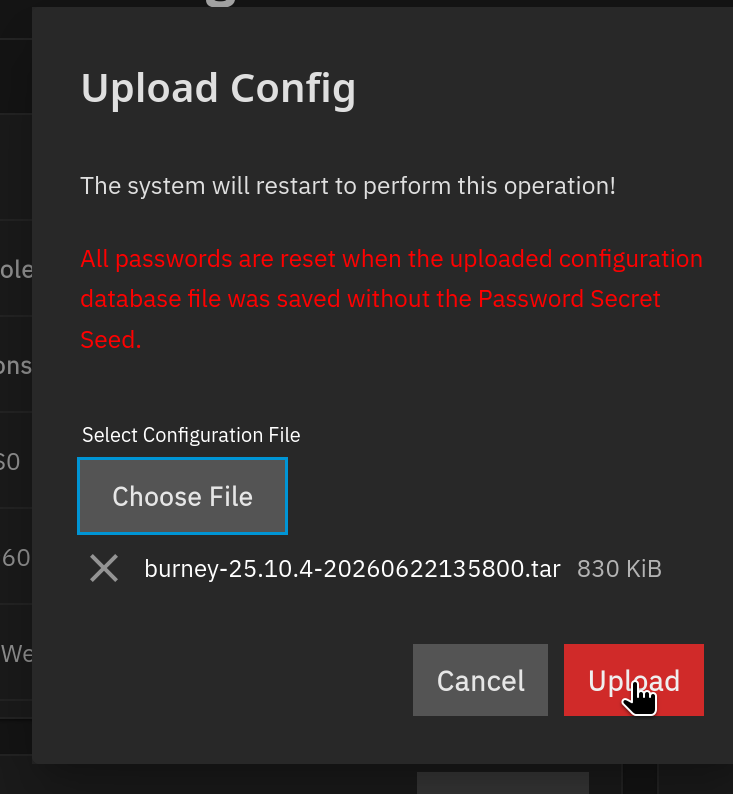
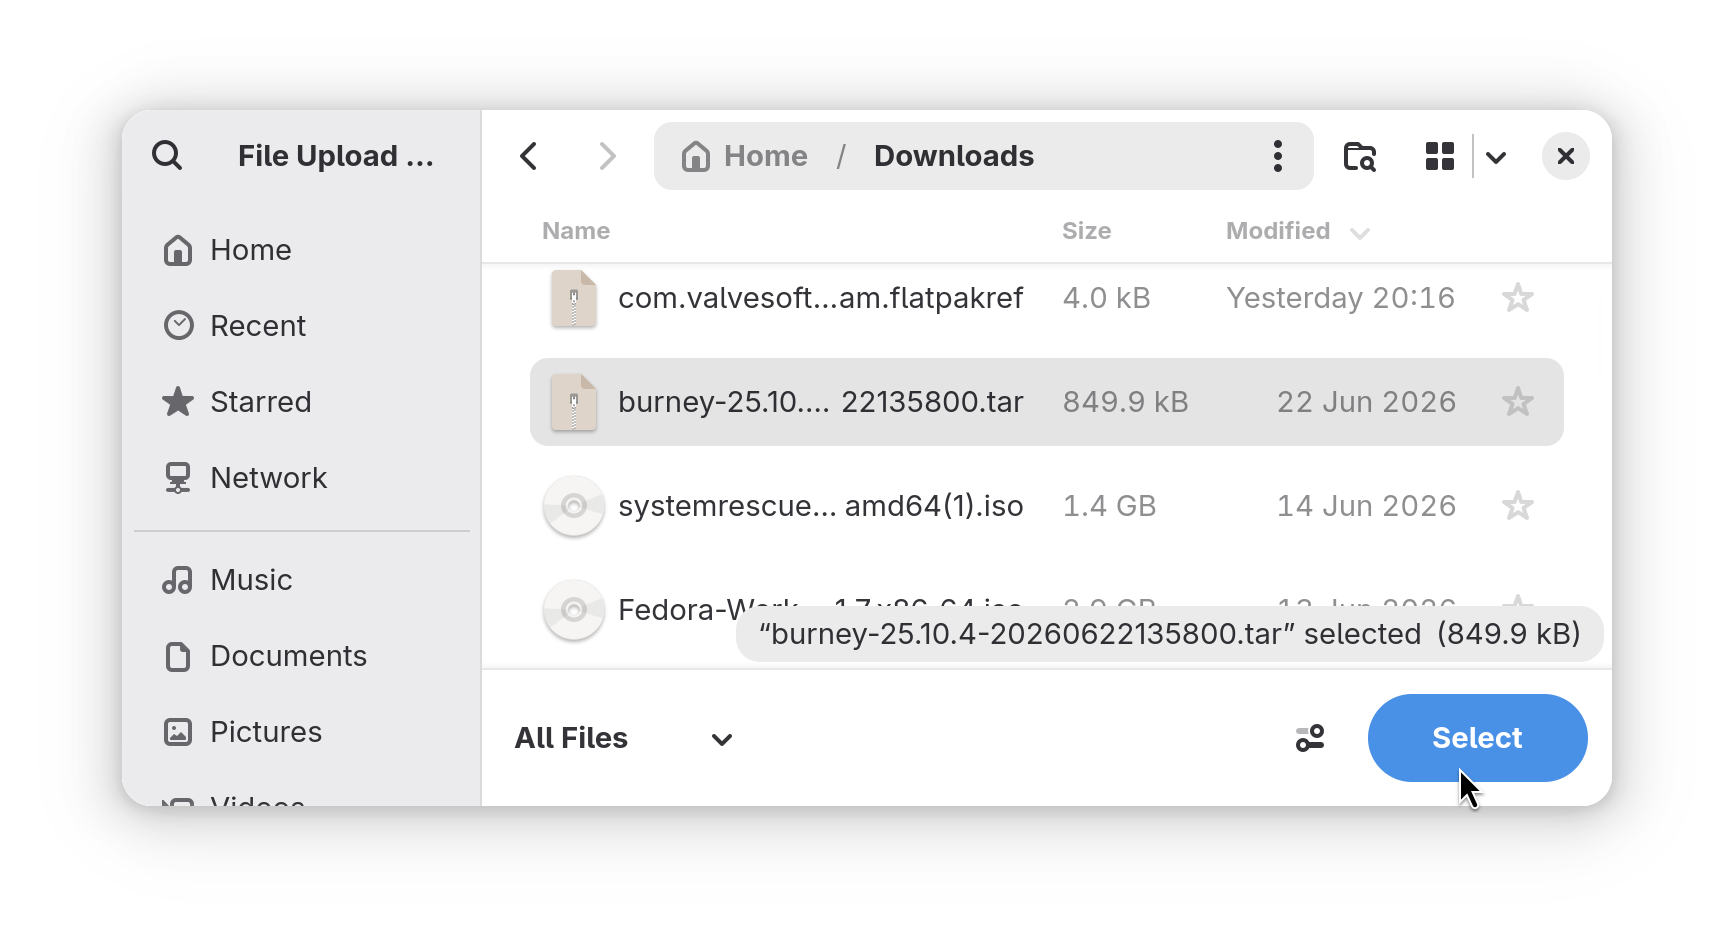
Navigate to and select your config file
Config file picker
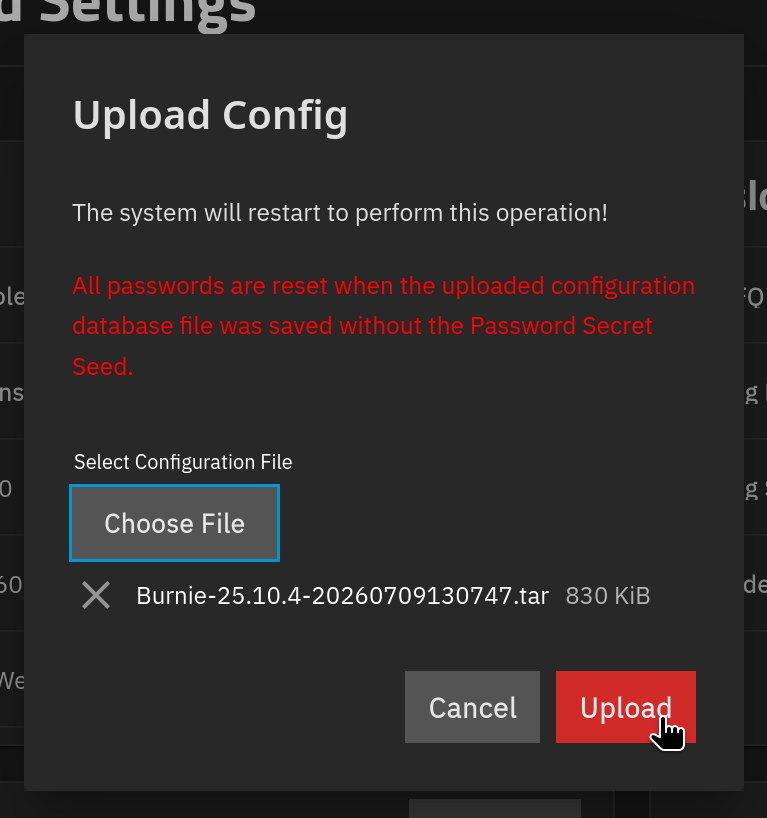
Click Upload
Upload button
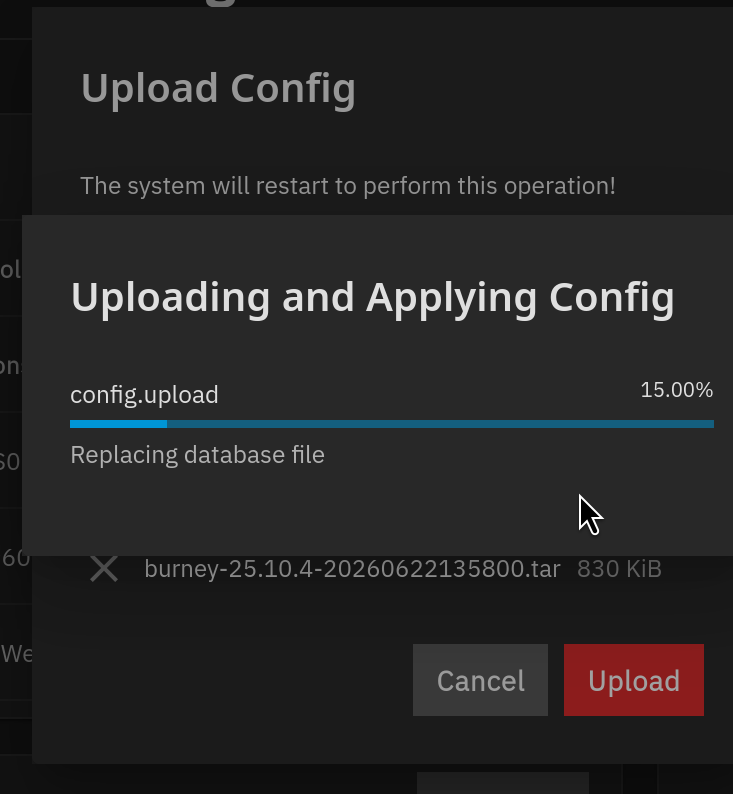
The import will run and the system will reboot.
Config import progress
While the system is rebooting you will see the error “Connecting to TrueNAS”.
Connecting to TrueNAS error
When the system has rebooted you will see the login screen.
TrueNAS login screen after reboot
When you log back in, you will need to use the original password which was noted at the start of the process. The temporary password is no longer used.
¶ Import keys for encrypted data and set up SMB share (if necessary)
If you had encrypted data with keys (as opposed to passphrases)
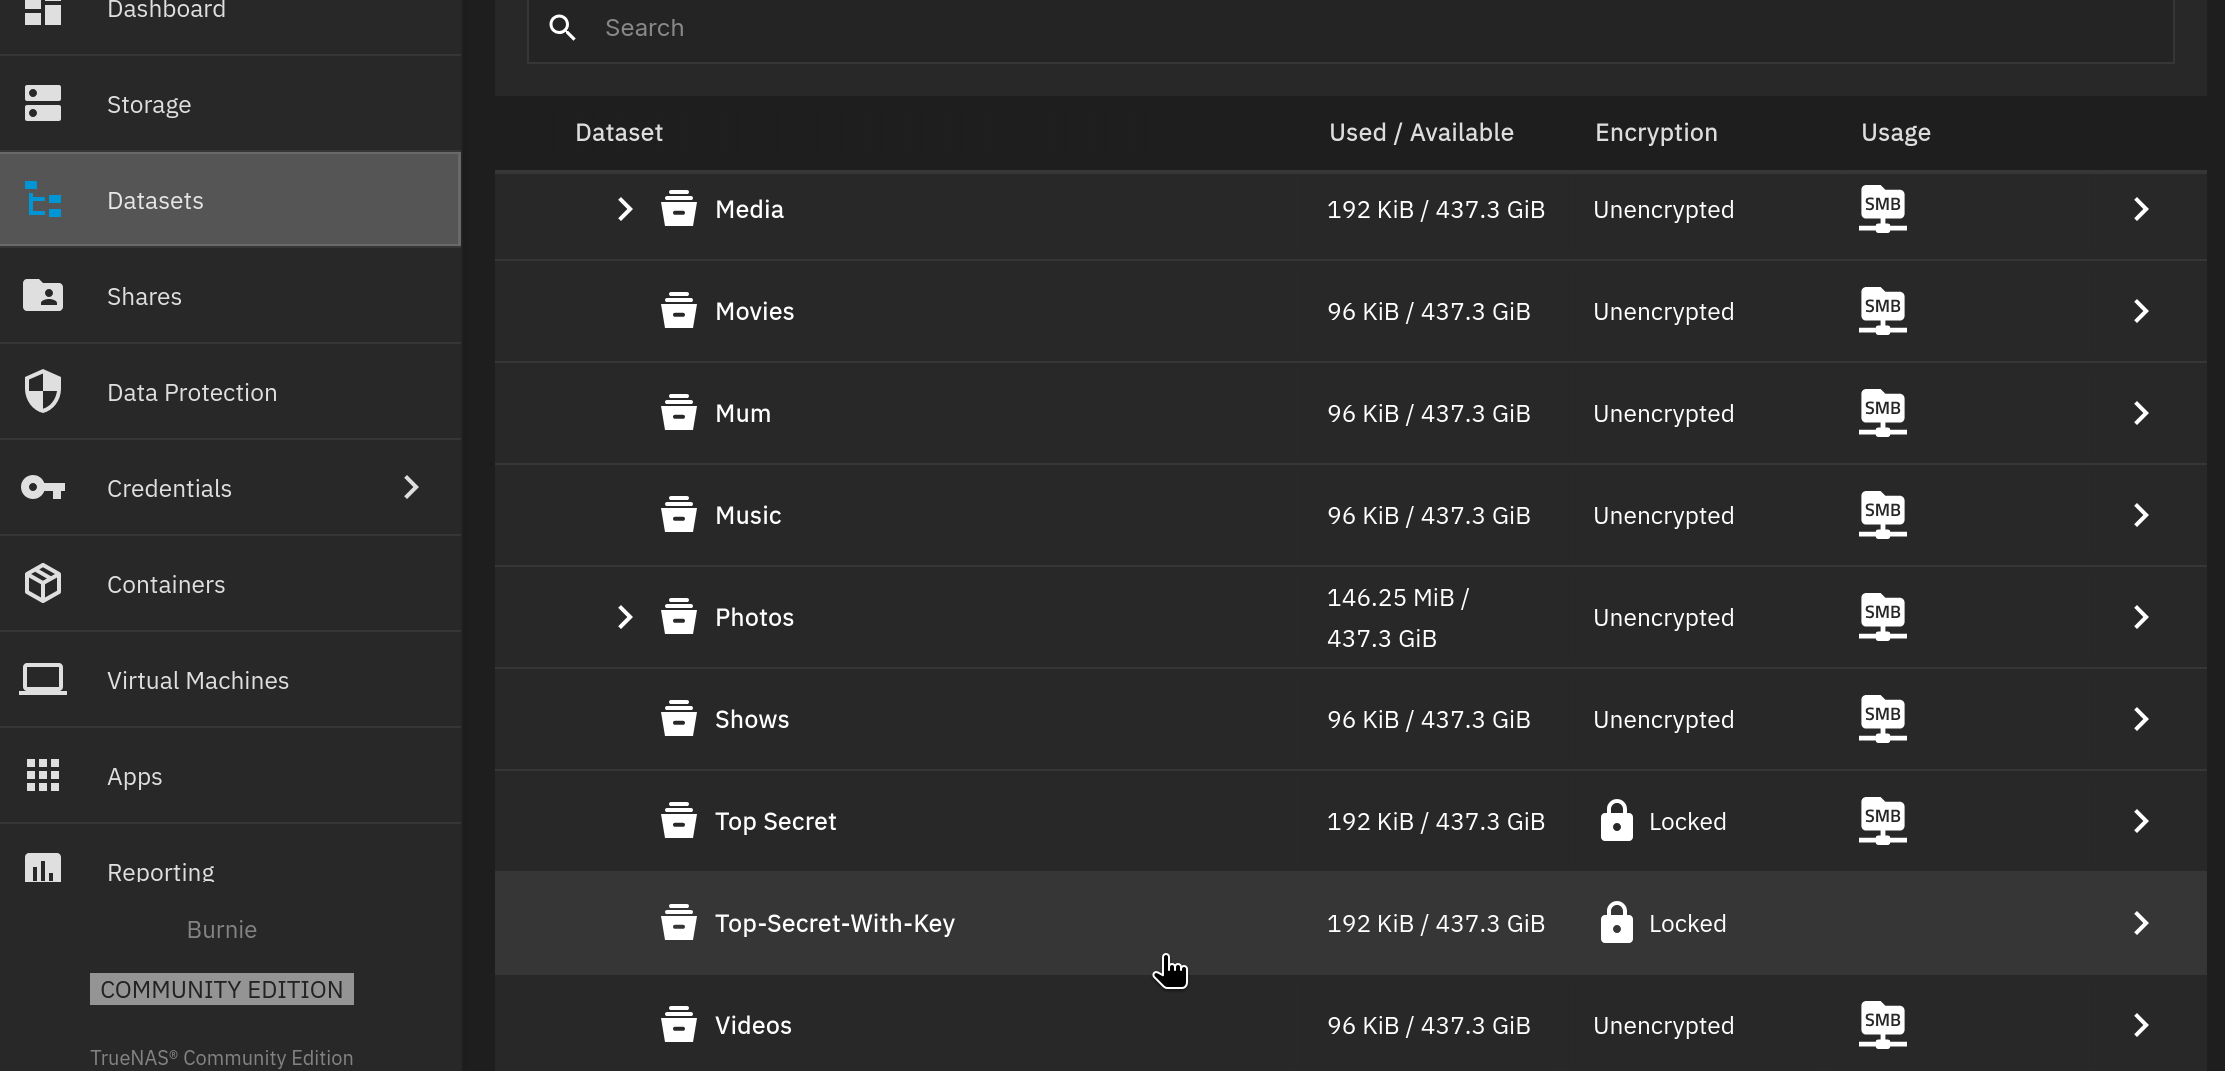
Go to Datasets and click the encrypted dataset
Encrypted dataset in Datasets list
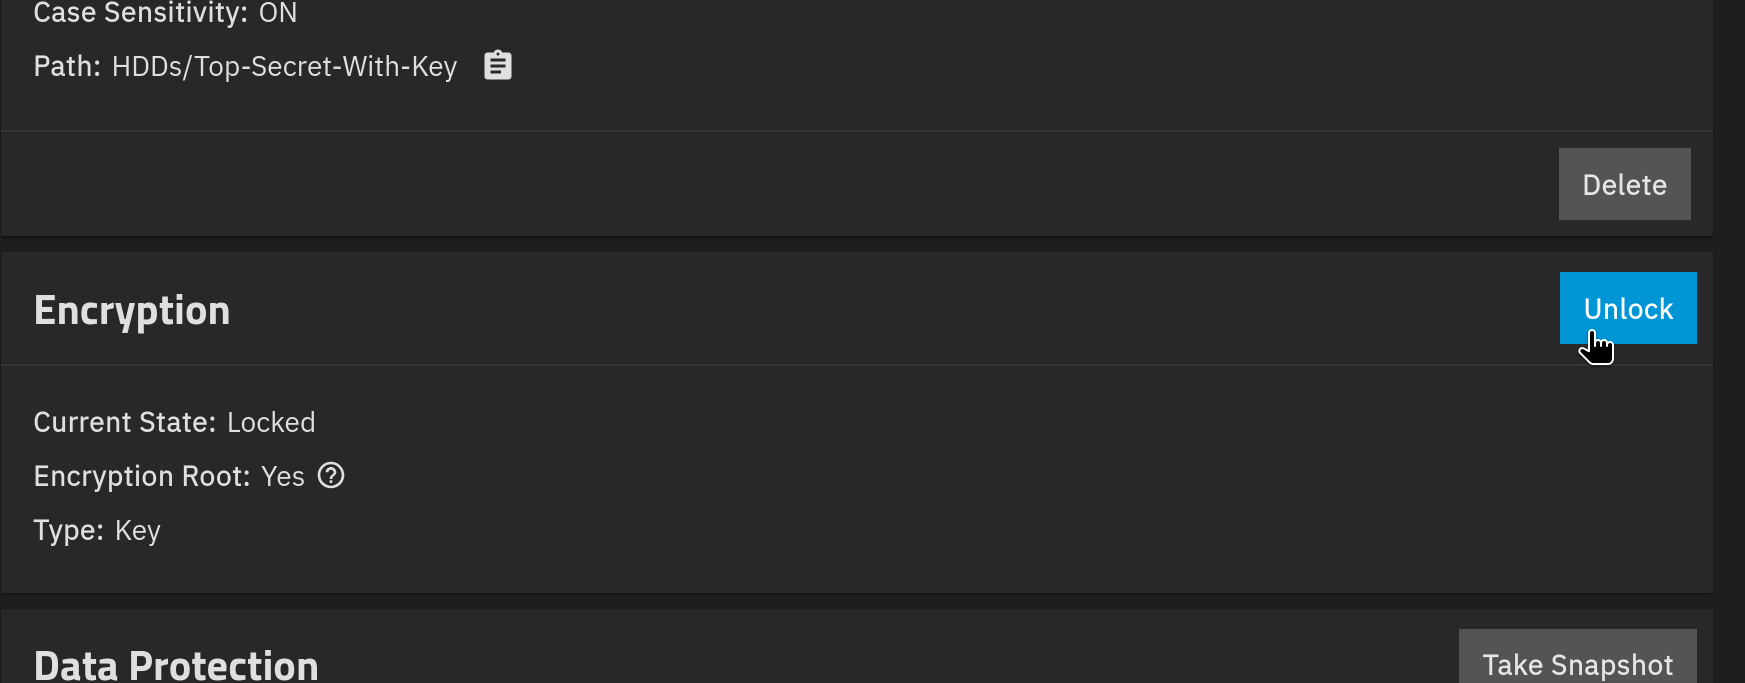
Scroll down to Encryption and click Unlock
Unlock button in Encryption section
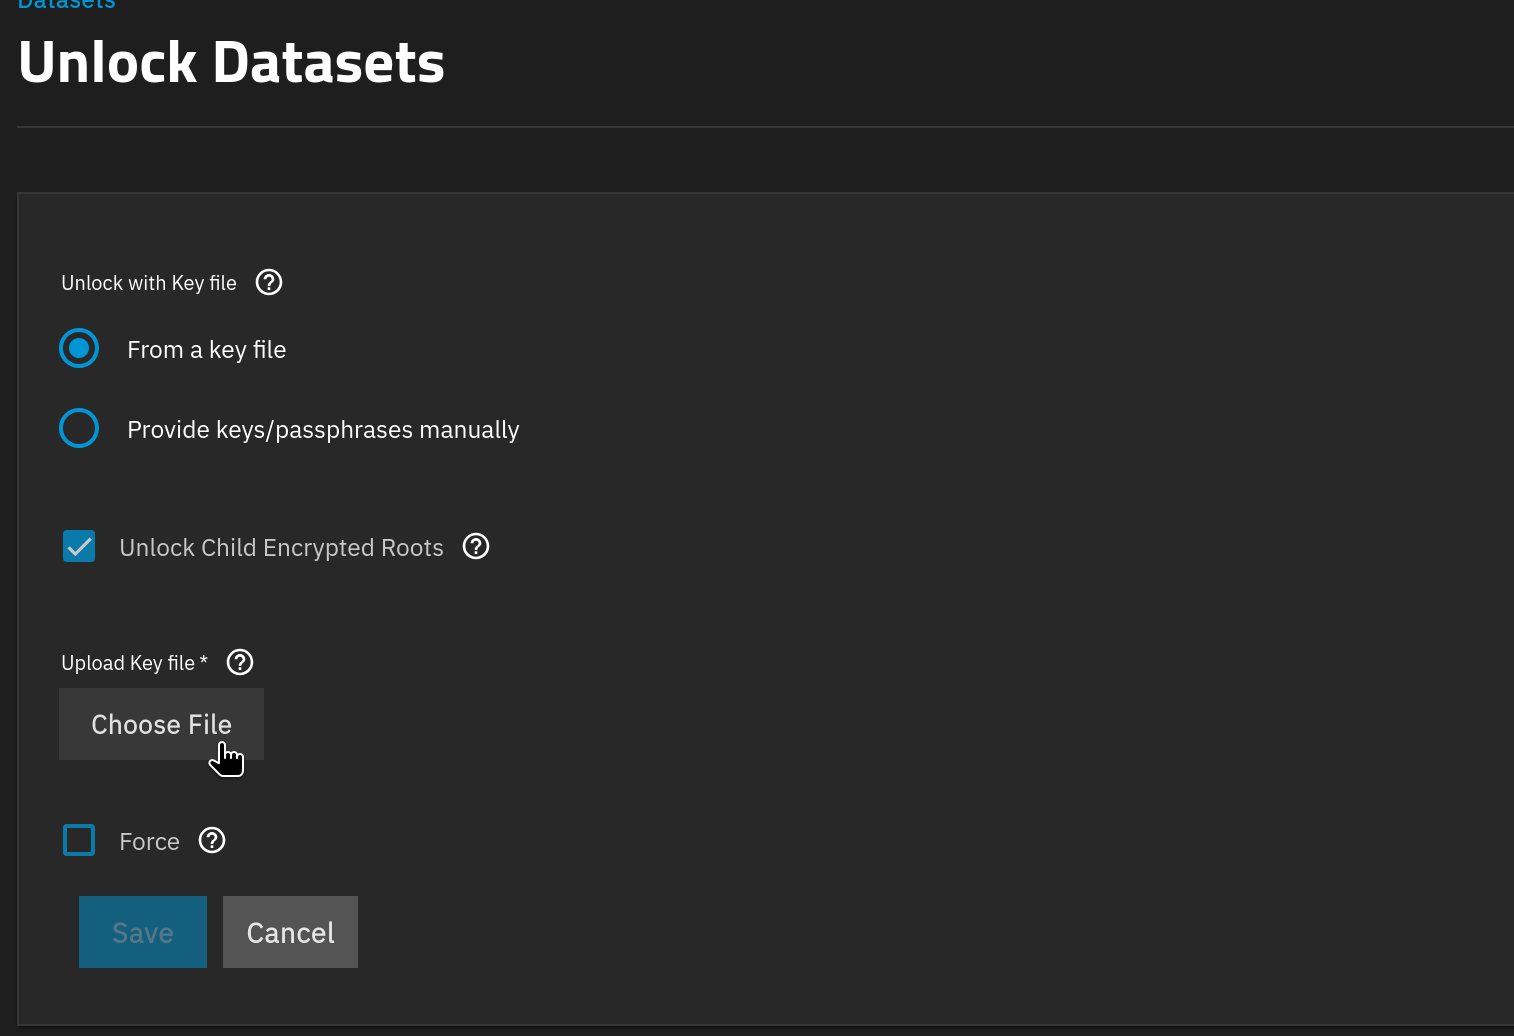
Click Choose File
Choose File button
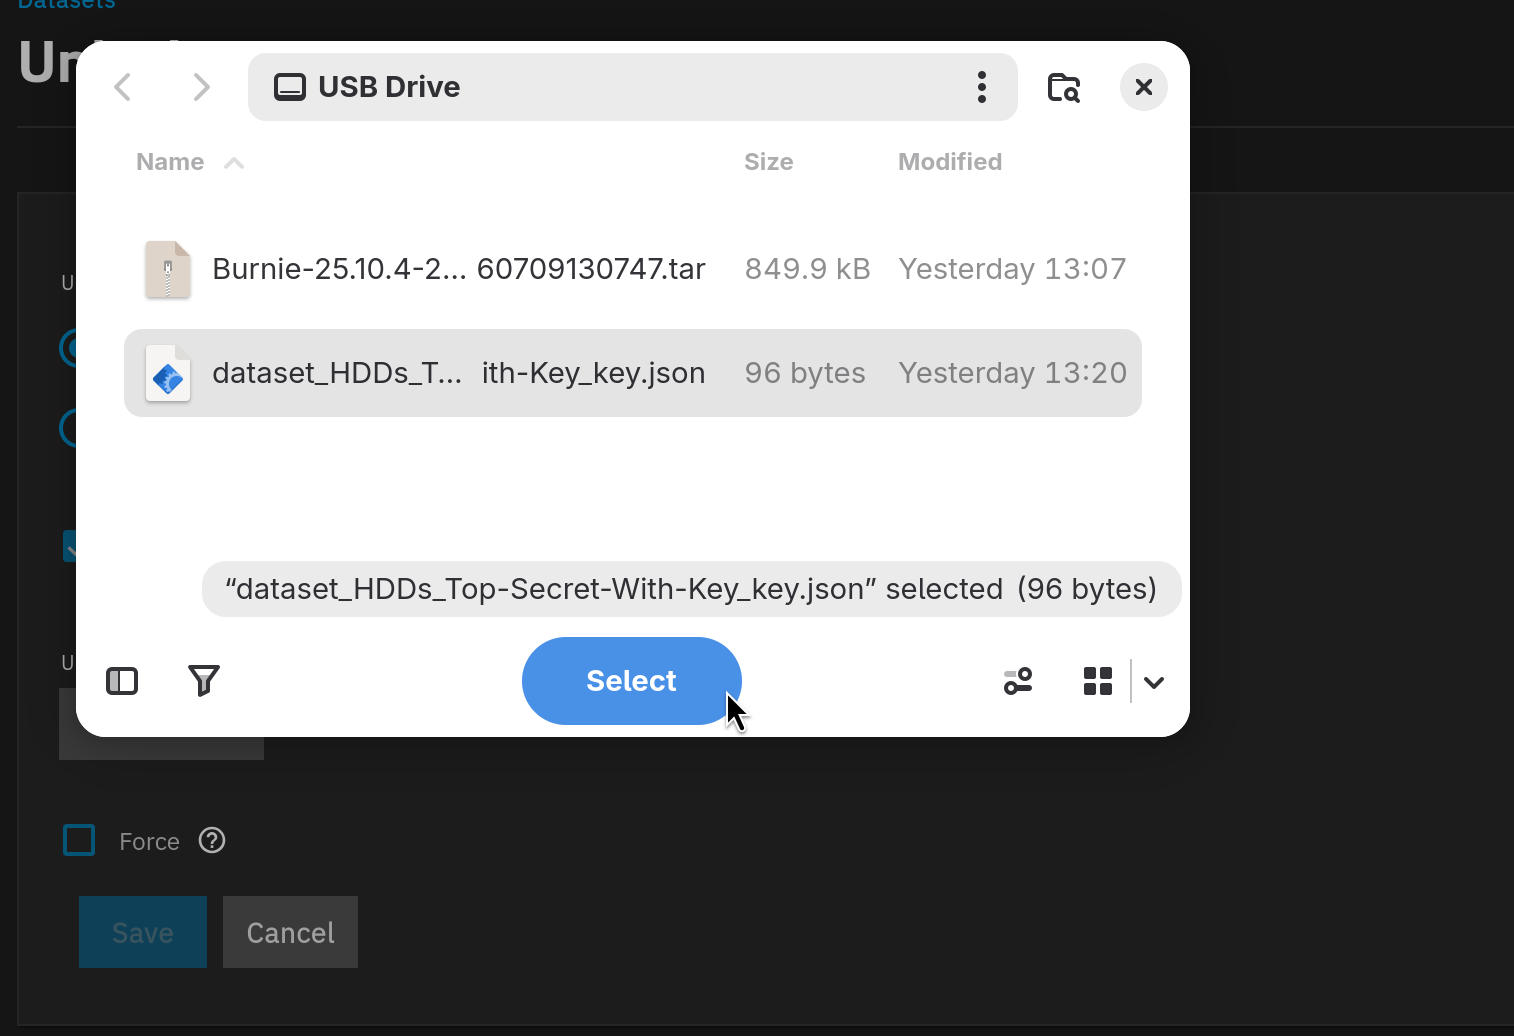
Choose your keyfile from backup
Keyfile selection dialog
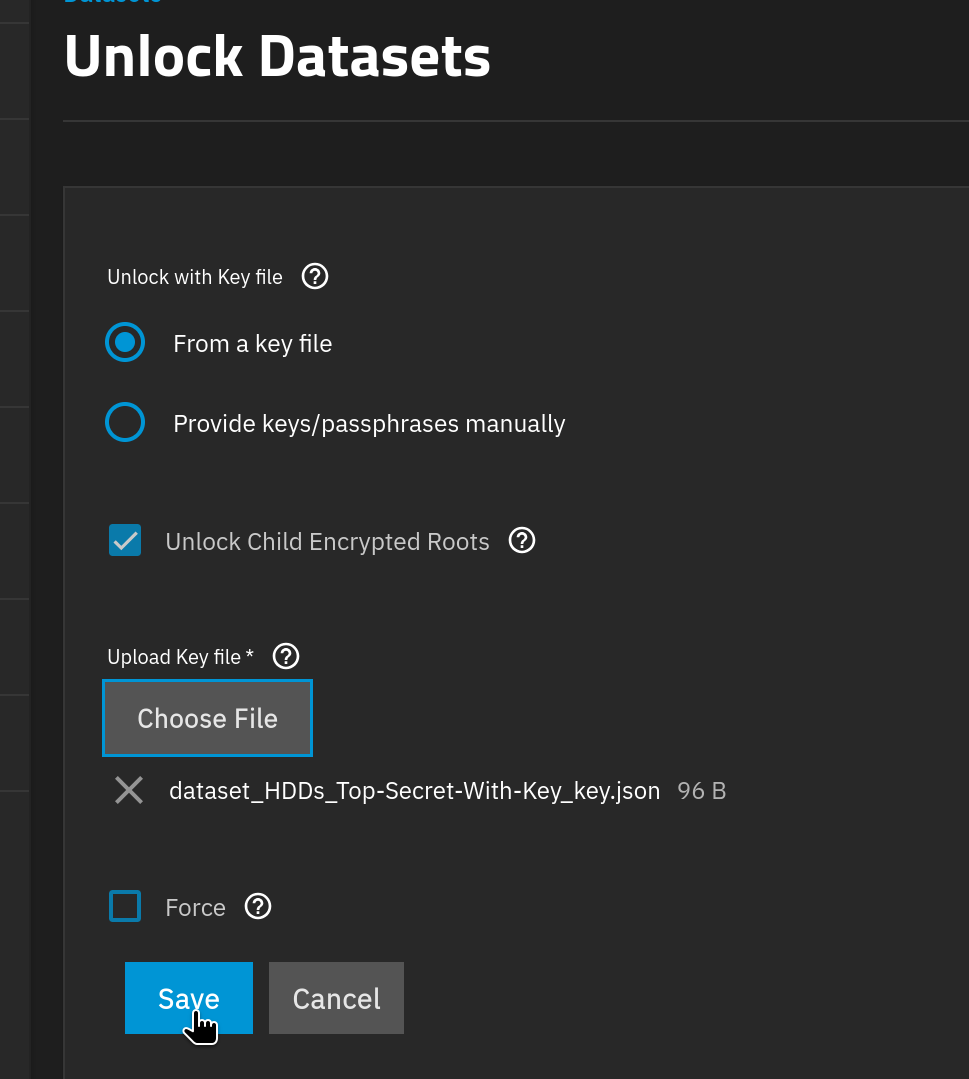
Click Save
Save button
Click Continue
Continue button
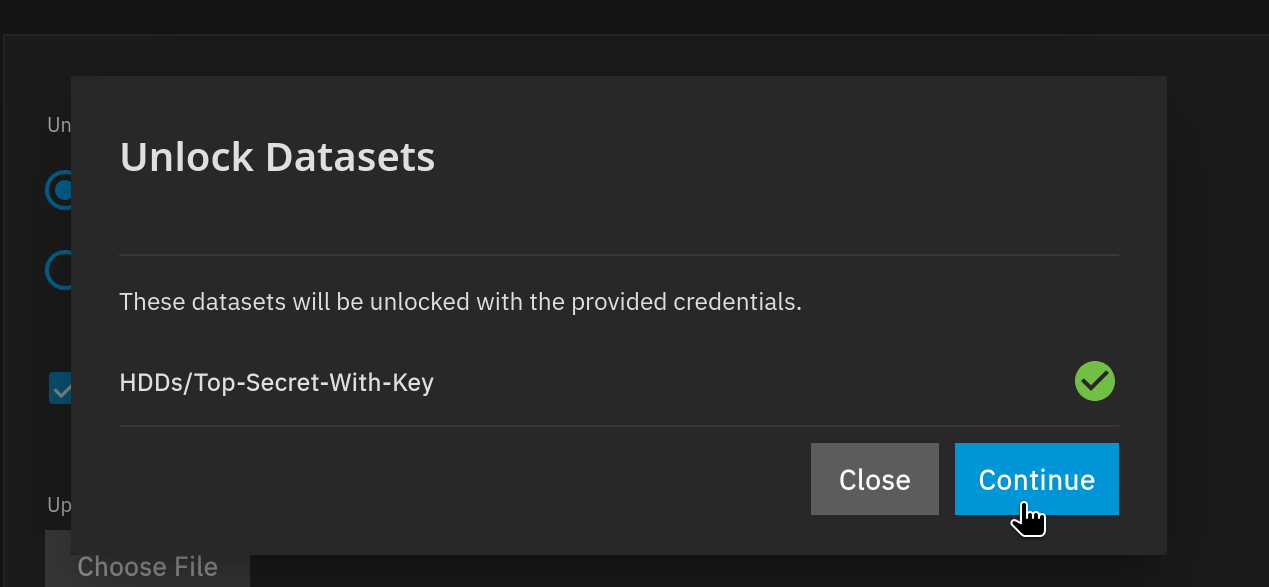
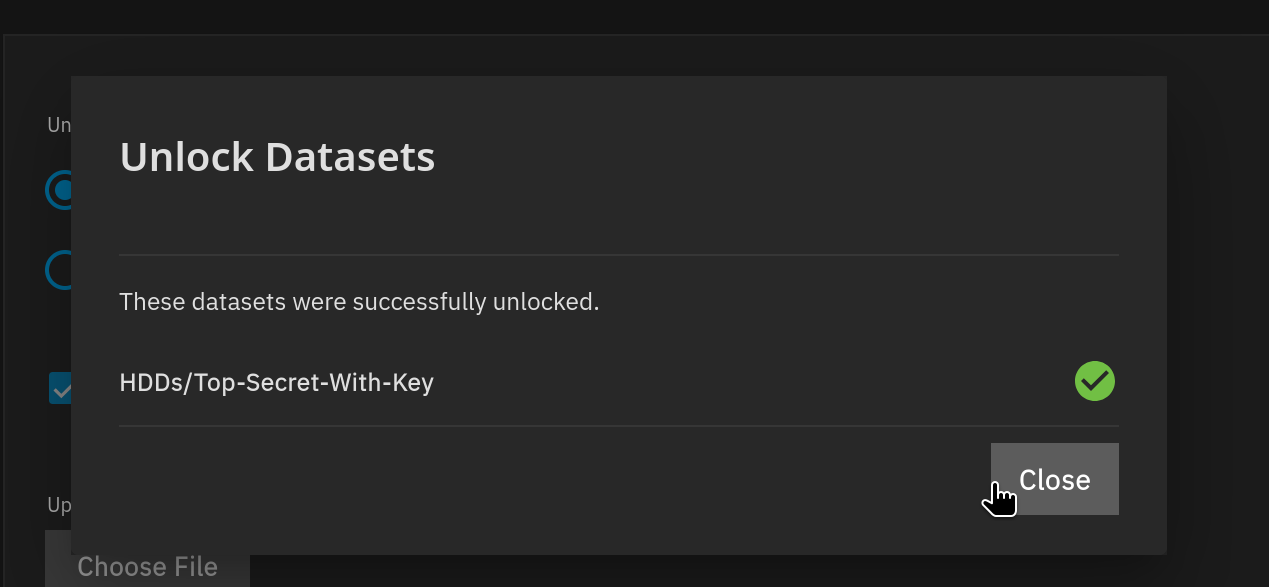
When the process has finished you can click Close
Unlock completed dialog
Additionally, as the key encrypted dataset was created in TrueNAS it needs an SMB share set up to be accessible in HexOS (if it doesn't already have one)
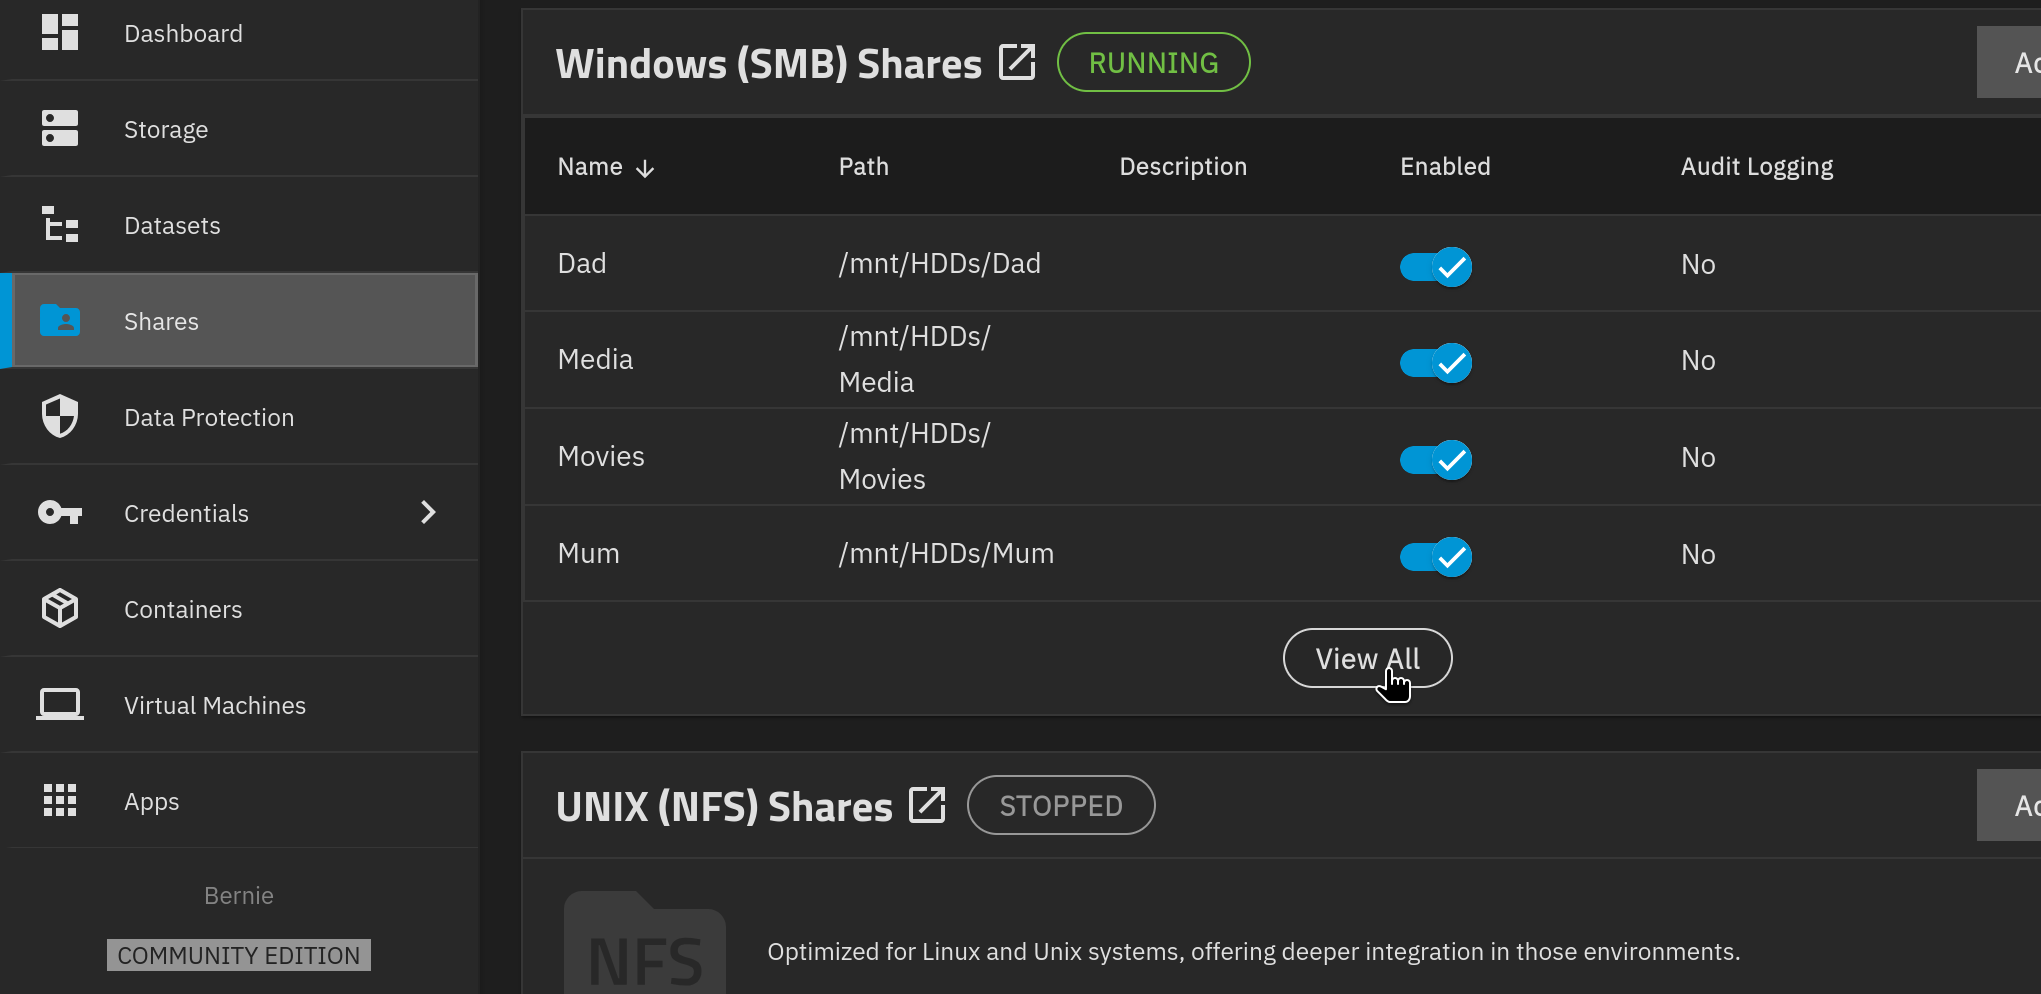
Go to Shares and click the View All button to see if the encrypted dataset has a share set up.
View All button on Shares screen
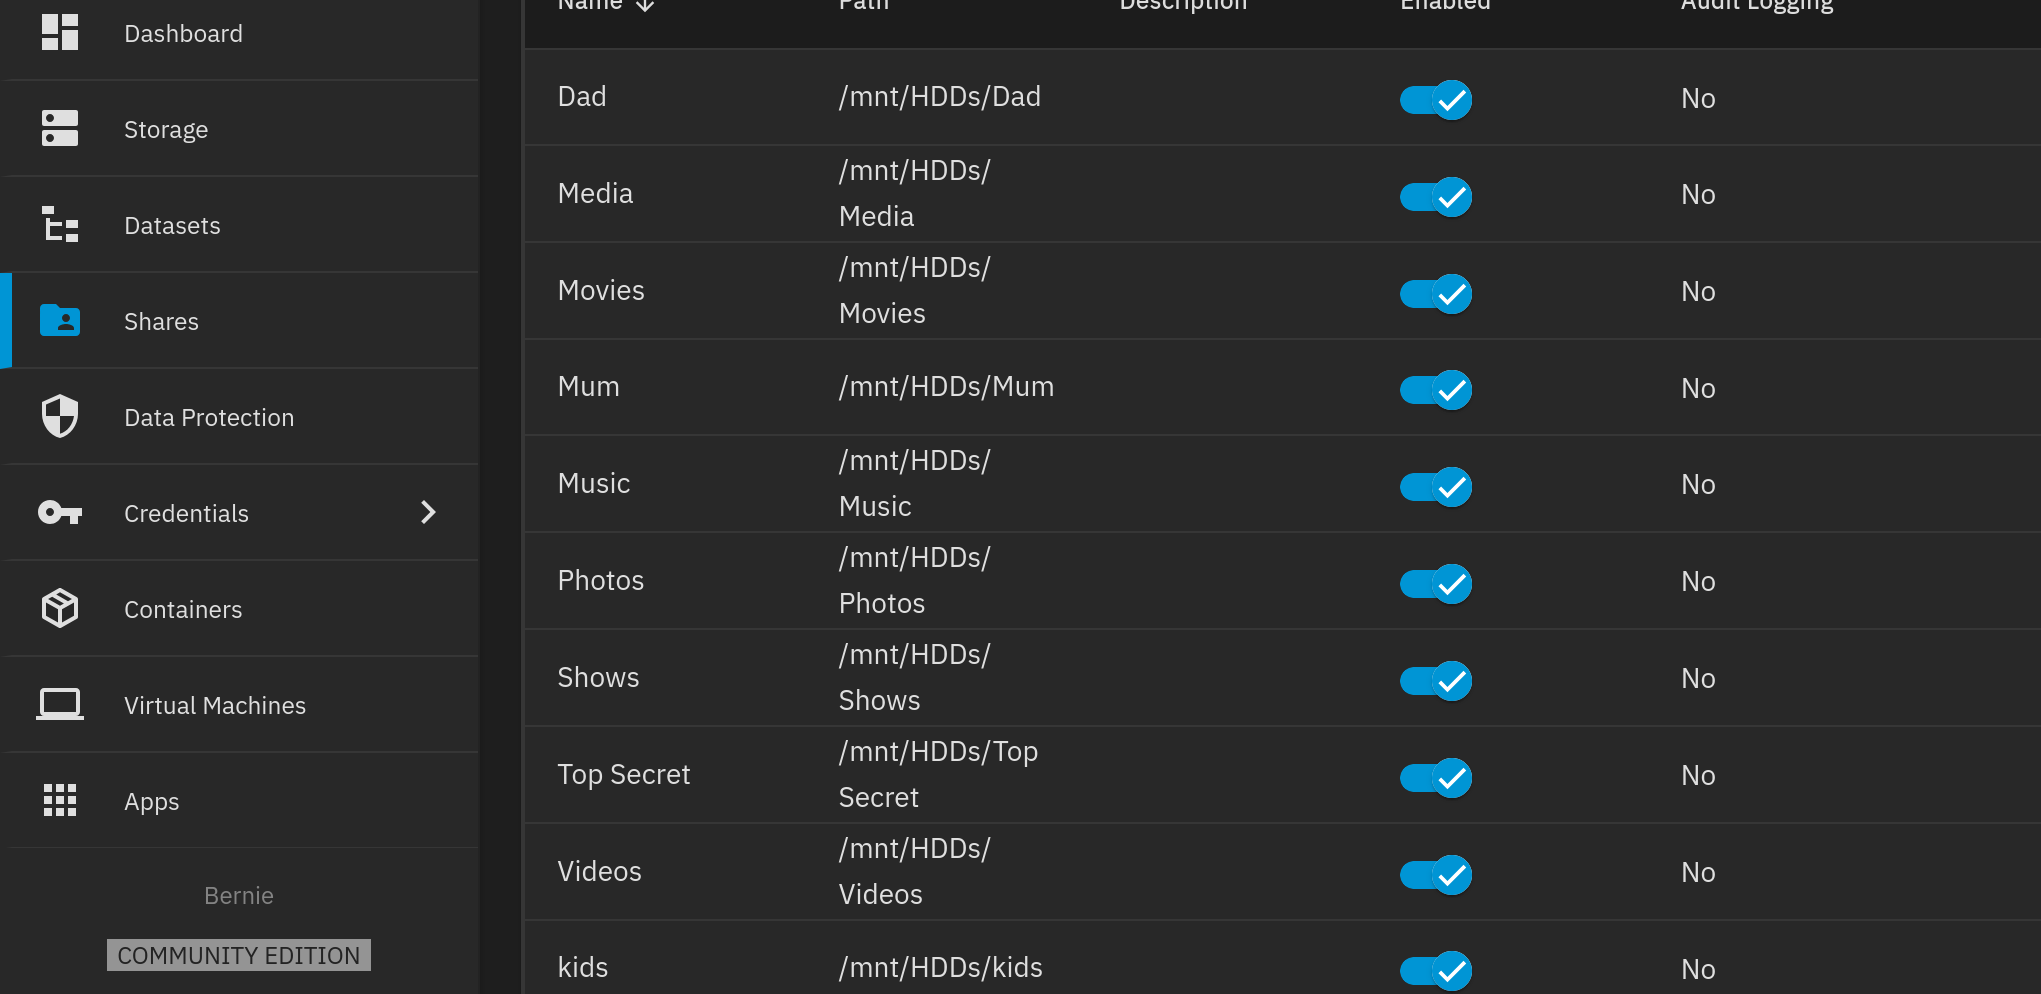
In this example the dataset Top-Secret-With-Key is not on the list.
List of existing shares
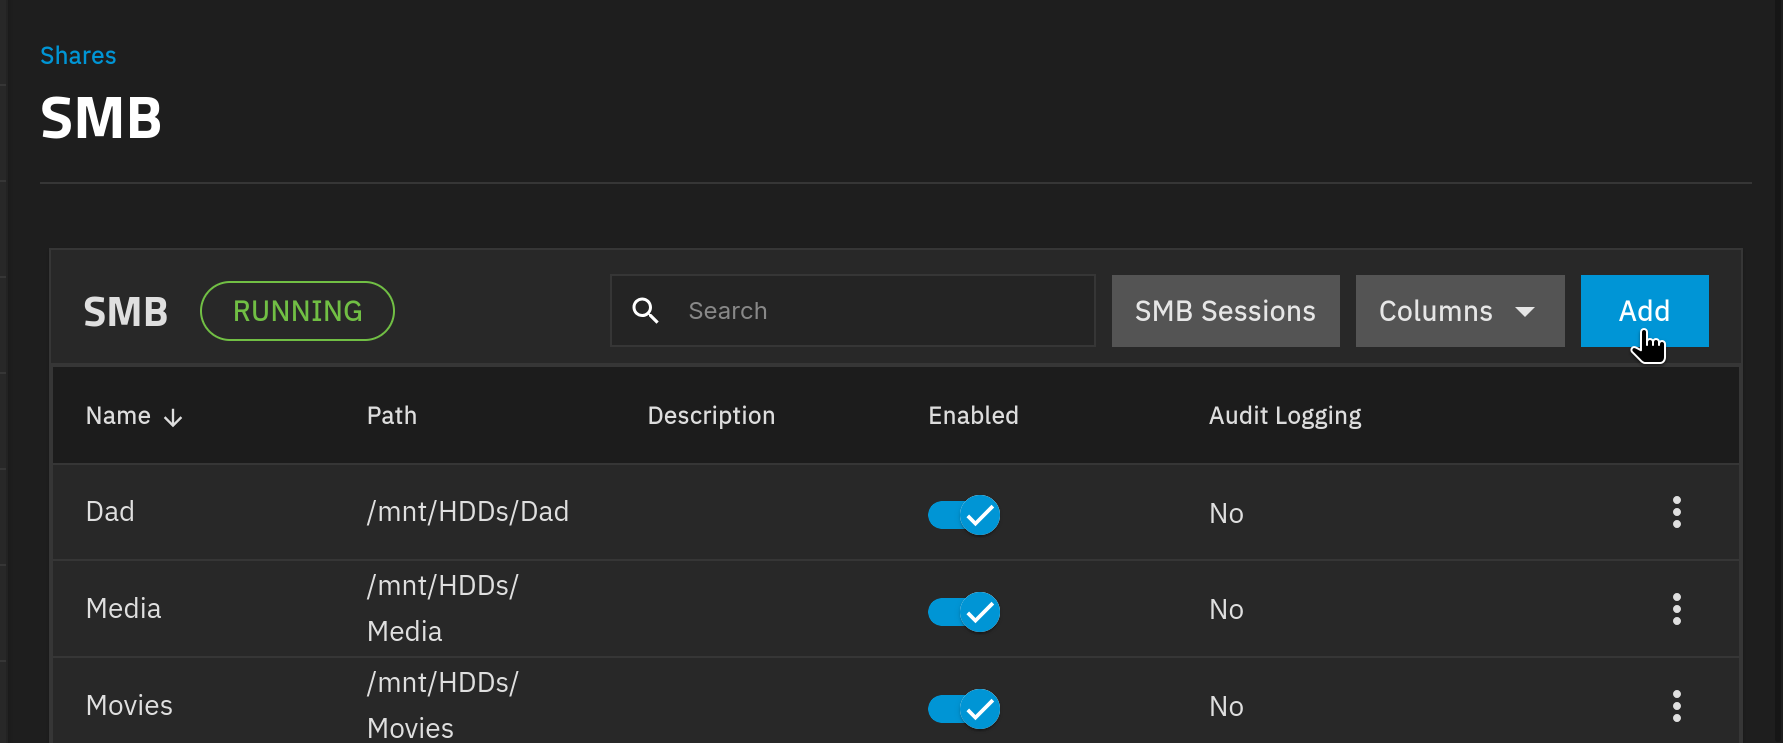
To set up the share click Add which is towards the top right
Add share button
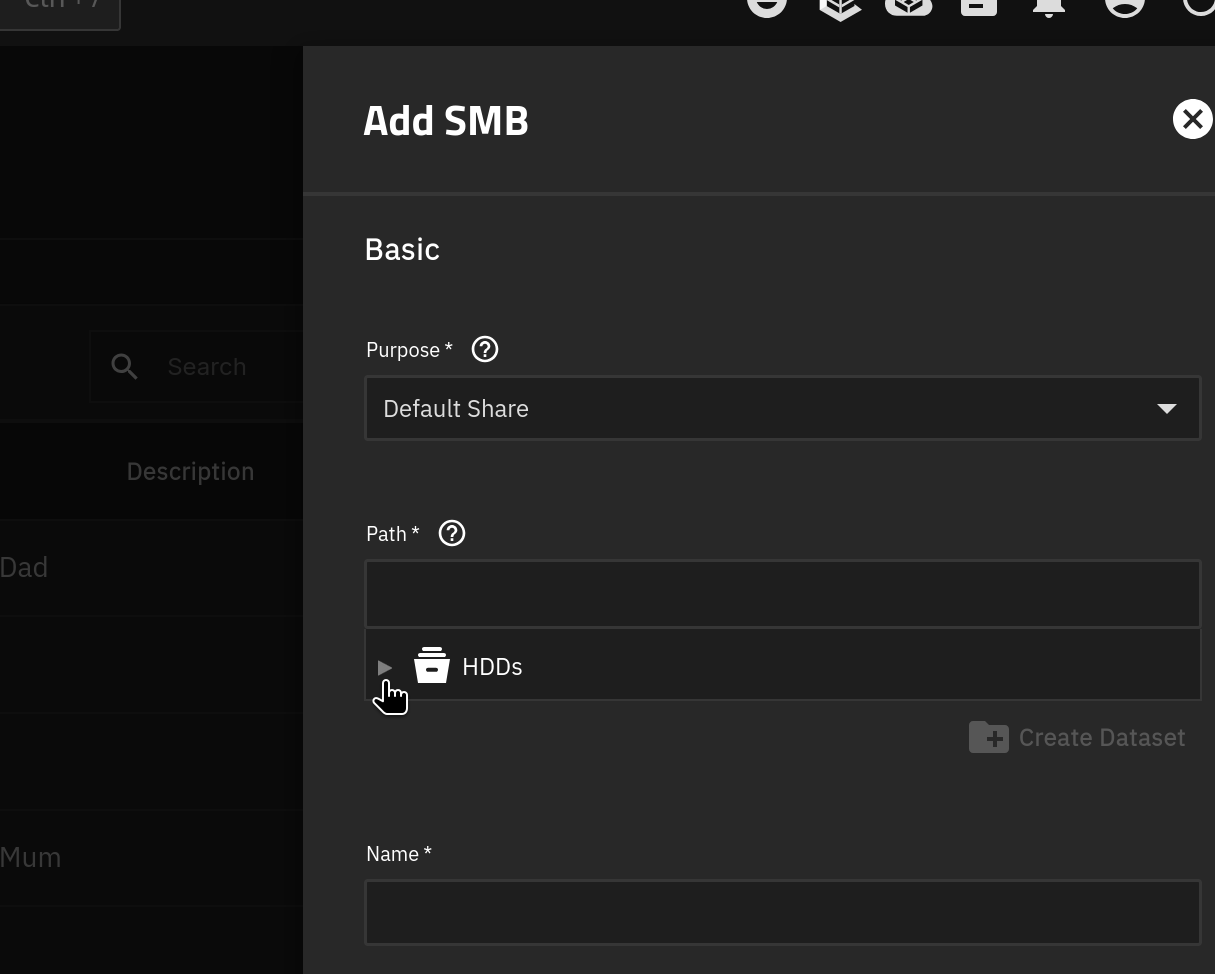
Click the arrow to find the dataset
Dataset path browser arrow
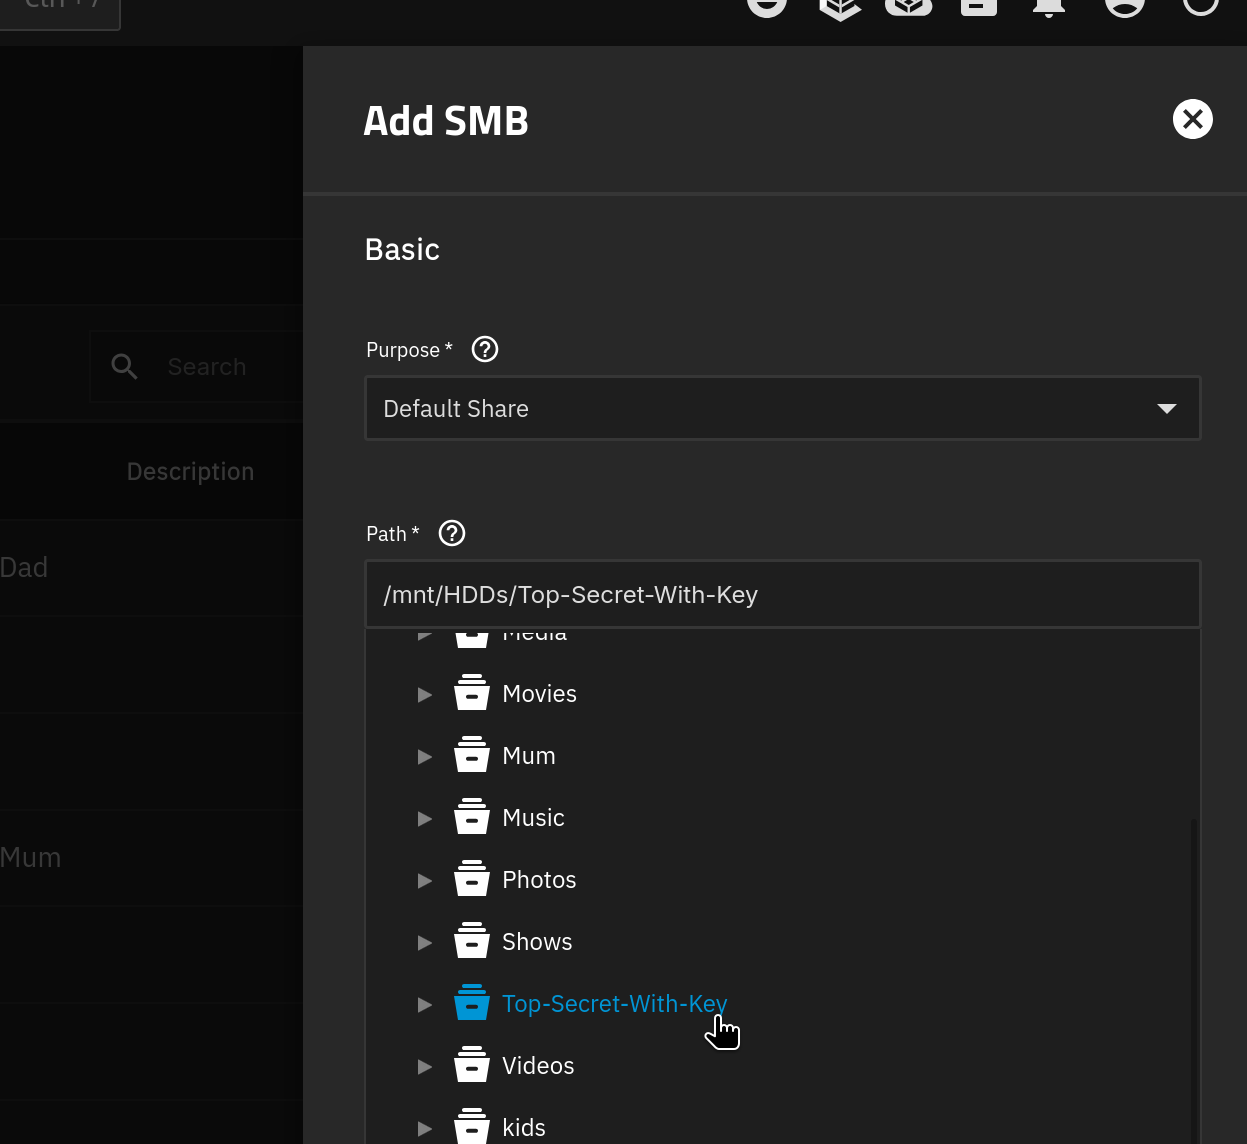
Click the dataset in the list
Dataset selection list
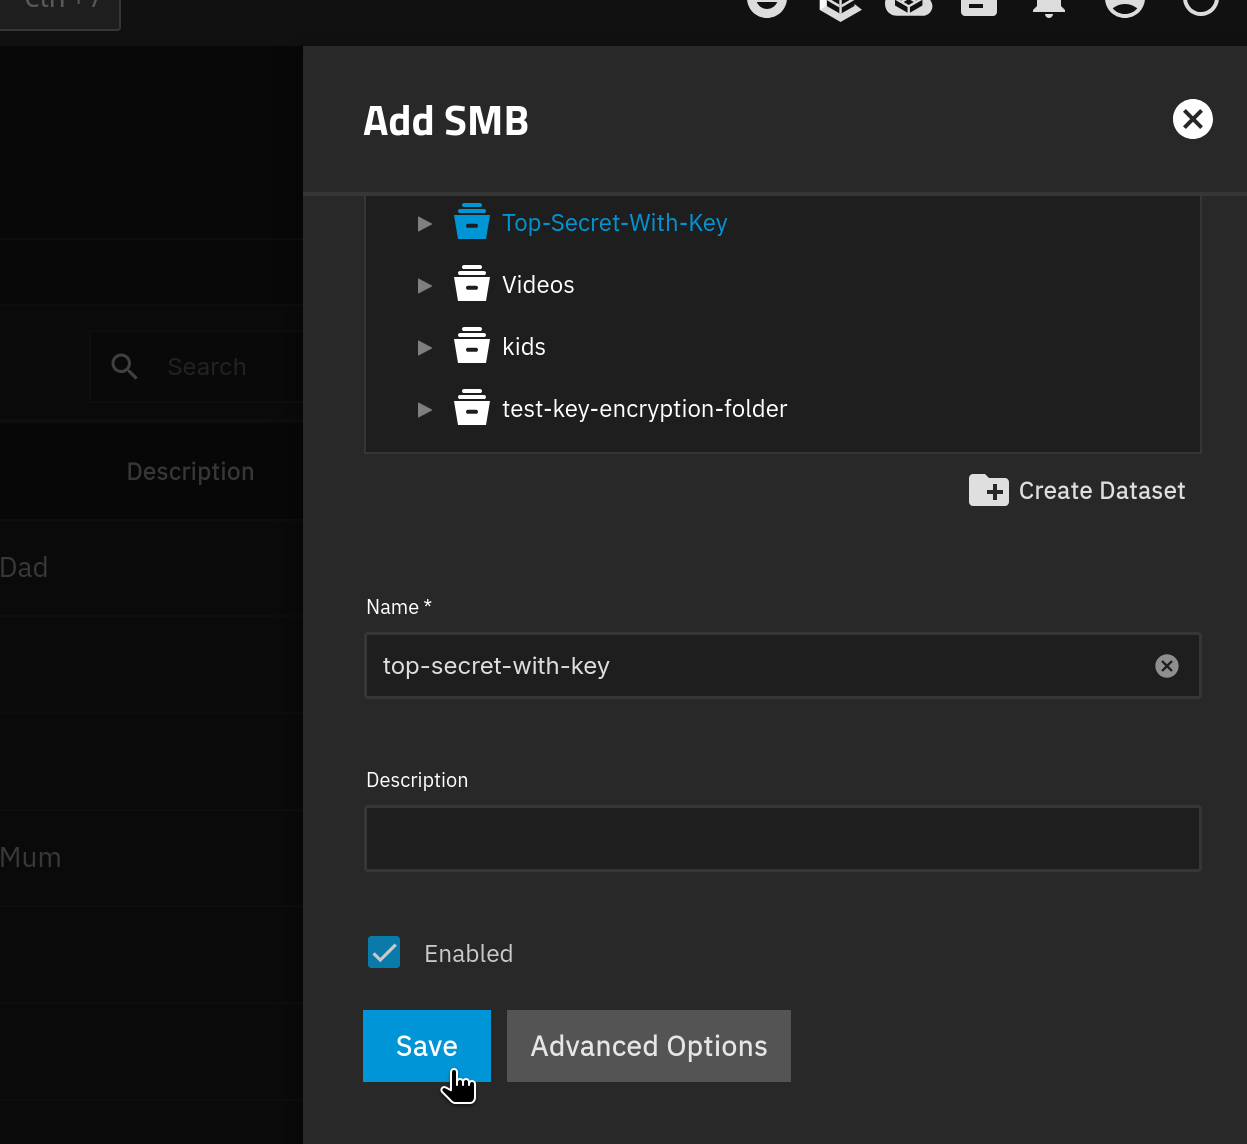
Then scroll down to the bottom of the dialog to click the Save button
Save button on share form
You should now see your new share on the list
New share in shares list

Please note that, as of writing, this folder needs to be locked and unlocked via the TrueNAS interface.
When unlocked, the data will be accessible via HexOS. If a folder encrypted with a key made in TrueNAS is locked, it cannot be unlocked within HexOS: unlock it in TrueNAS with its key file. Folders made in HexOS are different: a folder with an Autogenerated key unlocks with your HexOS account, and a folder with a passphrase unlocks with its passphrase (see Restore folders HexOS finds on your pools).
¶ Set apps pool correctly (if necessary)
Go to the Apps screen. If the apps show Running in the Status column then this step can be skipped.
If they are not running or not visible you need to choose the correct pool for apps.
If you are unsure which pool is the apps pool, it will be the first one you set up when the system was first built. If you set up multiple pools at once it will be the first pool that used SSDs.
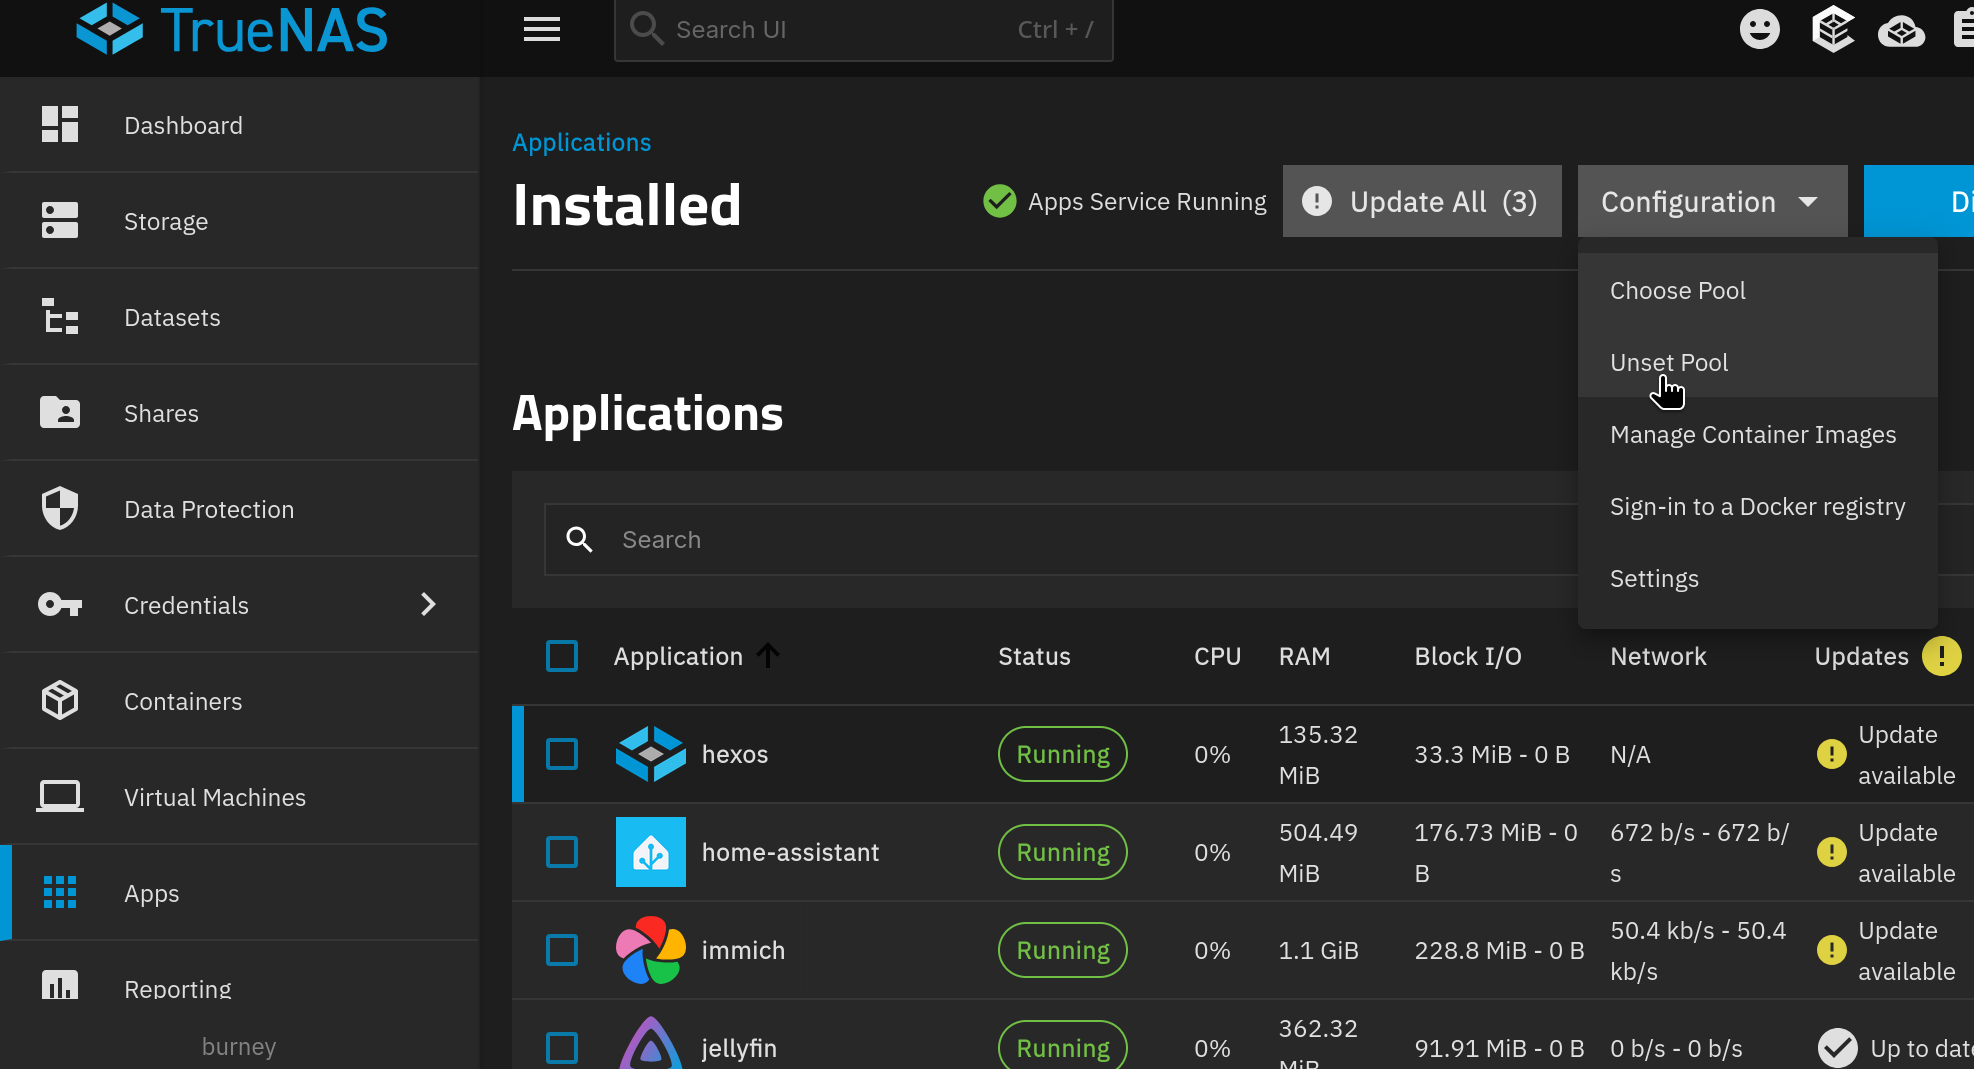
Go to Apps > Configuration > Unset Pool
Unset Pool menu option
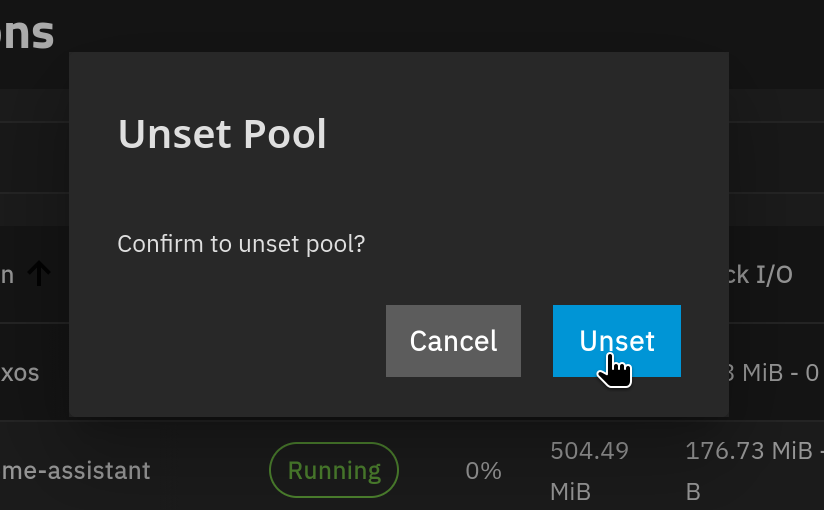
Click Unset
Unset pool confirmation
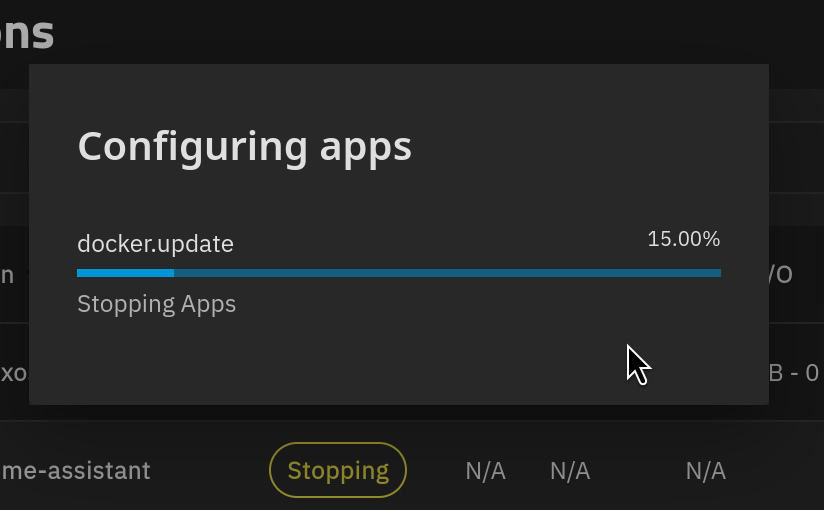
The process will run
Unset pool progress
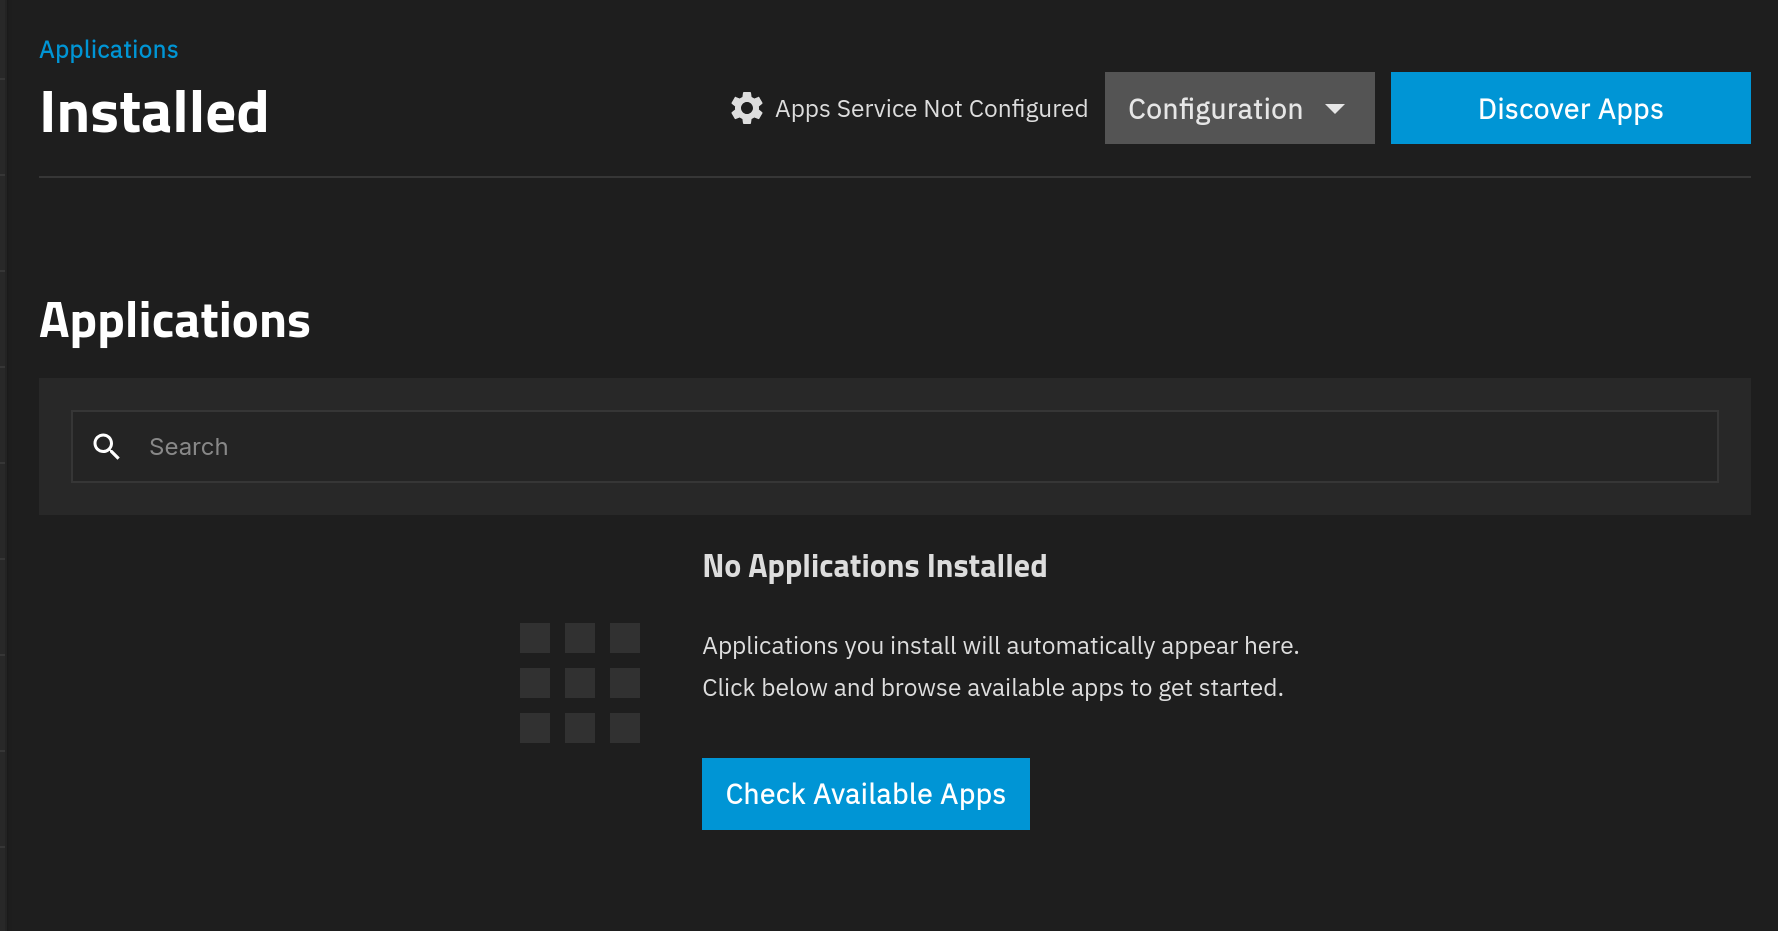
You will see No applications installed
No applications installed screen
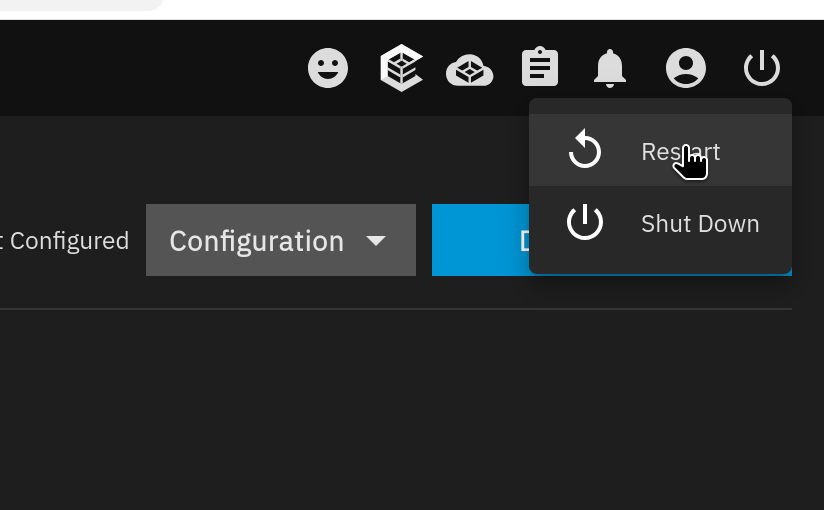
Restart TrueNAS by clicking the power icon > Restart
Restart menu option
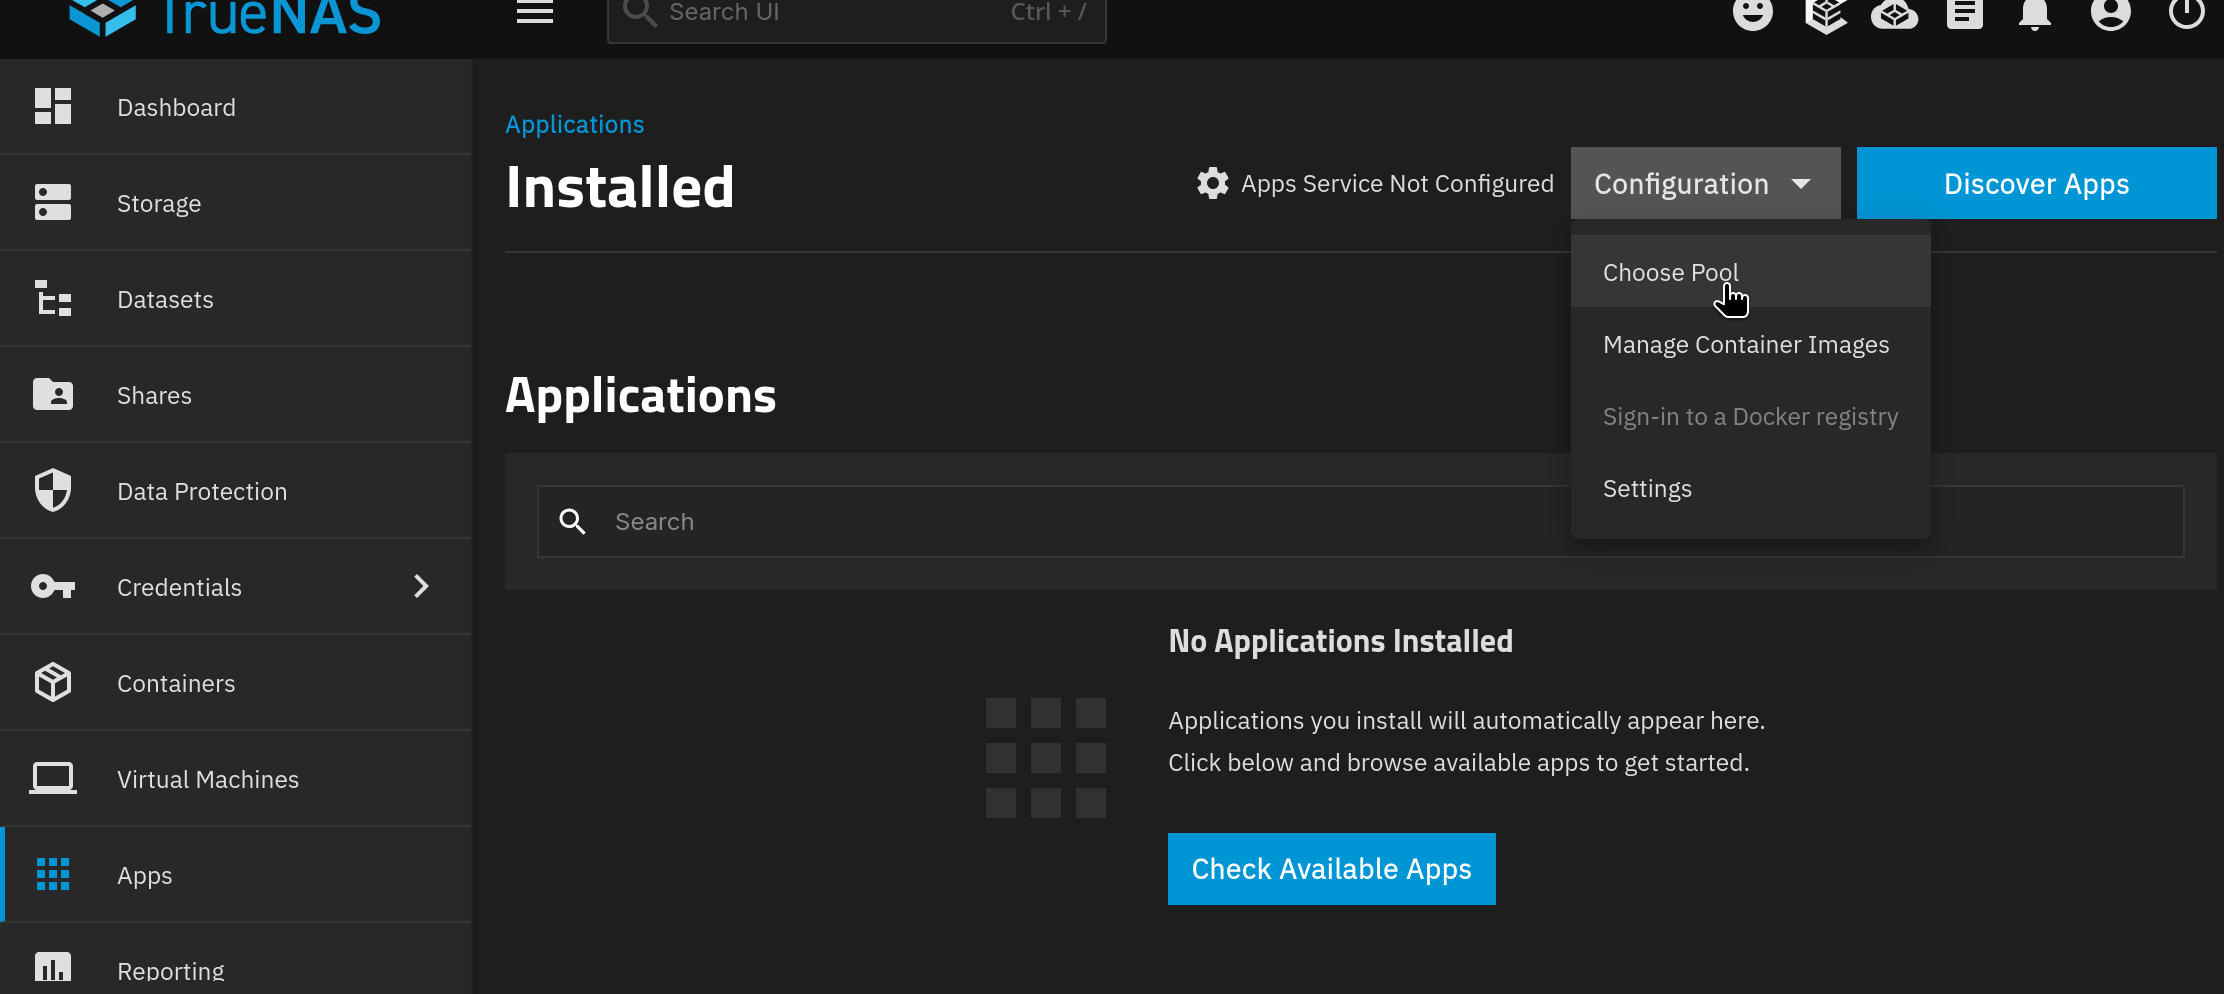
After rebooting and logging in, go to Apps > Configuration > Choose Pool
Choose Pool menu option
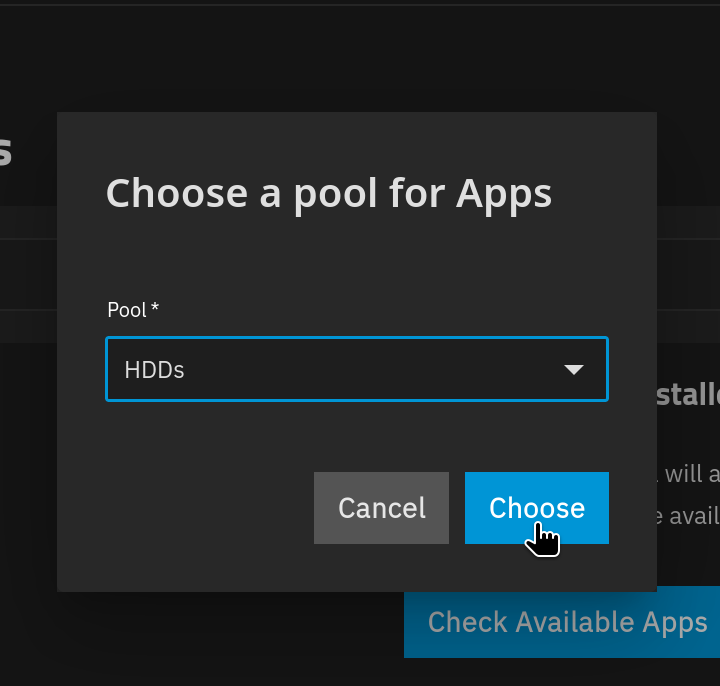
Choose your pool from the dropdown and click Choose. If you have multiple pools your apps pool is likely to be the first one you created. If you created multiple pools it will be the first one using SSDs (as opposed to HDDs)
Pool selection dropdown
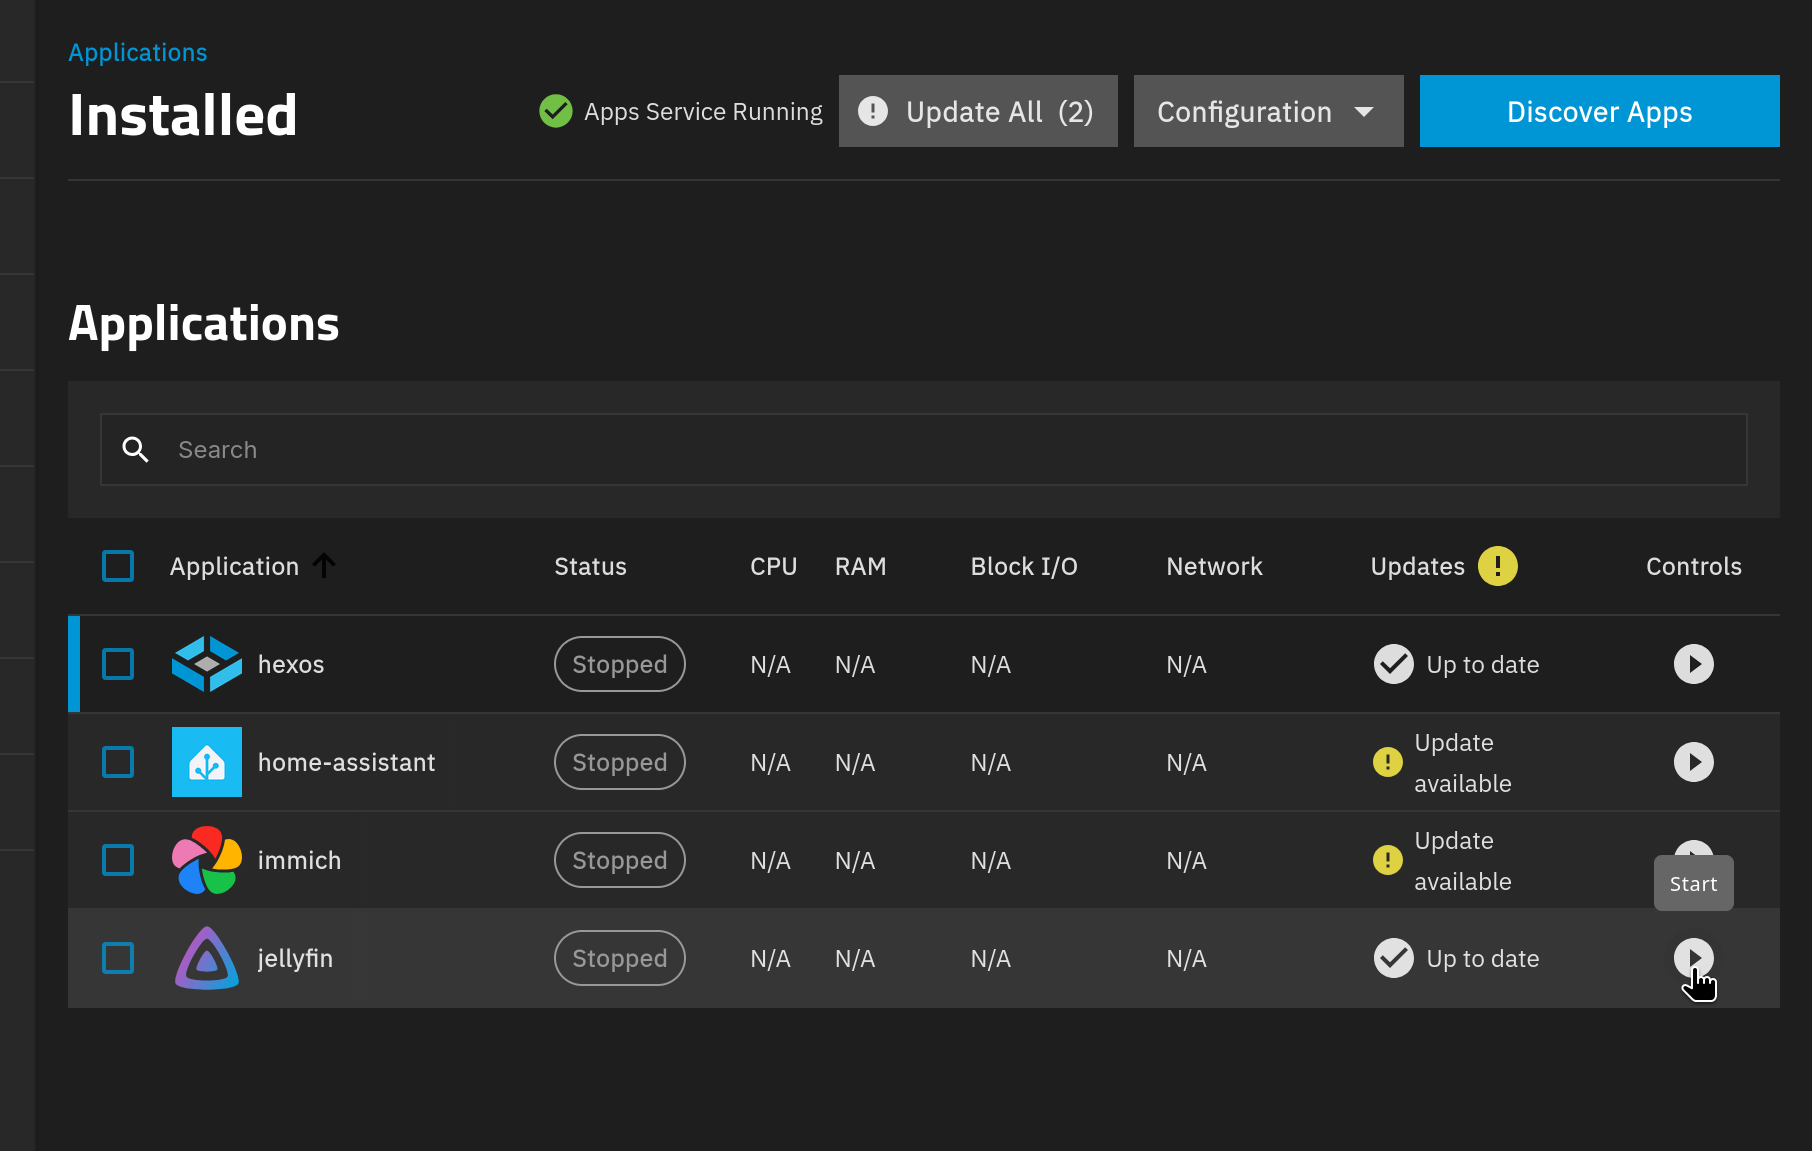
Your apps should show back up. Start them by clicking the triangular play symbol under Controls
Restored apps list
After apps have started you should see Running in green in the Status column.
Apps with Running status
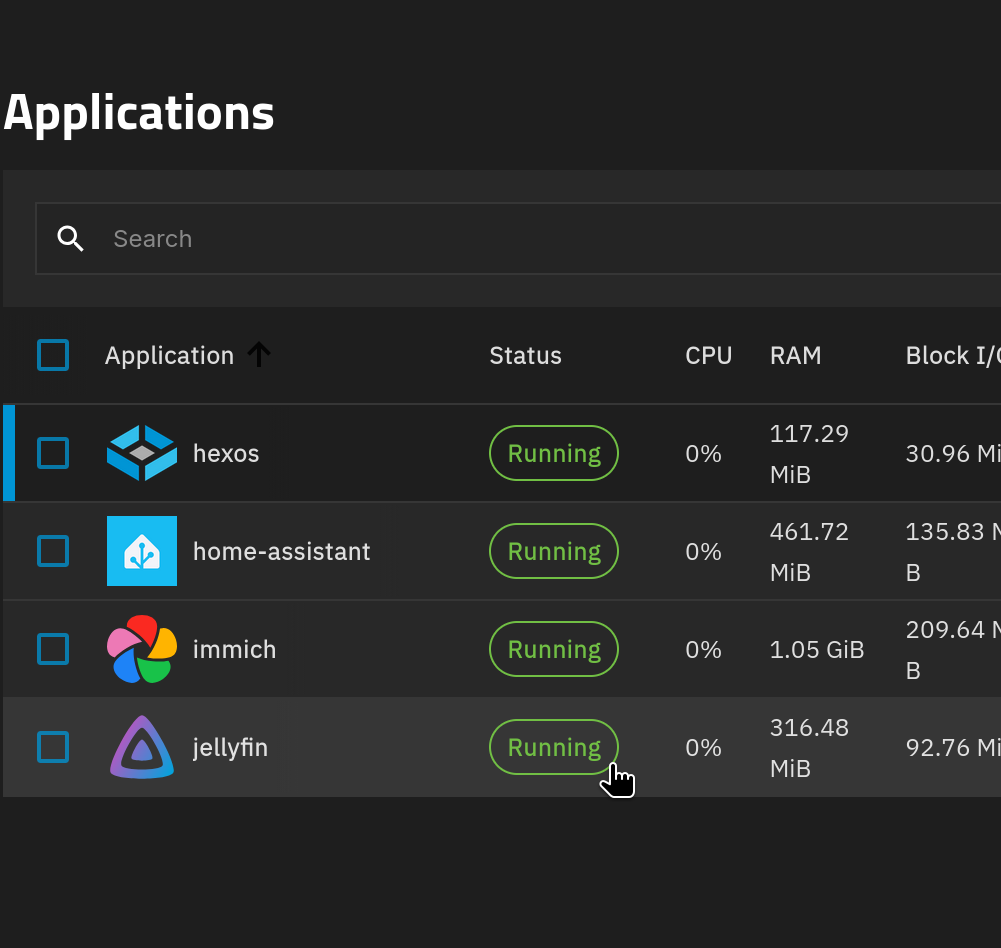
Checks
- You have imported your pools
- You have uploaded your config
- All apps are running
¶ Claim the new server on HexOS deck
In this section we will claim the server in the HexOS deck, making sure to skip the create pool step.
You will need
- HexOS.com username and password
- A HexOS license
- Server password
¶ Unclaim server
In most situations you will need to unclaim your old server in order to claim a new one.
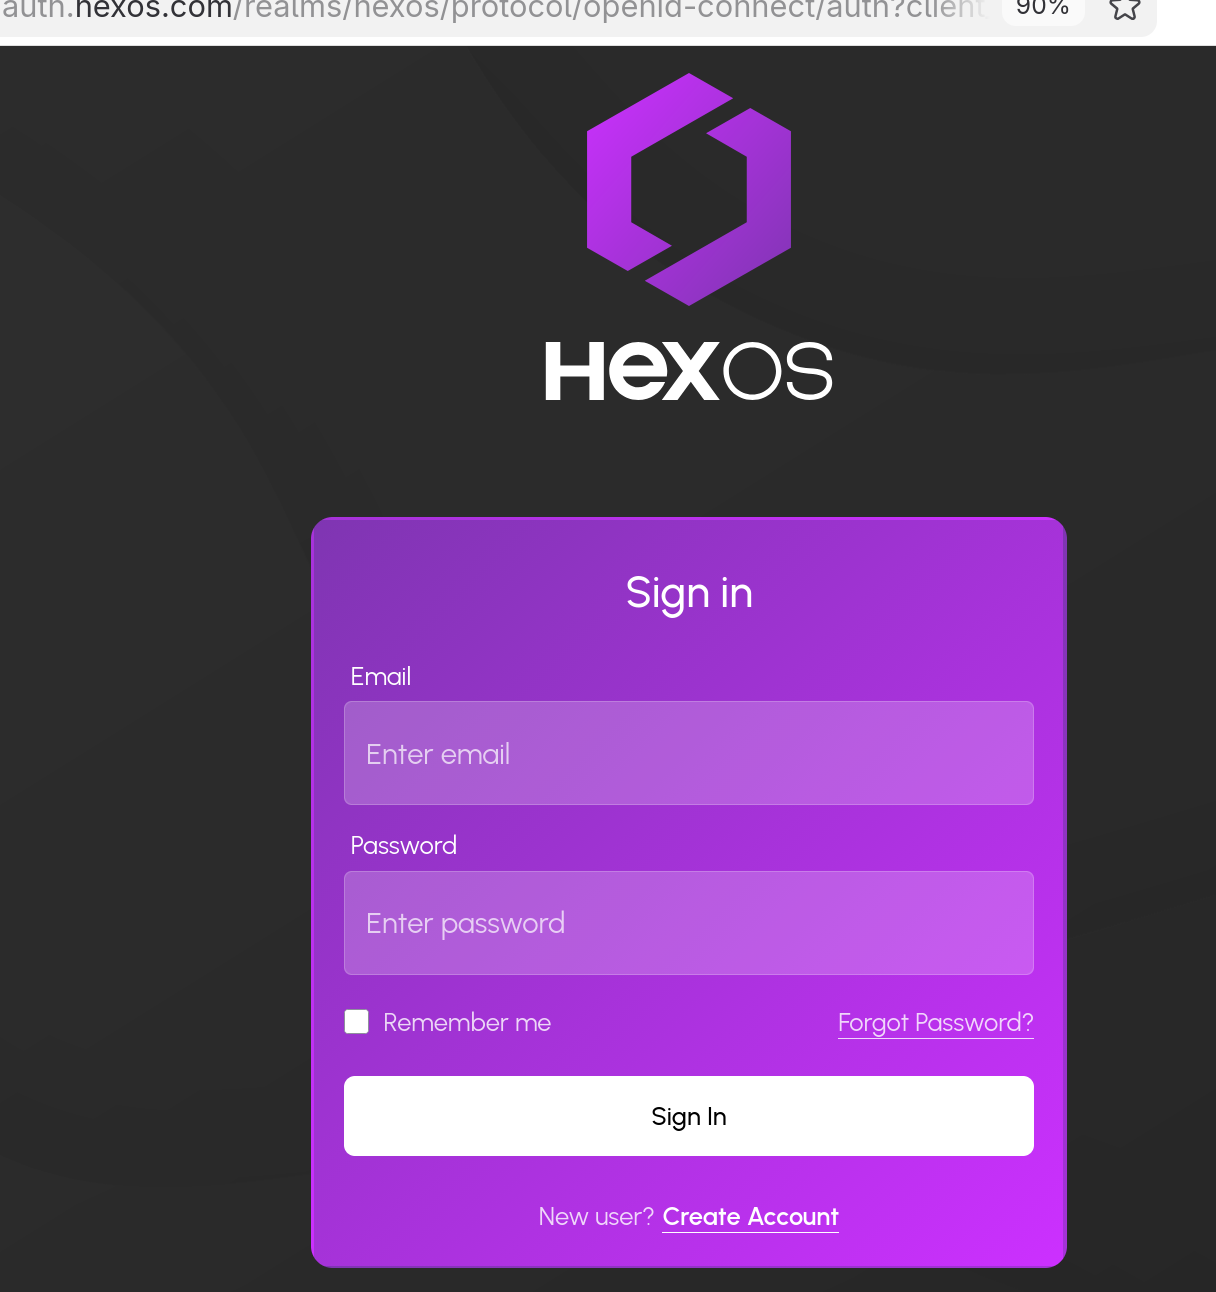
To do this, log in to deck.hexos.com with the email and password used when you purchased your HexOS license.
HexOS deck login
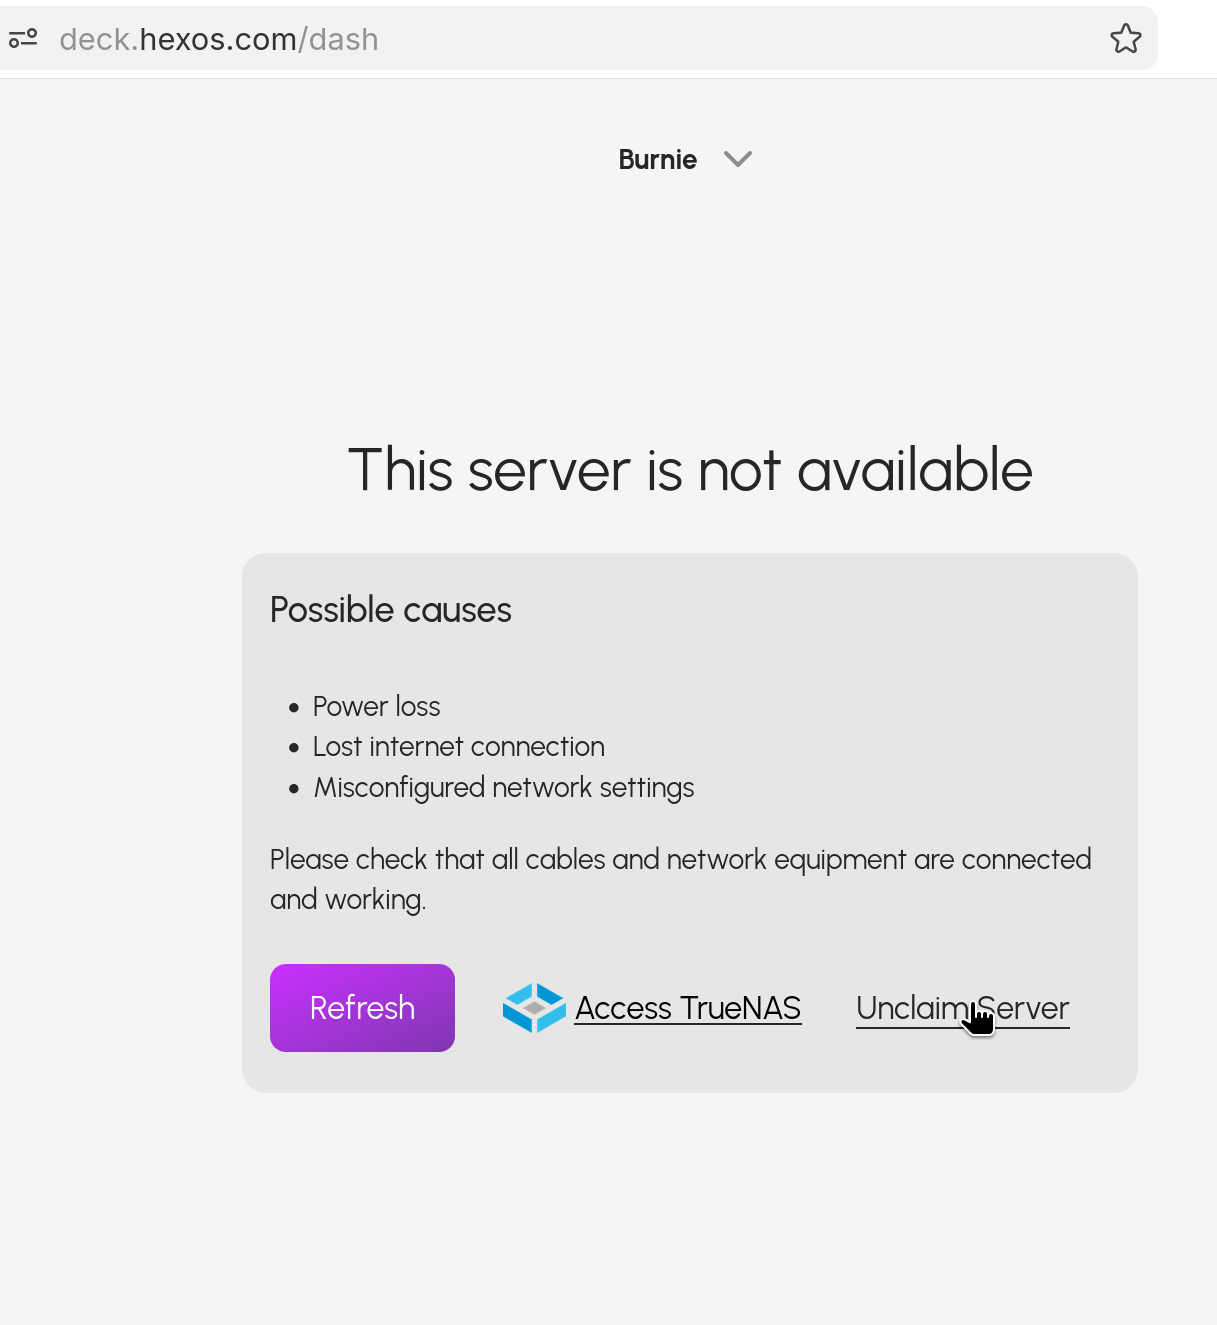
When you reach the deck, you will see This server is not available.
If you have multiple servers make sure that the server name, at the top of the screen, is the server you are currently working on.
Click Unclaim Server
Unclaim Server button
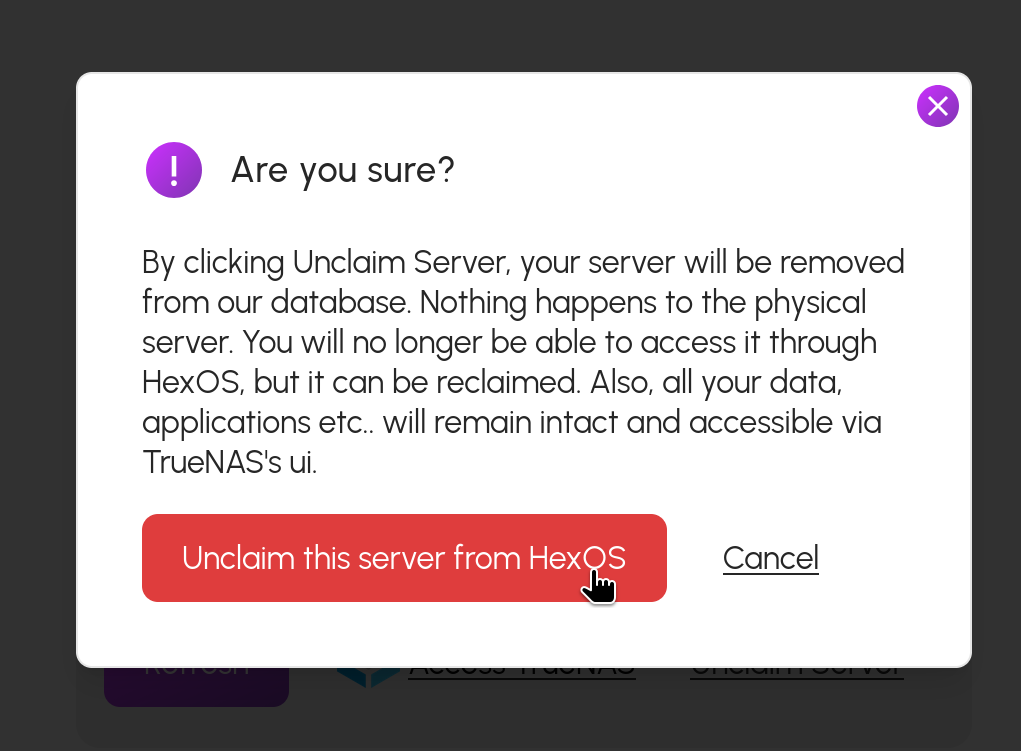
Click Unclaim this server from HexOS
Unclaim confirmation dialog
¶ Claim the new server
Follow the guide to claim the new server - noting carefully the differences described below, your data is at risk.
¶ Skip Create Storage Pool Step
DATA AT RISK
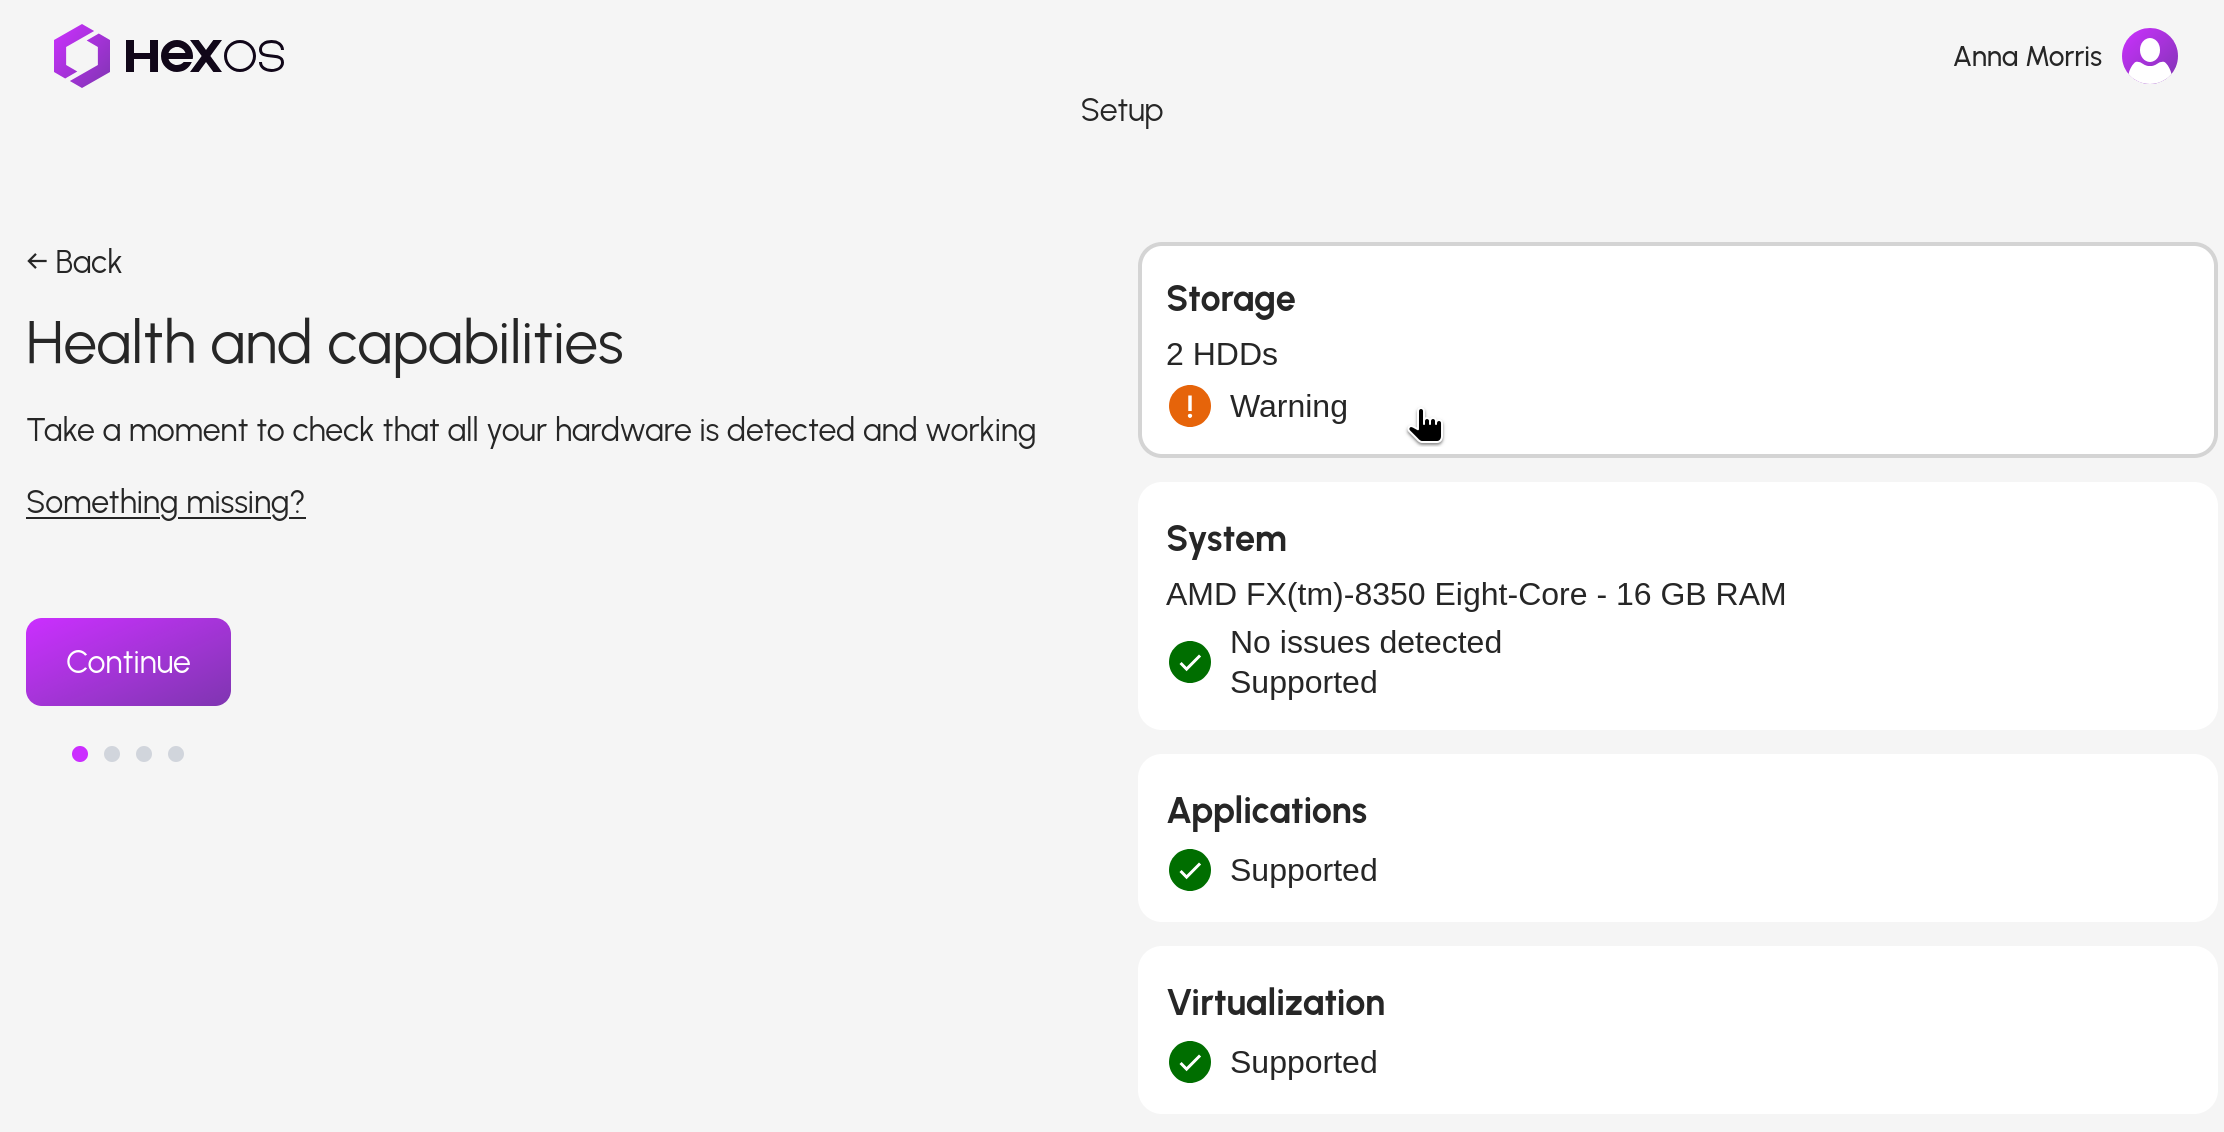
The following steps are ESSENTIAL to avoid data loss. Notice that your storage drives are shown to have data on: this is your pool data. Click Continue.
Storage drives showing existing data
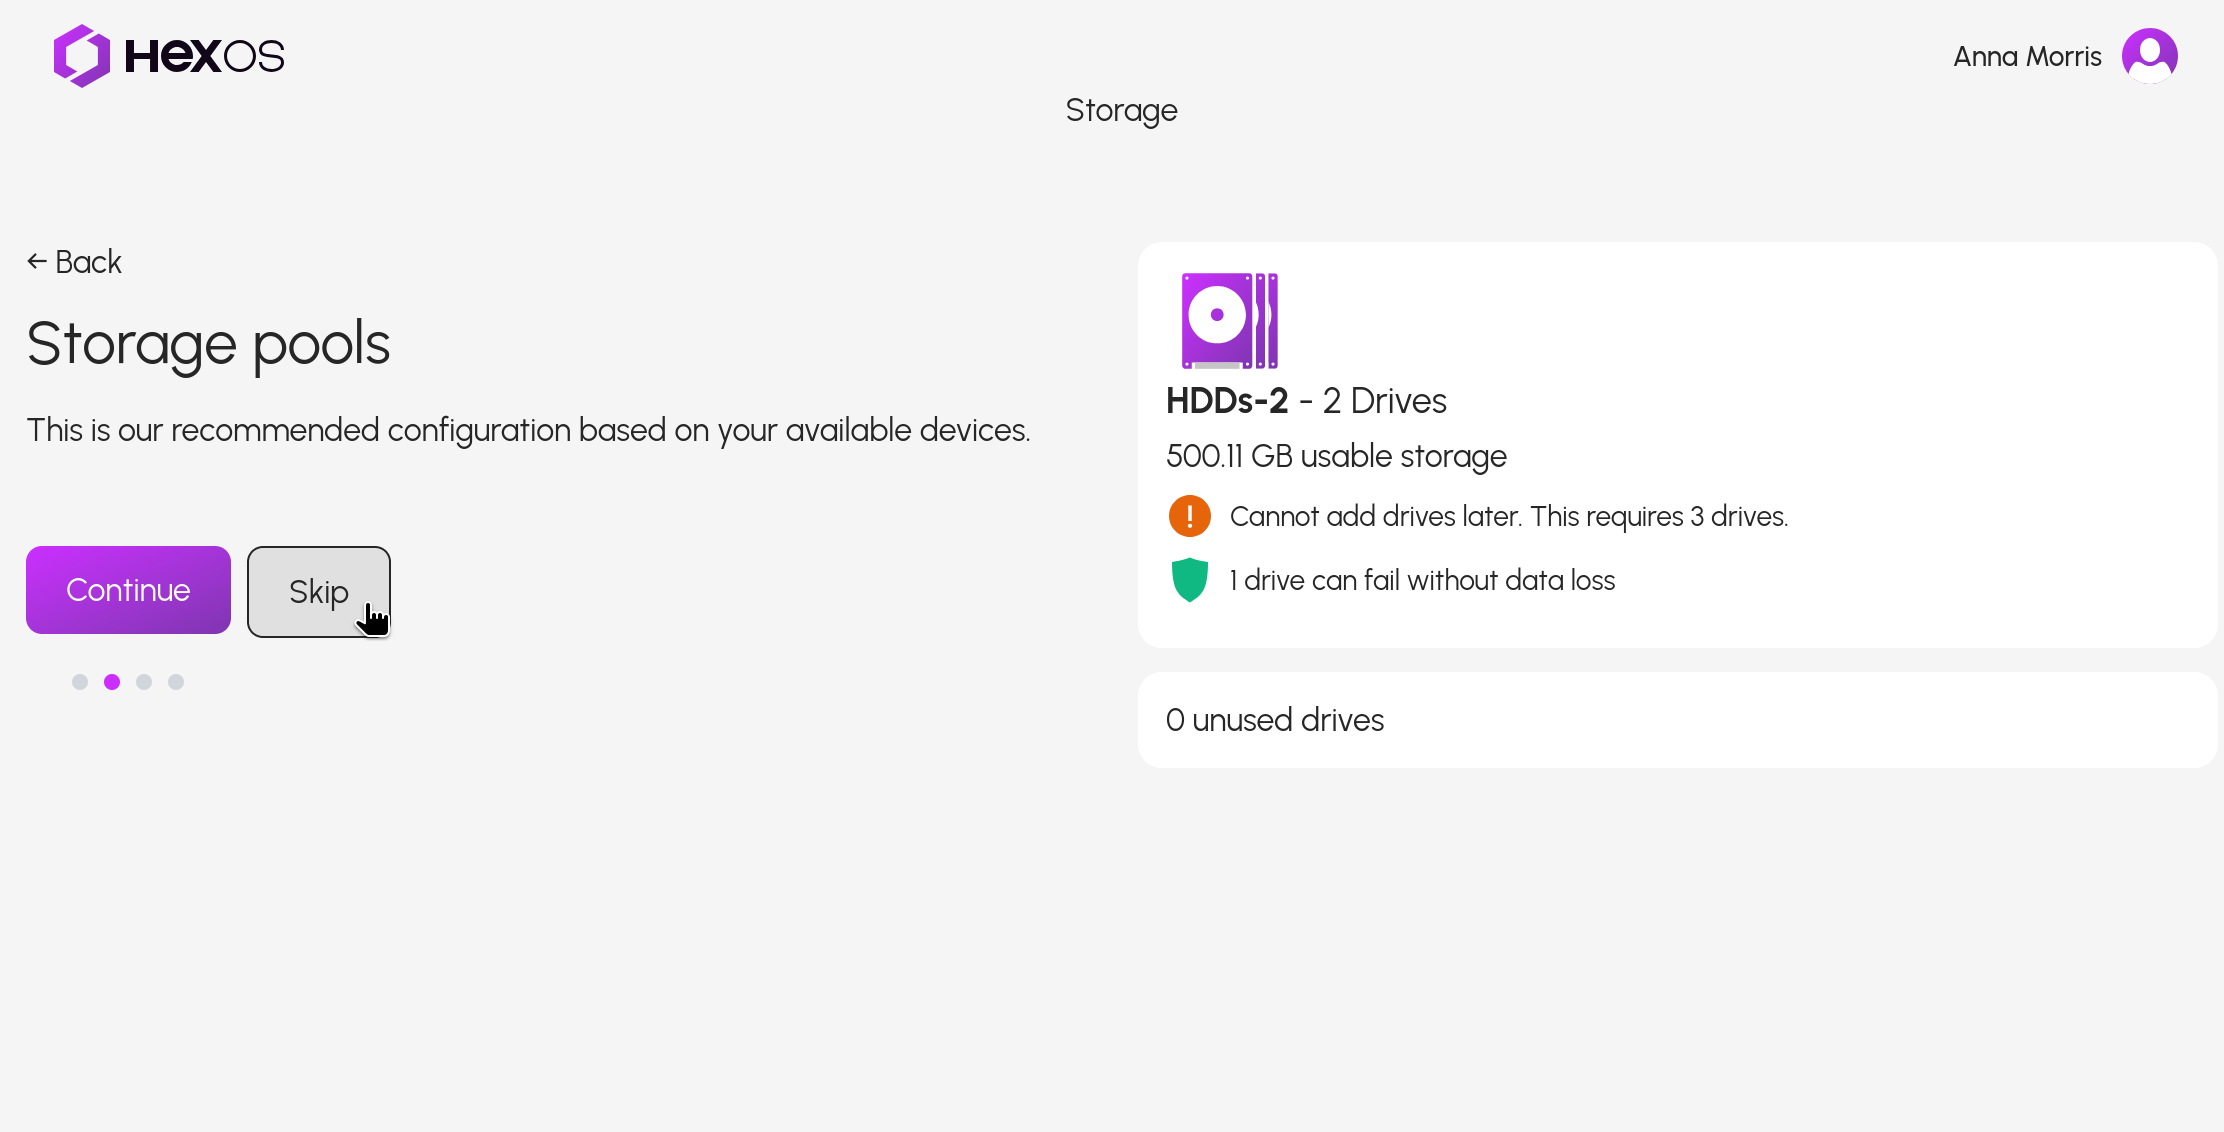
Next, when you reach the Storage pools screen you MUST click Skip.
Skip button on Storage pools screen
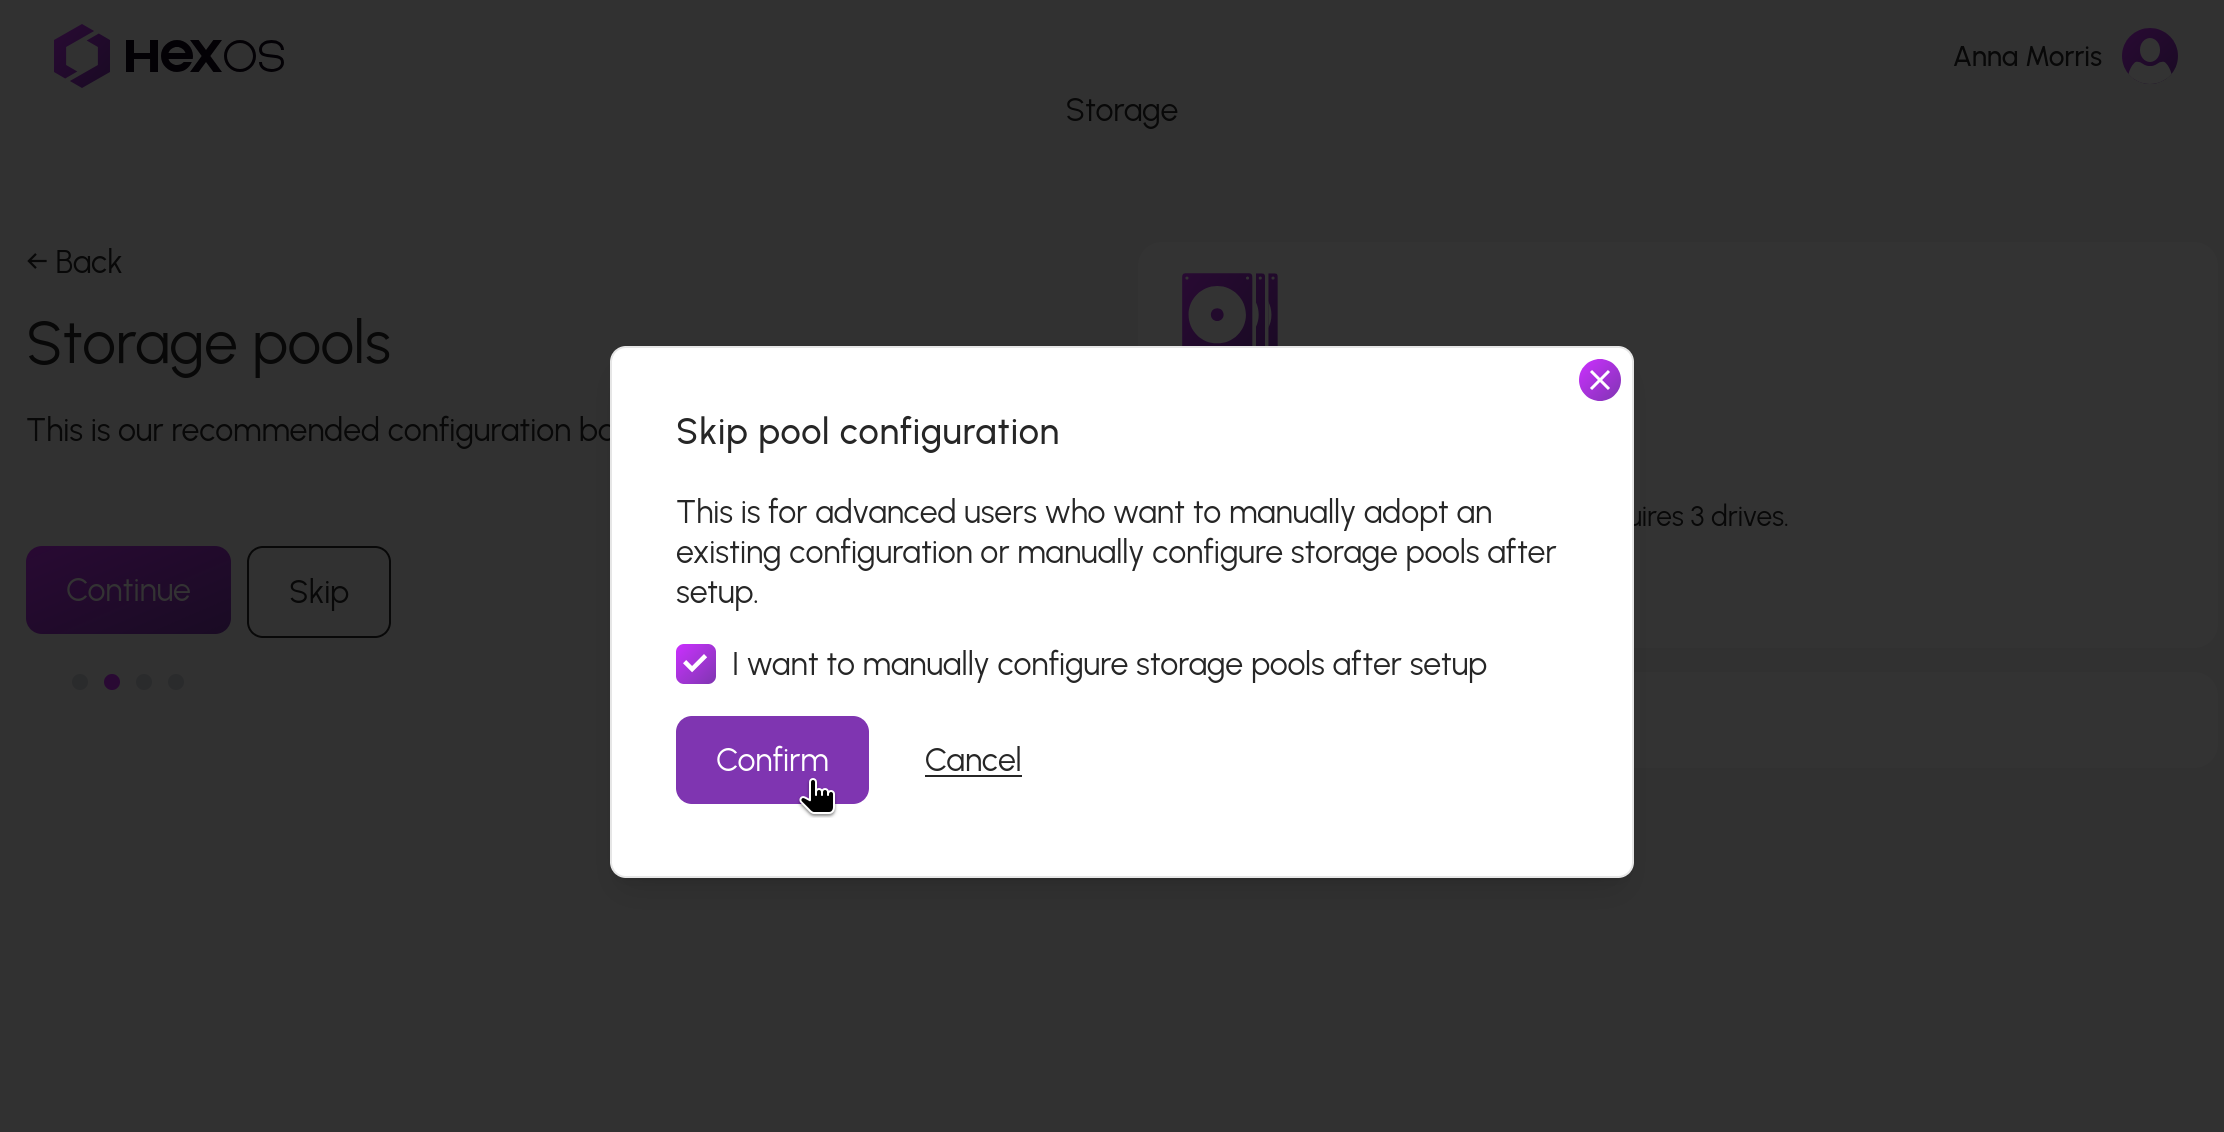
Check the box and click Confirm
Skip confirmation dialog
Then finish any remaining steps in the guide and your server should now be as it was before.
¶ Restore folders HexOS finds on your pools
If your pools hold folders that are not set up in HexOS yet (for example, because you did not upload your config), the Folders screen shows a notice such as Found 3 folder(s) on your pools, with a Restore folders button.
Restore folders notice
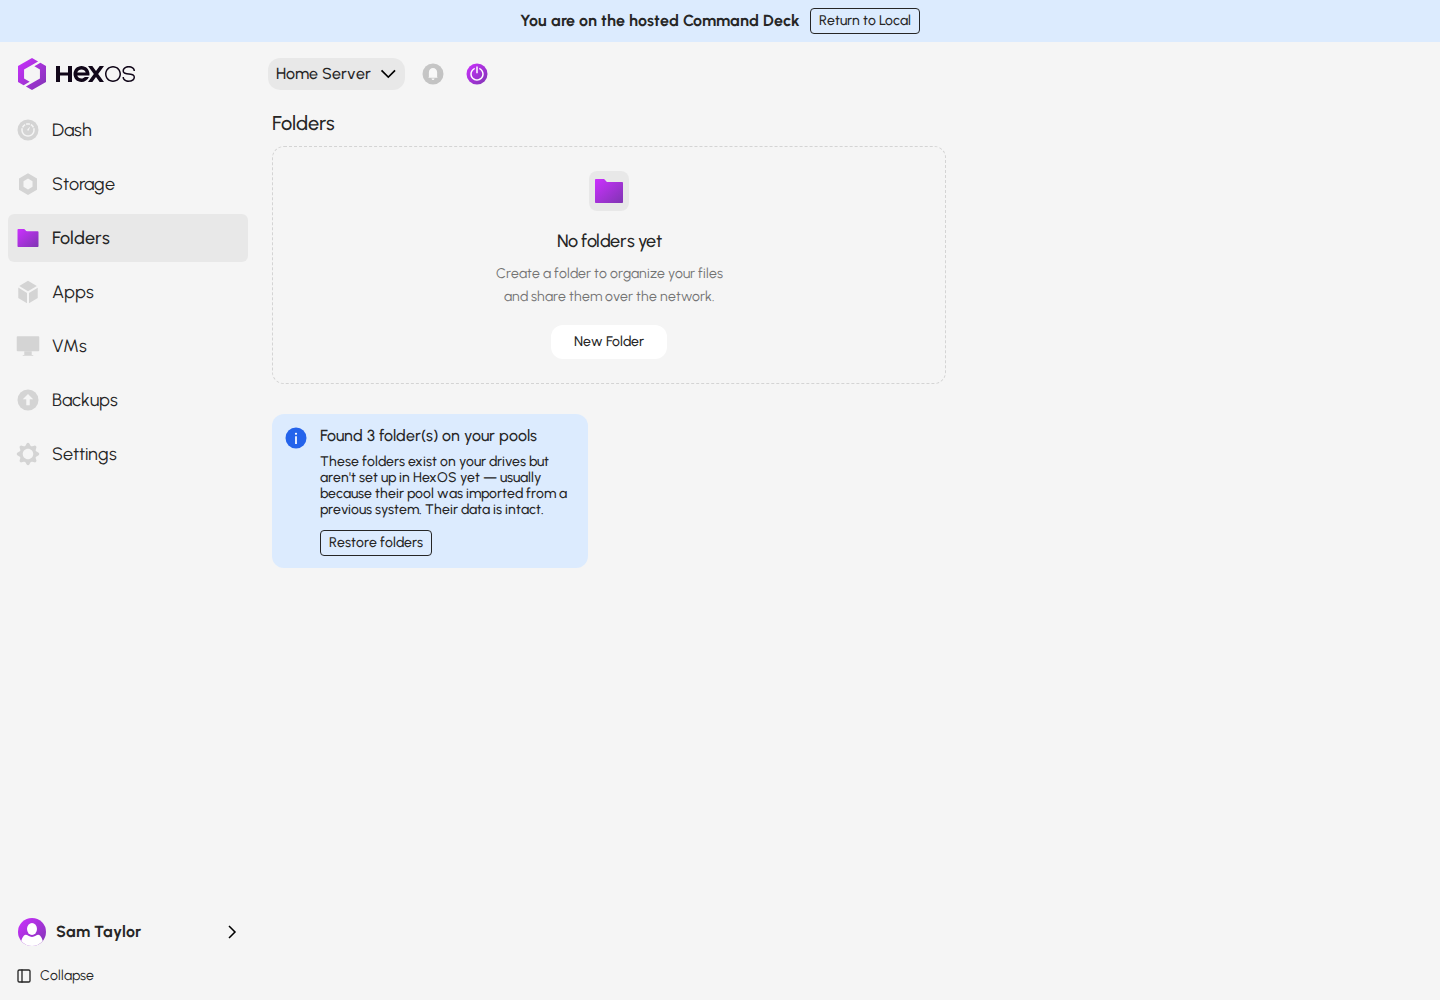
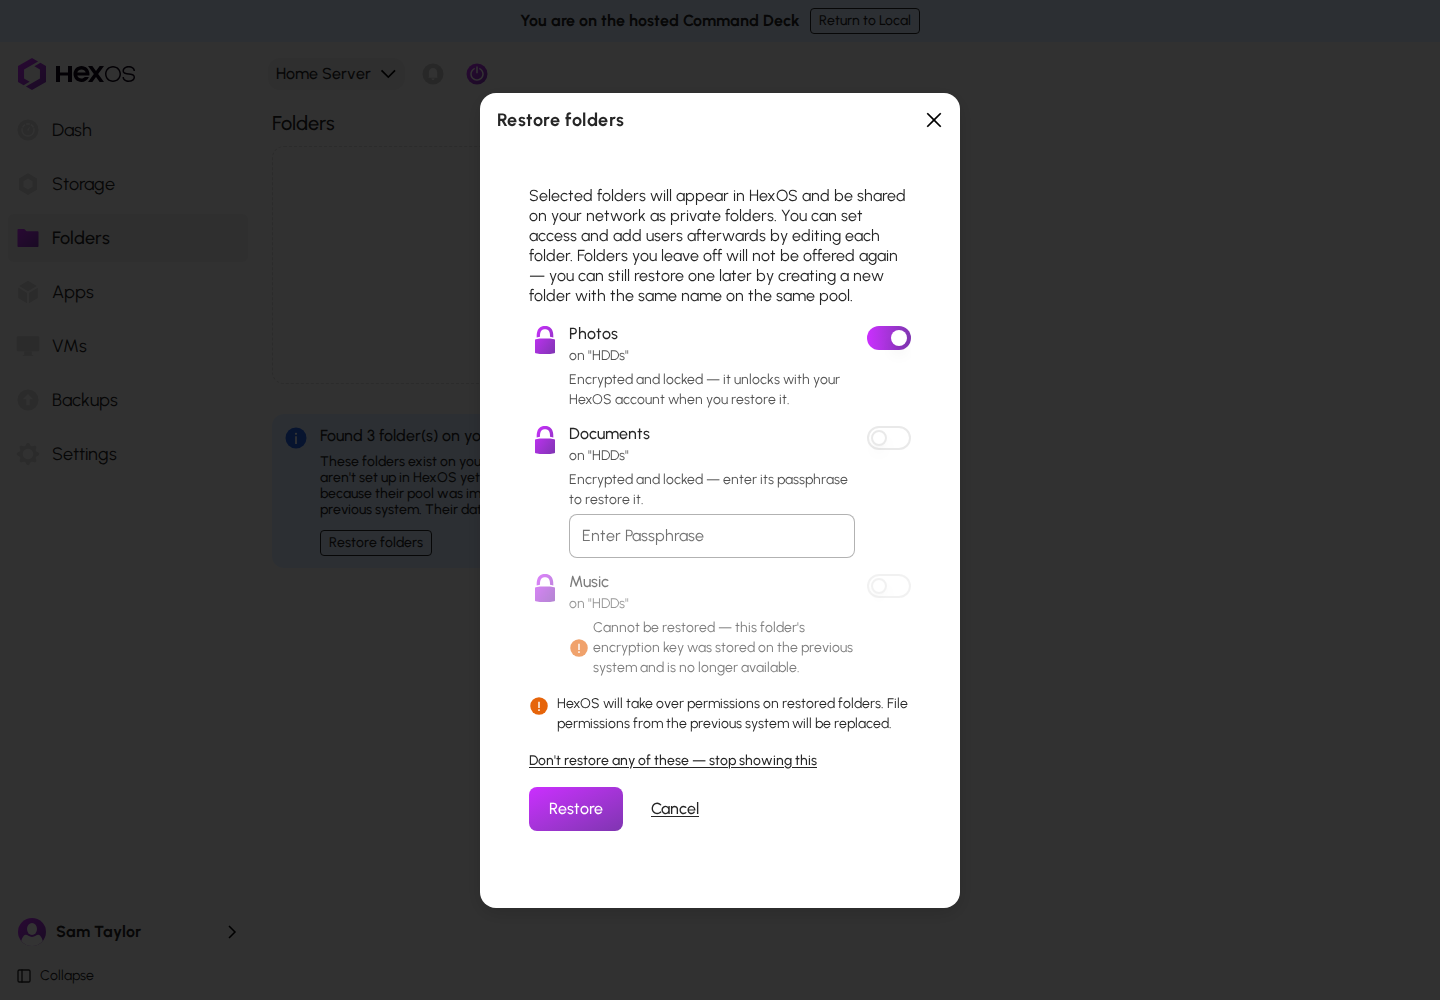
Click Restore folders. In the dialog, encrypted folders that are locked show what they need:
- A folder with an Autogenerated key unlocks with your HexOS account when you restore it. There is nothing to type. If you keep your recovery key yourself, HexOS asks for it once (see When HexOS asks for a recovery key).
- A folder with a passphrase asks for it. Typing it selects the folder.
- A folder encrypted with a key file made in TrueNAS Cannot be restored here, because its key was stored on the previous system. Unlock it in TrueNAS first, as described in "Import keys for encrypted data and set up SMB share (if necessary)" above.
Then click Restore. "HexOS will take over permissions on restored folders. File permissions from the previous system will be replaced." Set each folder's access afterwards.
Restore folders dialog with encrypted folders
Final Checks
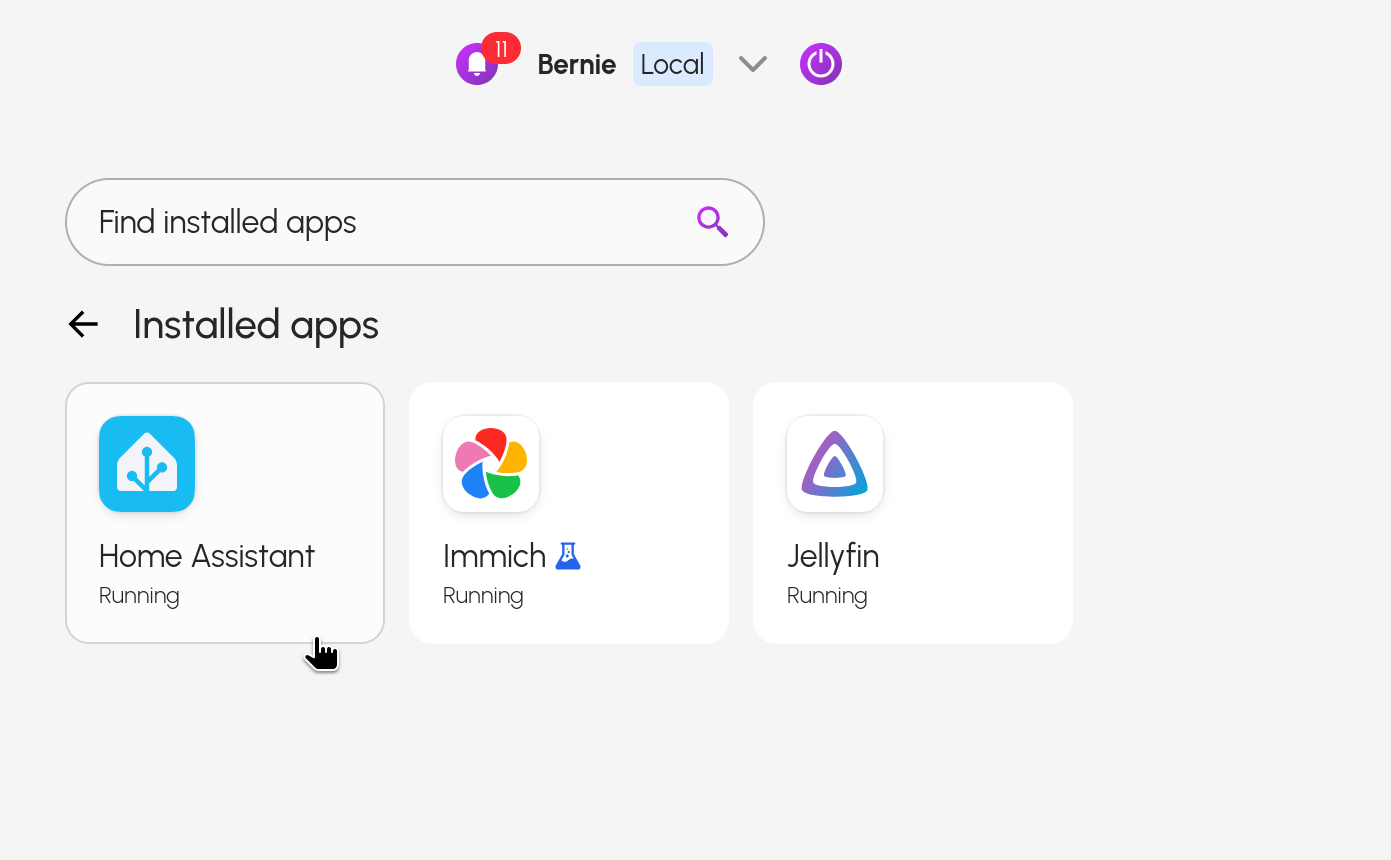
- Check apps are running
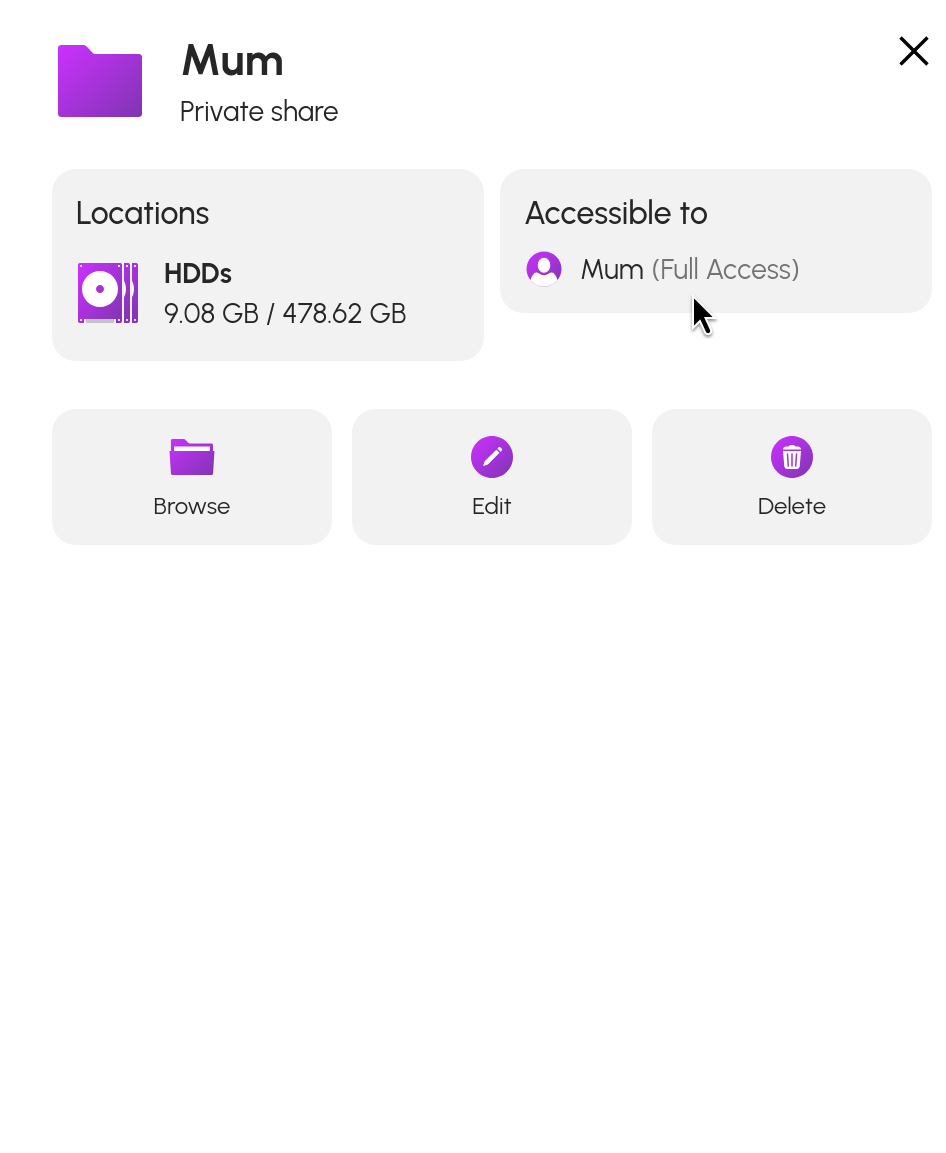
- Check users and folder permissions are correct
Apps running in HexOS
Folder permissions in HexOS
Contribute: to help to improve HexOS documentation join the #Docs channel on Discord today! Send feedback, suggestions or contribute a guide.